Sketching the Sketchers
")
")
")
")
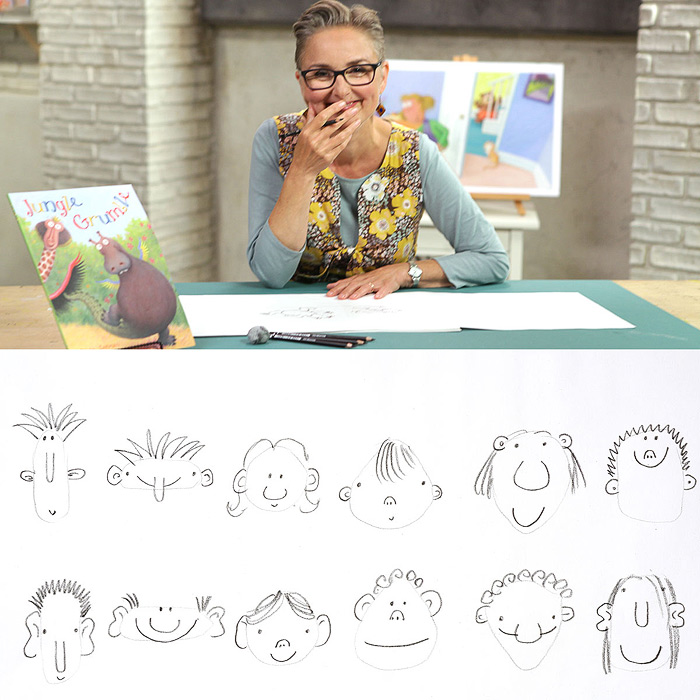
Here’s some little portrait sketches from our last USK:MTL dim sum lunch.
There’s a style right now for brightly colored eyeglass frames that makes for fun drawings. My feeling on drawing eyeglasses is – don’t draw the entire frame. Leave some of it to the imagination to avoid overpowering the face.
I suppose that is weird advice – because I can say that about absolutely anything. Don’t draw everything you see :) Less is more. Make the viewer interact with the sketch. Make the brain interpret the lines. It’s more fun for everyone.
I still had my small vial of diluted ink to draw with. I think it really works for these little portraits. They’re in a 6×9″ pad of Strathmore 400 watercolor paper. I had thought these were cheap little pads (I bought them in a Michaels in some small town, as emergency back up on a trip). But it’s actually very nice paper. I finally realized, when it comes to Strathmore paper, the higher the number the better (300,400,500).
From Urban Sketching to Picture Books (and back again) : Interview with UK artist/author Lynne Chapman
 Every year at the USK Symposium I get a chance to sketch with UK artist and illustrator Lynne Chapman. (That’s her on the far right in this lunch time doodle).
 So I know Lynne as an urban sketcher and as the author of Sketching People: An Urban Sketcher’s Manual to Drawing Figures and Faces
.
Imagine my surprise to find out that in addition to our shared hobby of urban sketching, Lynne is also an accomplished book illustrator with over 30 picture books to her credit.
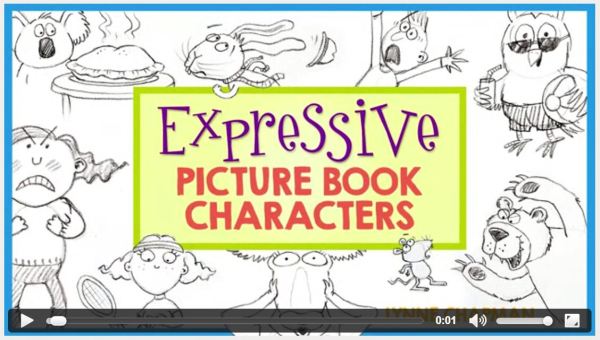
I am also pleased to see she’s recently become a fellow Craftsy.com instructor, releasing her first course Expressive Picture Book Characters.
Lynne has produced an in-depth how-to on her subject: how to invent light-hearted stylized figures for children’s books – with an emphasis on capturing personality and conveying the emotion of the story.
It’s an excellent primer for anyone interested in making picture books for their own friends and family, or for those building their portfolio as a professional illustrator. If this sounds interesting. have a look at the trailer:
Here on Citizen Sketcher, I’m somewhat focused on the art of location sketching – but I’m also fascinated with the other kinds of artwork a sketch artist can get up to.
To that end I’ve asked Lynne three short questions about the crossover between her professional illustration and her personal sketching practice.
Three Questions with Lynne Chapman:
MTH: So Lynne – you’re a dedicated Urban Sketcher, organizing drawing events with USK Yorkshire among other interesting location sketching projects.
Let’s talk about this split between sketching from the real world and your more imagination based work as an illustrator. What sort of skills or attitudes carry back and forth? Are there any ways one practice improves or influences the other?
 LC: Years and years of drawing from life have definitely made my life as an illustrator much easier. The link is not direct – I don’t take images from my sketchbooks and work them up into book illustrations – but the constant observation and interpretation I practice as an urban sketcher, means I can have a pretty good stab at drawing most things I need to, from my head.
I usually need reference for the detail though: ask me how all the bits of a bike join together and I’ll have no idea, but I could still do a passable sketch of somebody riding one!

MTH: Can you tell us a bit of what that it’s like when you’re doing a book project – maybe let’s talk about the ones you write and draw entirely yourself. How do you start making the ideas real – is it a slow burn or a creative sprint? About how long does it take from beginning to end?
LC: It’s a far more drawn-out process than most people realize. When I get an idea for a story, I progress it by brainstorming-sketching on a big sheet of paper, creating possible narrative directions and quickly capturing funny pictures which pop into my head (this is where the drawing practice is so vital).

I leave it and come back to it, several times over a period of anything from a couple of weeks to a few months (so I have fresh eyes), changing things, ironing out problems, adding more images and fine-tuning the dialogue. That’s just the beginning though.

I next have to tweak the story line, to make it split into 14 double-page spreads (to fit the standard picture book format), then design all the spreads and draw it all out in pencil, ready to take to a publisher.
That bit takes around a month. If I sell the idea, I will probably need to rework it yet again (which could be anything from minor tinkering to almost an entire rewrite. The end usually takes a lot of getting right).
Eventually, I begin the pastel artwork, which generally takes me another couple of months. So, I am usually drawing a book for 3-4 months, but working on it, on and off, for more like 6. It takes another full year before it hits the shops.

MTH: On a personal note – you’re currently doing a location drawing themed artist-in-residence program at Manchester University’s Morgan Center for Research into Everyday Lives (which sounds a bit like a cover for government surveillance!). Can you tell us a bit about that project?
LC: Ha ha – so it does! It’s actually the center for sociological research and their work is really interesting. As artist-in-residence, I am sketching a portrait of a-year-in-the-life of the department.
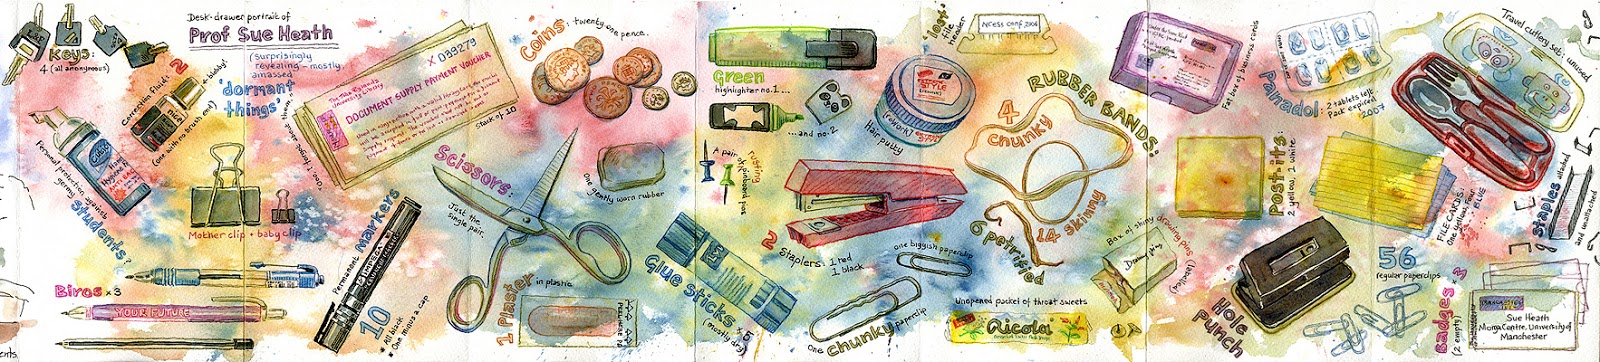
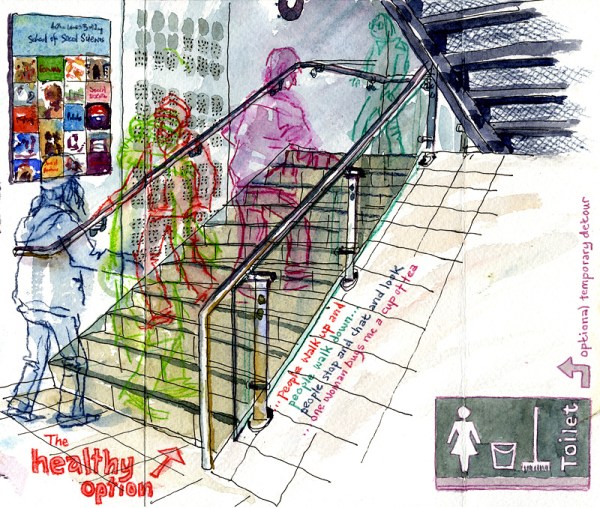
I have been sitting among students on the grass or in the refectory, sketching them and their conversations; I’ve been a fly-on-the-wall in corridors and at meetings; I have sat in on lectures and PHD tutorials; I even created a portrait of the centre’s director, as seen through the contents of her desk drawer!
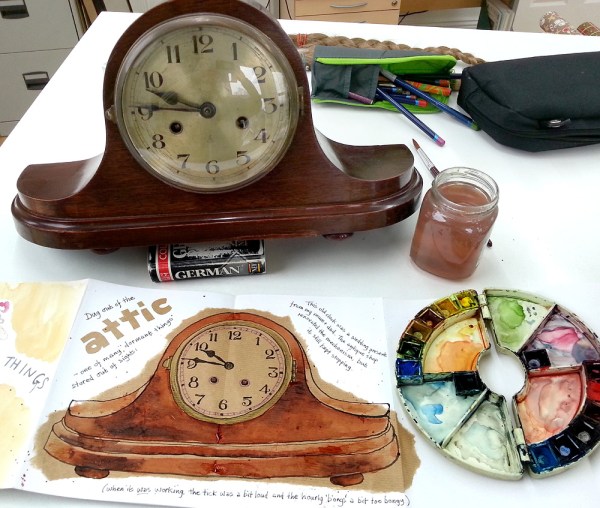
Probably the best bit is that I am shadowing various researchers. I have been sketching a project about how we interface with the weather (very pertinent with all the floods we’ve been having) and am just getting started on another one called Dormant Things – all about the objects we all no longer need, but can’t quite bring ourselves to throw away.
One afternoon we went into a woman’s house and I drew the hoarded contents of her hall cupboard! I’m using concertina-format sketchbooks, (ed note: we say accordion books over here) so I get a sense of a continuous narrative, an ongoing journey. I’ve filled loads already.

MTH: Following up with that – when you go into the world to do an extended sketching project – how does your background in writing books and storytelling with characters come into play?
LC: It’s interesting that, though the two kinds of work look very different, there is this strong link, through my interest in storytelling. I didn’t realize that myself until quite recently.
This sketching project is perfect for me as I am far more interested in capturing the flavor of what is happening throughout an entire day than creating drawings which are unrelated snapshots. I love how the concertina book allows images to flow into one another and how the linear format adds a sense of time moving through the work.

The other interesting link between my children’s book work and my reportage is humor.
The ideas and images I pull from my imagination, when I am telling stories for children, are almost always founded in some kind of humor. Now, I am noticing that, when I am recording what is happening in the Morgan Center, I tend to see the funny side, which means I project some of myself back into the images, both through what I pick up on to draw and by the comments I often flow around the image.
MTH: Now you’re bringing your picture book experience to Craftsy fans – what was your primary “teaching goal” for this new class? – what do you want people to take away?
LC: I chose to help people with characterization, because it is the most important aspect of telling a children’s story, or any story for that matter.
Your reader must totally believe in your characters, in order to be drawn into the dramatic tension: you need to make them care.
People so often struggle with this and yet a few simple pointers can make a massive difference. I have been sharing tips in schools for years, helping kids (and teachers) to create their own characters, and I’ve seen people’s delight at what they can do with a bit of guidance.
So, I crammed everything together into these 7 lessons: all my hot tips and everything I know about drawing personality, conveying emotions, communicating movement and vitality… it was quite a squeeze I can tell you!
But, by the time you have worked through the class, you should be able to draw any character you like: any animal or person; and make them funny, cute or mean, old or young.
Most importantly, through facial expressions and simple body-language, you will know how to convey what is going on inside their head. Best of all, it’ll be fun!

MTH: You can find our more about Lynne Chapman and all her various projects on her blog and her website. Or pick up her book on Urban Sketching from all the usual bookshops.
Sketching human frailty at the Mütter Museum Philadelphia

I waited many years to get to the Mütter Museum in Philadelphia. it’s the sort of place where I can lose myself for hours. I love sketching a museum full of fascinating artifacts.
I actually managed a quick trip last year, but have debated a while before posting the drawings. You may want to skip this post if it’s not your kind of subject matter. That would be perfectly understandable.
In this case, the sketches aren’t just history. Mayan culture or Samurai armor. But rather, a look at the fascinating machine that is a human body – and the things that might go terribly wrong with it.
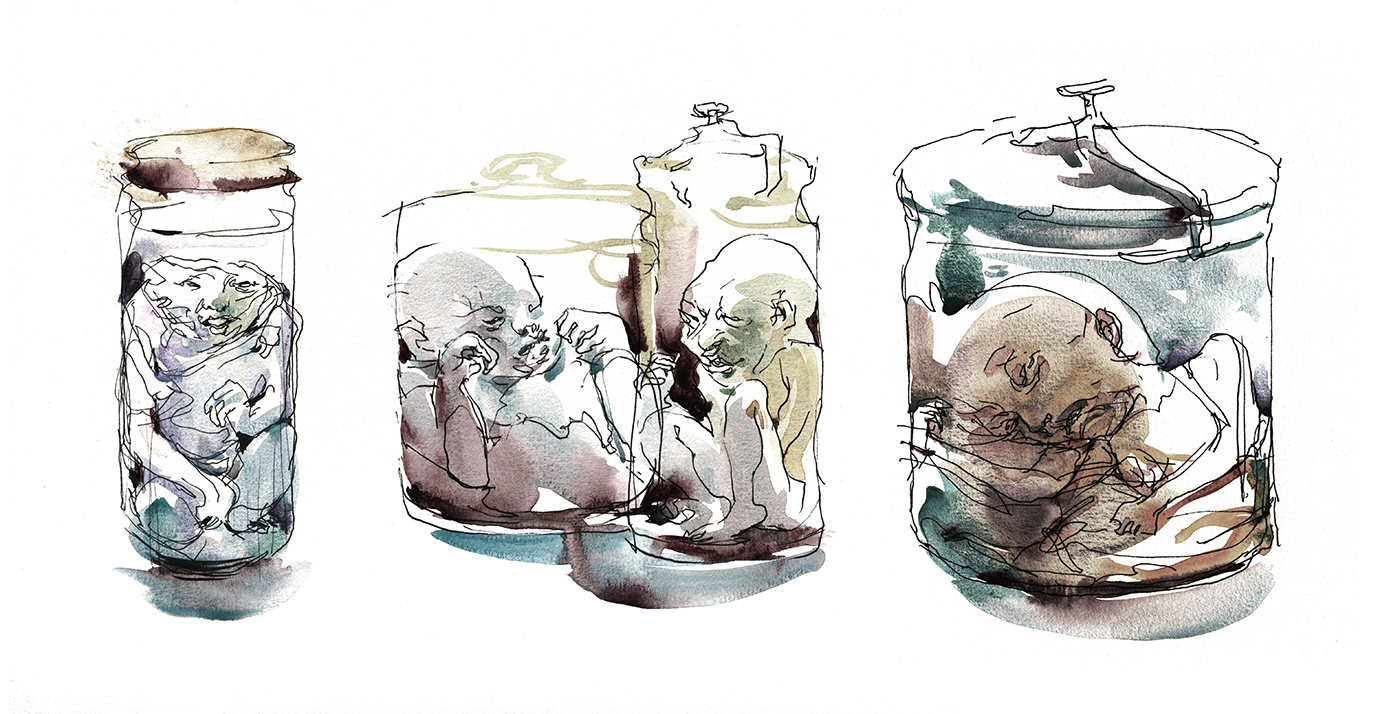
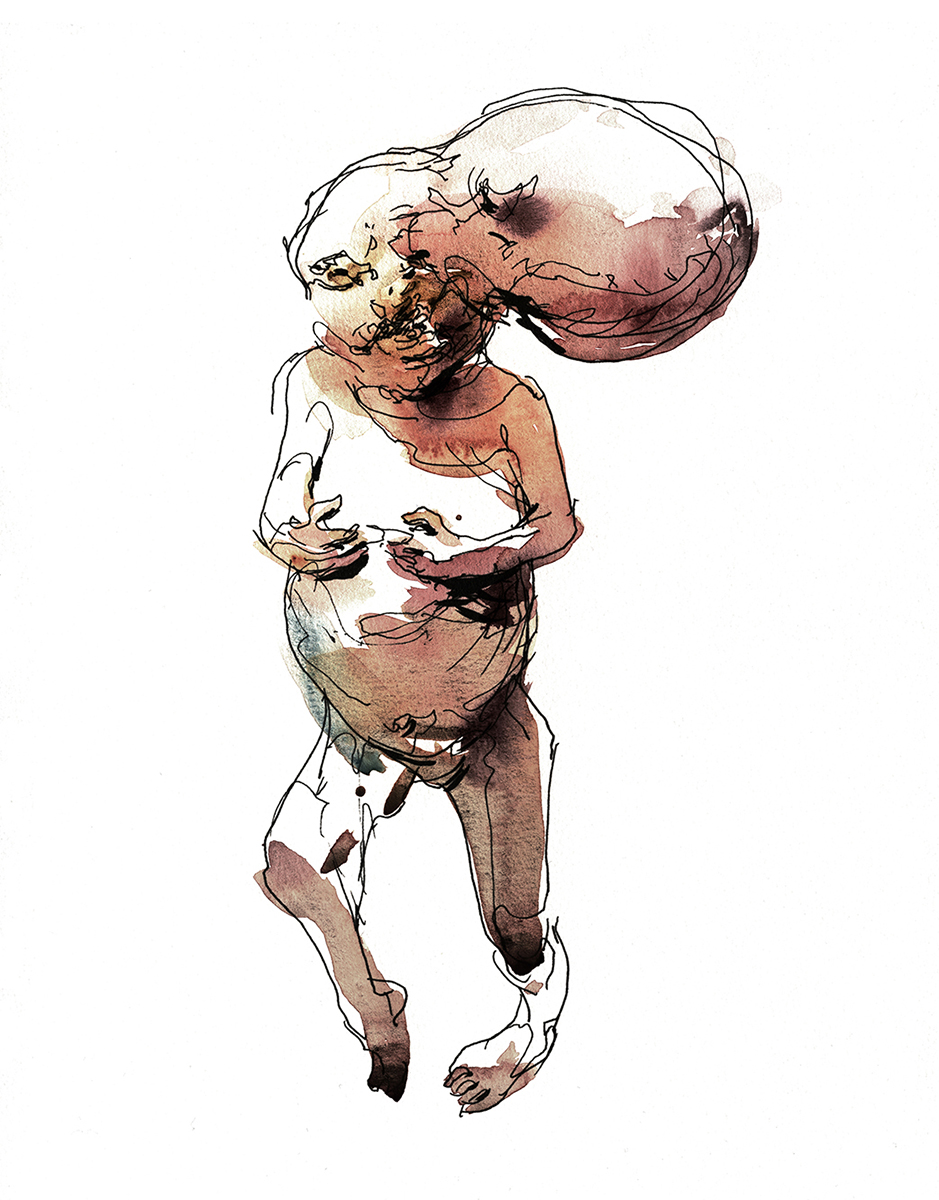
The Mütter is a museum of medical oddities. Antique anatomical wet-specimens, plaster casts, wax models, osteological (bone) collections, and rare medical instruments.
There’s a bit of a Dr. Frankenstein feeling about the place. The collection was originally assembled by a Dr. Thomas Dent Mütter (1811-1859). Initially begin as a means of teaching his private students, Mütter later donated his specimens to the College of Physicians – backed up by a sizable monetary endowment to launch the museum, and a demand for an on-going commitment to public access and education.


Dr. Mütter must have been an interesting man. He is described as an “exceptionally gifted ambidextrous surgeon”. Which is strangely specific praise. How did he demonstrate this ambidexterity? Removing a burst appendix with one hand while stitching a perforated bowel with the other?
He is known to have been a very successful surgeon, training in Europe before establishing a practice assisting Dr. Thomas Harris in Philadelphia. (No relation to Hannibal Lector-Thomas Harris. I don’t think?) Mütter is said to have been a handsome man, with a confident bedside manner. He was also a pioneer in reconstructive surgery. One of the first nip and tuck artists. I can see him played by Robert Downey Jr or Daniel Day Lewis depending on the kind of bio pic you might want to make.
But I don’t mean to make light. His work was apparently ground-breaking. He was restoring club feet and cleft palates – not injecting botox. These were surgeries that could give a patient a productive life, or just allow them to walk down the street without drawing stares and mockery. This was a time before anesthetic – something he introduced to America. It was also before doctors had a real understanding of anatomy or awareness about the spread of disease. He’s credited as an early advocate of Aseptic Technique – which we take for granted in this age of hand sanitizer at the Walmart.
I can see his passion for teaching. Working as he was, with all manner of medical quackery going on around him, he must have felt a great drive to show the world the science behind the surgery. This was knowledge that could truly improve people’s lives, if it only could be better known.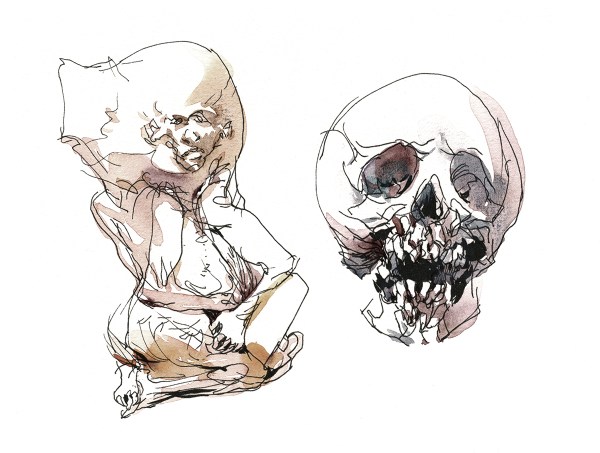 Only a small percentage of the collection is on display at any one time. To be honest, what began as a teaching collection is now a kind of educational haunted house with annual attendance exceeding 130 thousand visitors.
I don’t suppose there’s anything too wrong with that. But the display is biased towards the grotesque over the simply factual. (As are my sketches, I admit).
Besides the mesmerizing examples of non-viable fetuses in jars, and a variety of conjoined twins, there are skeletons of the smallest dwarf and largest man on record. Amazing to see how the body tries to adapt our basic pattern. The dwarf and the giant have the same bones, just squeezed together or stretched apart.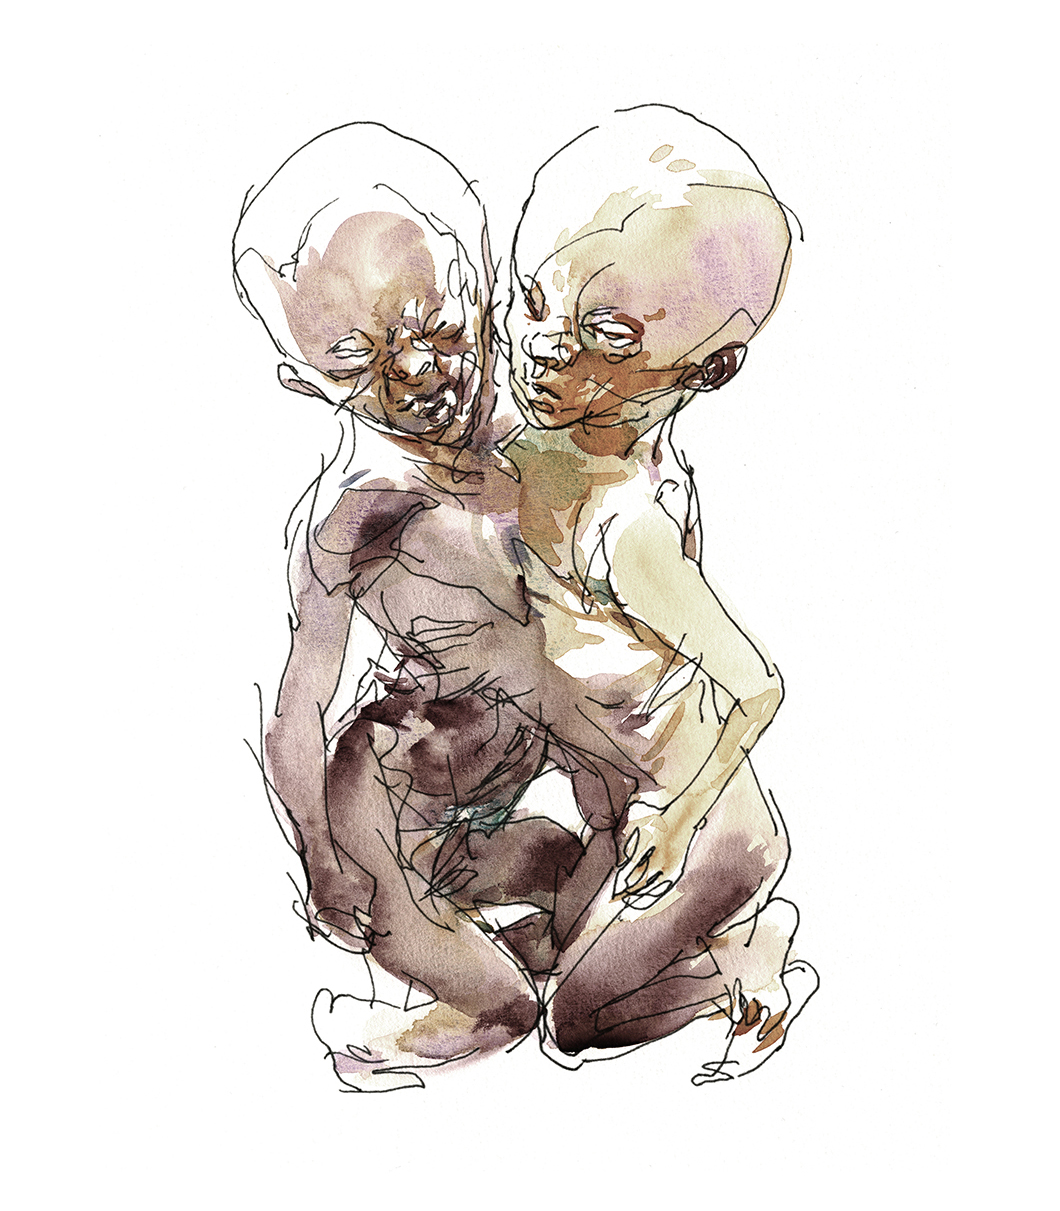 You might also see the skeleton of a man whose bones never stopped growing – all fused together in a jumble. Or an exhibit of Anthropological CSI – skulls of pre-humans demonstrating various kinds of historic murder.
The most disturbing for me was the example of a perfectly normal child’s skeleton labeled ‘Healthy Youth”. Apparently not that healthy. It seems unfair that a lad would beat the odds of all these birth defects, abnormalities and murders, yet still end up as bones in a cabinet.
It’s certainly an informative collection. And if it sparks a youthful interest in medicine or just sends you away with an appreciation for your own good health – or how recently we’ve invented modern medicine – well that’s probably enough learning for a day.
If you’re in the Philadelphia area the museum is open daily 10-5pm (barring a few holidays). Photography is not allowed, but if you’re a sketcher they’re ok with that. In fact, the museum has run drawing classes in the past, so you might inquire about upcoming opportunities for art in the collection.
If you’re not passing through town any time soon, you might be interested in the late curator Gretchen Worden’s excellent book: The Mutter Museum: Of the College of Physicians of Philadelphia.

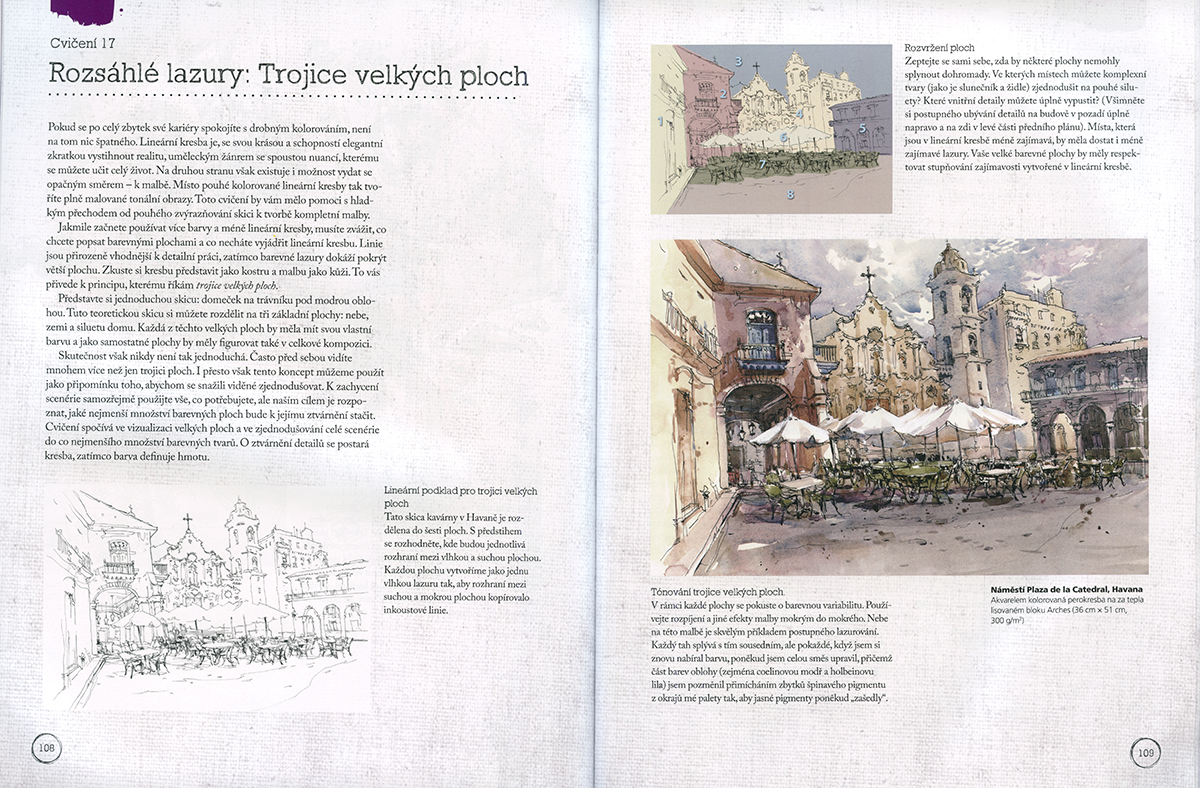
The Urban Sketcher in Česká Republika

I was pleased to find out that The Urban Sketcher has been translated into Czech :)
I don’t speak/read the language, so I’m interested to hear from anyone if they like the translation. If anyone has a copy or sees it in the wild please let me know.
It’s exciting to think people could be trying out ‘Street Sketching’ in Prague. Send me some links to whatever you’re drawing over there in Česká Republika!

Workshop News: Galway IE sold out! Thinking about India?

July 2016: IRELAND: This just in: our Galway Ireland Urban Sketching Workshop is sold out! Thanks everyone – we’re looking forward to meeting you all and starting the wandering sketch-trek from Galway to Manchester with those that will carry on with us. We have a short waiting list building up, so you can still contact Laurel to put your name down with the hopefuls.
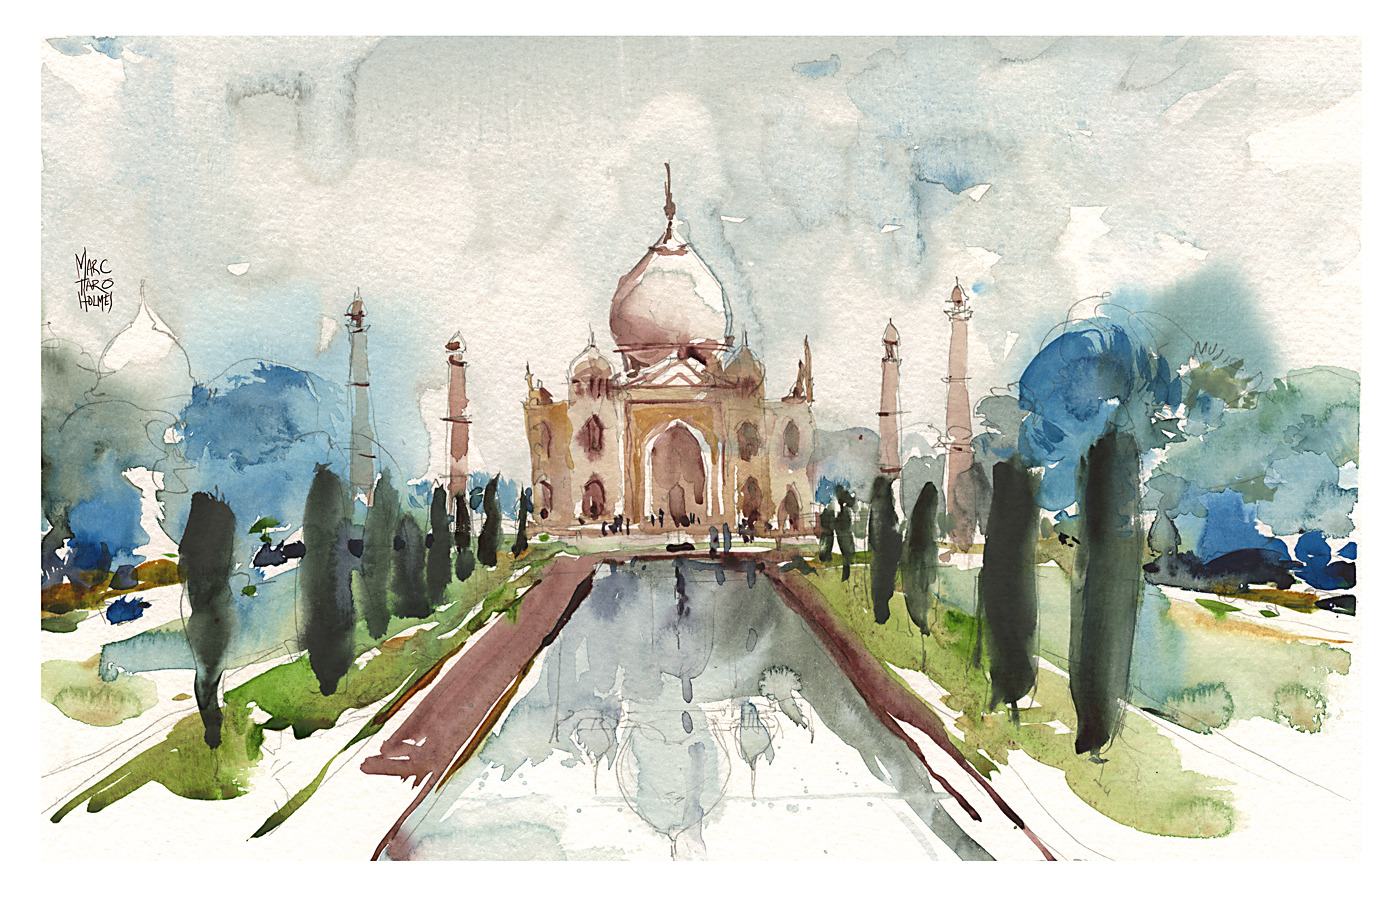 FEB 2017: INDIA: It might seem like a long time in the offing – but if anyone is interested in our FEB 2017 painting adventure trip to India (Delhi/Varanasi/Agra) – it is worth it to sign up soon. We’ve just sold out Ireland six months in advance. So, don’t hesitate if you’re thinking you want in on that painting trip of a lifetime. Head over to the workshops page to get more info on registration.

Trip Planning For Portugal Begins in Earnest!
In other news: I’m starting the ramp up for travel to Portugal! Stocking up colors and paper. I think I need a minimum of 6 sheets a day to be sure I won’t be short paper. (I’m bringing 10×13″ for a standard format this time – fits in my lighter weight mid-sized bag and makes a 9×12″ original, which is a nice size for framing). And I’ve just been listening to advice from photojournalists who say ‘bring a full duplicate set of all important gear in case of loss/theft/etc’. So I’m doubling or tripling up on tubes and need to purchase a backup set of brushes to go into the suitcase. (That’s going to be a big investment).
")
")
")
")
Some news from online: Roseann Hanson of Arizona showed us this great idea (over in the Craftsy Travel Sketching class message board). She’s invented a DIY magnetic quick release for her drawing easel. Brilliant! Much quicker to set up than the threaded items you might have on a standard tripod. Read about her plein air setup and her very interesting life over on her blog The Constant Apprentice.

Here’s another brilliant invention/adaptation. Leslie Fehling of Prosperity PA is using the drop-in magnet trick for her water jar, but has another smart tip – use a drill bit gauge (Velcro’ed on here) for her brush holder. Pretty smart! Something to pick up at the local hardware store. Read the details of her compact lap-desk over on her blog: Everyday Artist.
Ok – that’s it for news from the studio – back to planning for Portugal! Hope I get some warmer weather soon to begin training in earnest.
~m
Good Question of the Week: How do I avoid ‘cartoony’ sketches?

Post Preamble: This is another in my very irregular series: Good Question of the Week. (which is not weekly by any means).
I have discovered there is a limit to the length of an answer on the Craftsy.com website.
Students ask questions in an email-like sidebar and I get notified when there’s something to discuss. Today, I found out the hard way there must be a character limit to the entry field. Because this (long winded) answer simply wouldn’t go through until I broke it into three replies.
Anway, enough inside baseball.
Here’s the question for anyone that might be interested:
Student Question: For sketching I think that line adds a freshness to the drawing but mine always turn out far too cartoony…which I don’t like. I Love the direct approach but I tend to leave that more for “real” paintings. How do I lose the cartoony effect? (ed. note: by ‘direct approach’ I think they are referring to direct-to-brushwork with watercolor).
Overly long answer: Absolutely good question [Name Redacted]! Ready for a super long answer? (Sorry, but apparently I was waiting for this question :)
So – the reason this course (referring to my Travel Sketching course) has so much emphasis on drawing-at-speed and embracing-your-errors via single line sketching in ink – is exactly to do with this problem of ‘cartoony’ sketchbook drawings.
It’s a method to push yourself out of stiff or awkward drawings, by not giving your mind enough time to over-think.
I find I have to be in a zone of seeing and drawing reflexively to avoid a ‘cartoony’ result – that I feel comes from overworking, and timidity.
(ed. note: Of course – I believe that there is nothing lesser about cartooning as an art. I love every language of drawing, and great cartooning is a very demanding mode – so I don’t mean anything snobbish about my current desire to be more painterly. I do admire cartoonists and one day might become one – if I live long enough).
Let me dive in to the reasons!
The things that I feel make a drawing ‘cartoony’ are A: rigidity and simplification, B: monoweight and closed lines, C: flat color, lack of depth.
A: Rigidity and simplification:
Cartoons tend to simplify complex shapes into something more geometric.
If you are not sensitive to tapering perspective, or a slight slope of the earth, or the lean of an old structure, or the divot of a broken brick, you might end up putting inflexible straight lines where a more organic shape might bring life.
Speed and reflexive recording of what you see allow you to exaggerate and record in a fresh way which you won’t achieve by taking pains to make a ‘good drawing’.
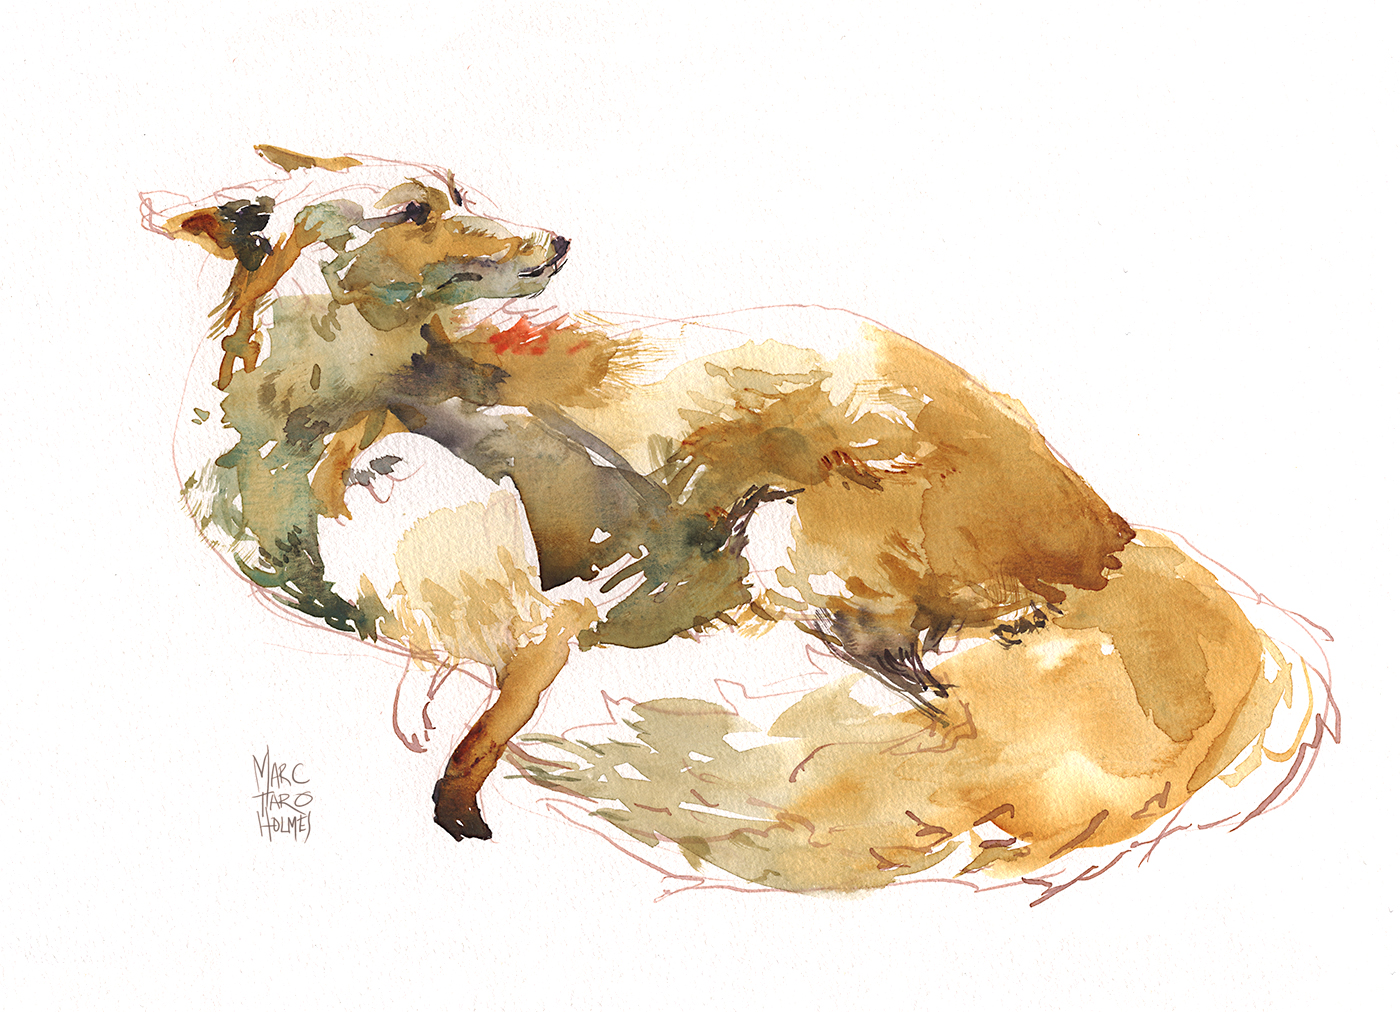
Here’s a drawing that I think you’ll agree is the opposite of rigid :)
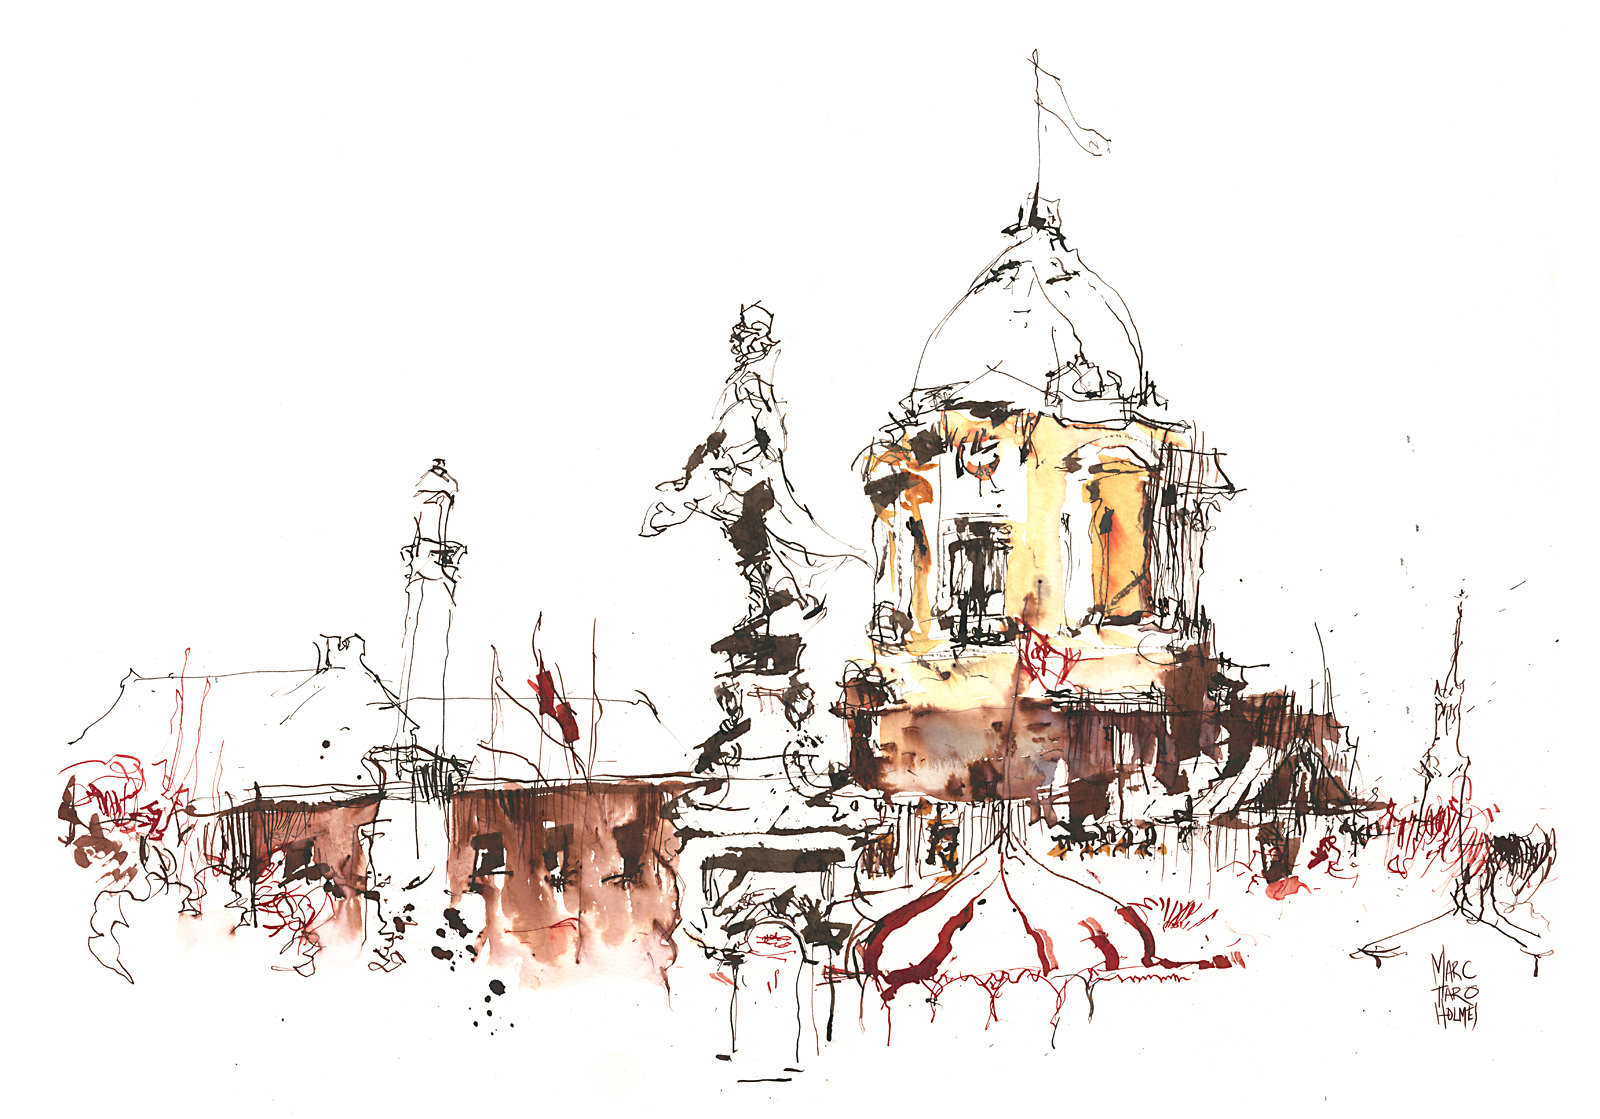
This one too, to some extent:
These were accomplished by drawing while having a lively conversation with a friend at the same time! Also by being very cold and working standing up, and wanting to get moving soon :)
B: Monoweight and closed lines:
There is nothing more flattening than a graphic outline; a solid closed line that goes all the way around a form. This is a classic cartoon effect, meant to make a shape visually separate from a background.
One easy thing you can do is soften the ink line – I’ll point back to yesterday’s post on diluting ink, or of course there’s water soluble ink. Blending the line with water makes it much less prominent.
But if we’re talking about black ink line, that’s different.
In drawing, unlike painting, we have less natural opportunity for lost edges (places where object and ground can blend together).
What we have to do is force lost edges to happen by breaking lines. Let them taper off into open shapes. Vanish into the highlights. This looks to the eye like a painter’s lost edge.
Just look at the faces in this life drawing:
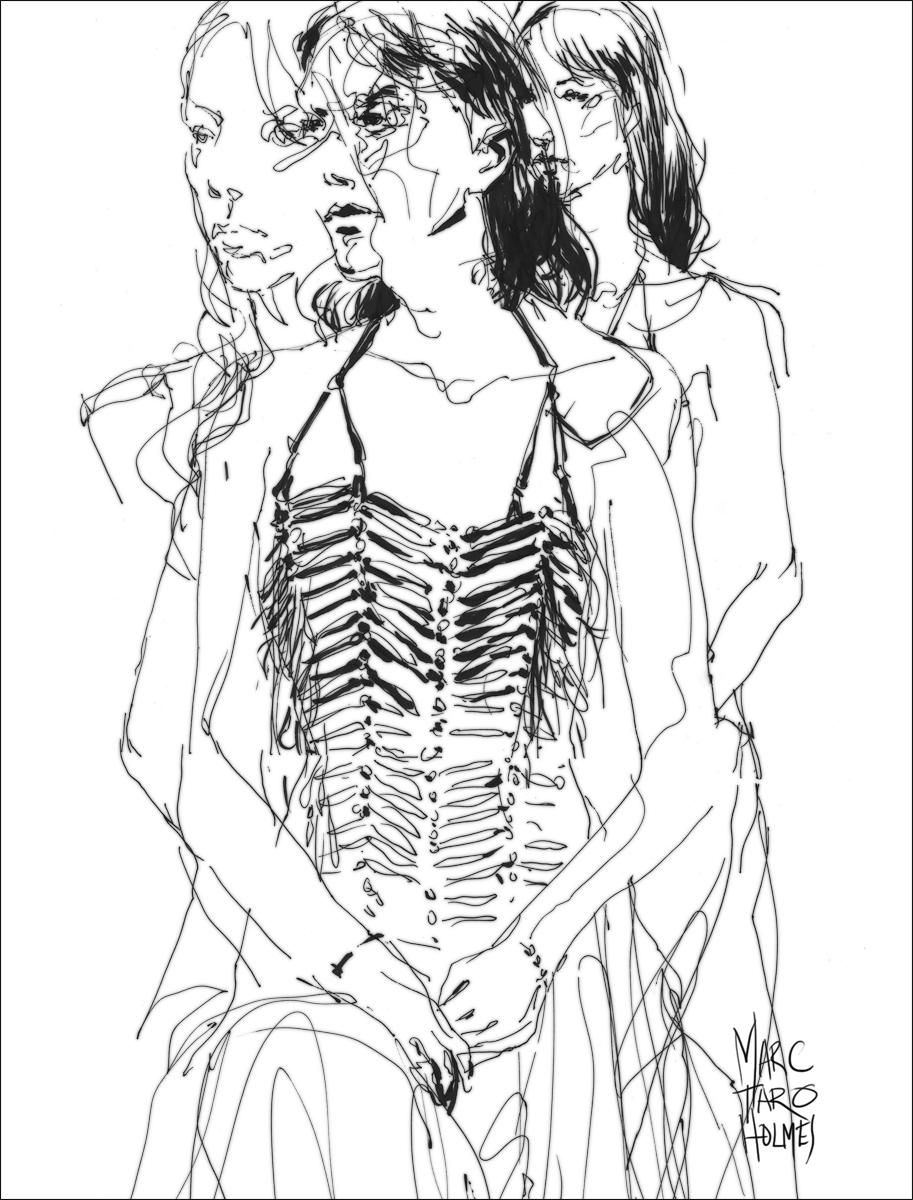
Here’s a sketchbook example of breaking line (and tone) to let in light:

C: Flat Color, lack of depth/texture:
Cartoons (and comics) are most closely associated with flat color. It’s practically the definition of cartoony.
The first part of the answer is texture. With watercolor, we push back against any monotonously smooth passages with a combination of paper texture and brushwork.
You can use broken brushwork as seen in the Impressionists. Or charging-in to promote wet-in-wet mixes. Also a slanted board will encourage backwash/blooms and drips. These are all ways of getting natural texture, instead of clinical perfection.


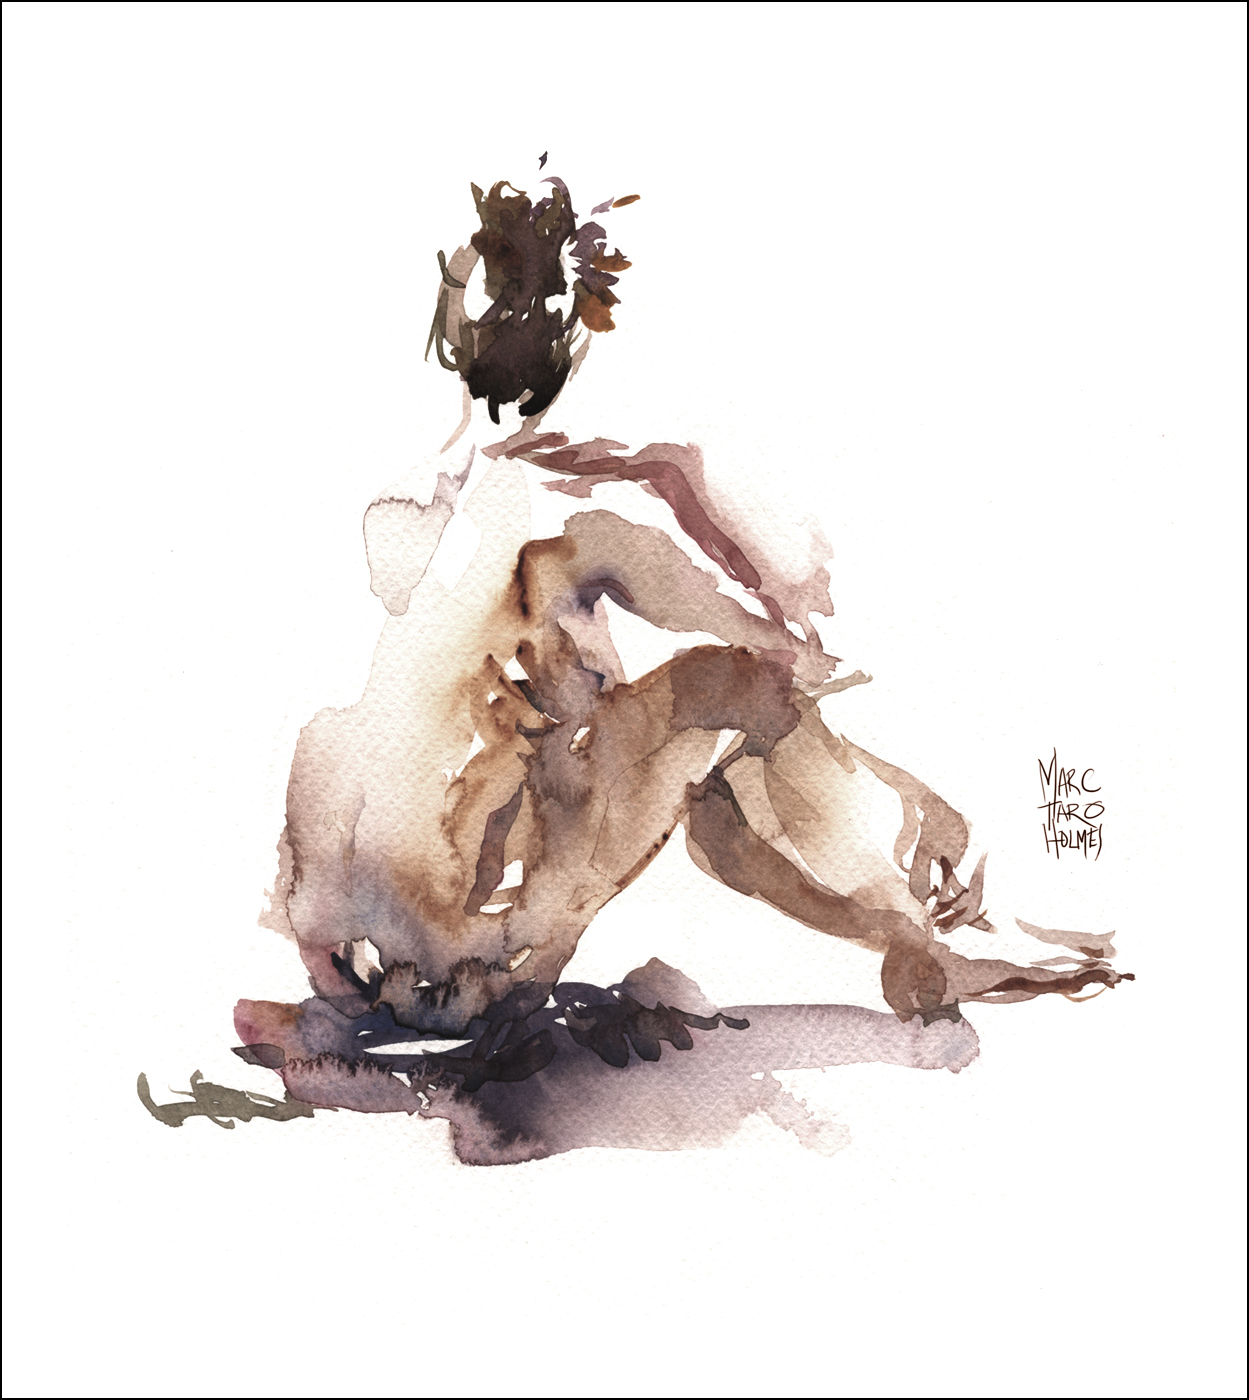
The second part is depth. I should say ‘dimensionality’ – because by this I mean observing shadow shapes.
Not talking about depth as in distance toward the horizon (that’s atmospheric perspective) but what I mean is being very conscious of ‘self-shadowing’. When objects cast shadows on themselves.
Marking what is light, and what is the shadow side is the fastest way to teach the eye that a thing is three dimensional. That’s why so many of my sketches are just white paper with only color in the shadow shapes.

And of course, you can do this in the drawing – without even any color or brush pen blacks. See how the shadows are in the drawing, even before the color.

All this combined is what makes a sketch painterly and not cartoony at all.
So anyway, just wanted to post that here, as it might make better reading on the blog, than in the questions window on craftsy :)
~m
Sketchbook Drawing Tip: Soften your Linework with Diluted Ink
I was out sketching the other day, (at the Montreal Biodome) and wanted to try a slight tweak to my sketchbook drawing method. Nothing too revolutionary – just the simple idea of sketching with diluted ink.
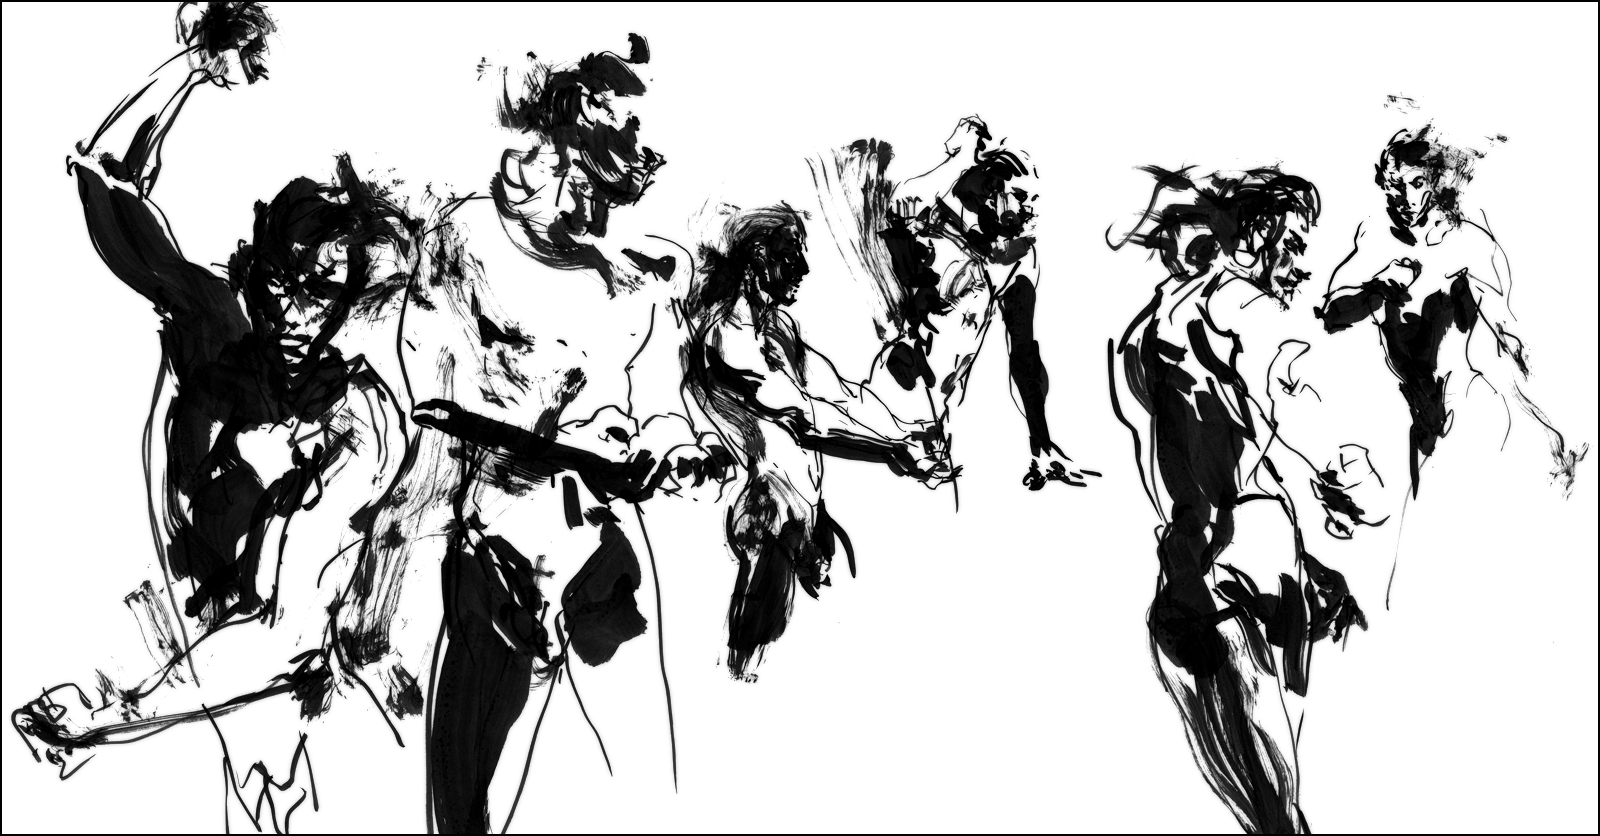
Sometimes I’m in the mood for an aggressive high-contrast drawing. It can be a lot of fun – especially if you’re working quickly (like these 5 min gesture drawings).
But other times I feel like having a black line under a watercolor sketch is a bit overpowering. Of course you can also sketch directly with watercolor (with no drawing at all). But that can be a bit nerve wracking. I find it takes a lot of focus. Or a willingness to draw three drawings and keep only the best one :)
So – this is a bit of a middle ground. A more relaxing way to draw.
I took a small 5ml vial of water and added two drops of Higgins Sepia. This extremely diluted mix gives you a very pale pink ink color
This simple trick has a number of advantages. The line is so pale, I don’t mind using a ‘searching line’. That is, over drawing – sketching very freely, feeling out the form with multiple contours. Sometimes ‘drawing through’. That is – drawing the back side of a form, or how a limb goes behind the body.
Because of the pale-ness of the ink I don’t care so much if the drawing is incomplete, messy, or otherwise experimental.
I know the color to follow will overpower the drawing, rather than ‘color in’ as it might feel with a black ink drawing.
A small note; this is a water soluble ink – so it would normally melt into the watercolor and bias the color. But since it’s diluted already, it doesn’t actually move on the paper any longer. It becomes no longer water-soluble. So that’s just an interesting and unexpected property.
So, there you go! A simple variation on pen-and-ink drawing you might want to try out.
~m
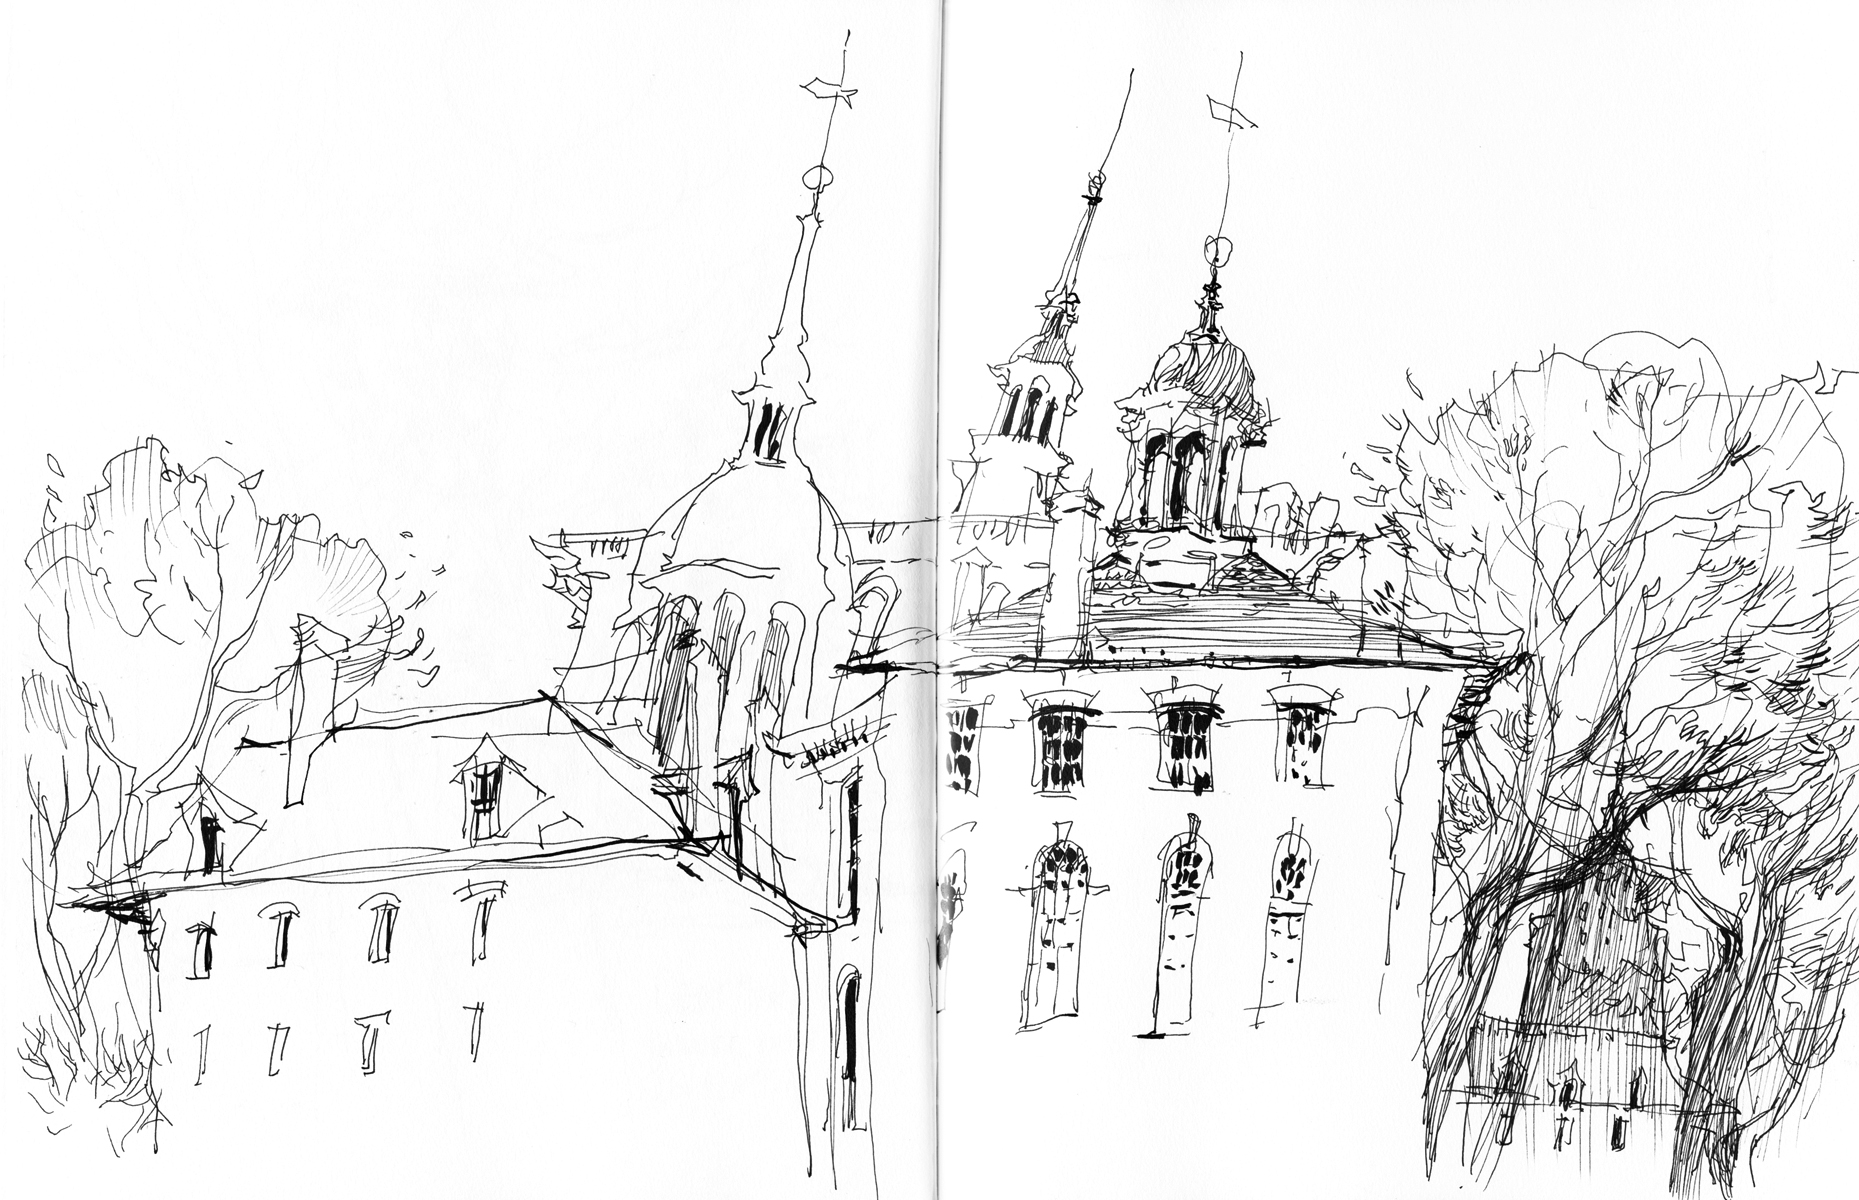
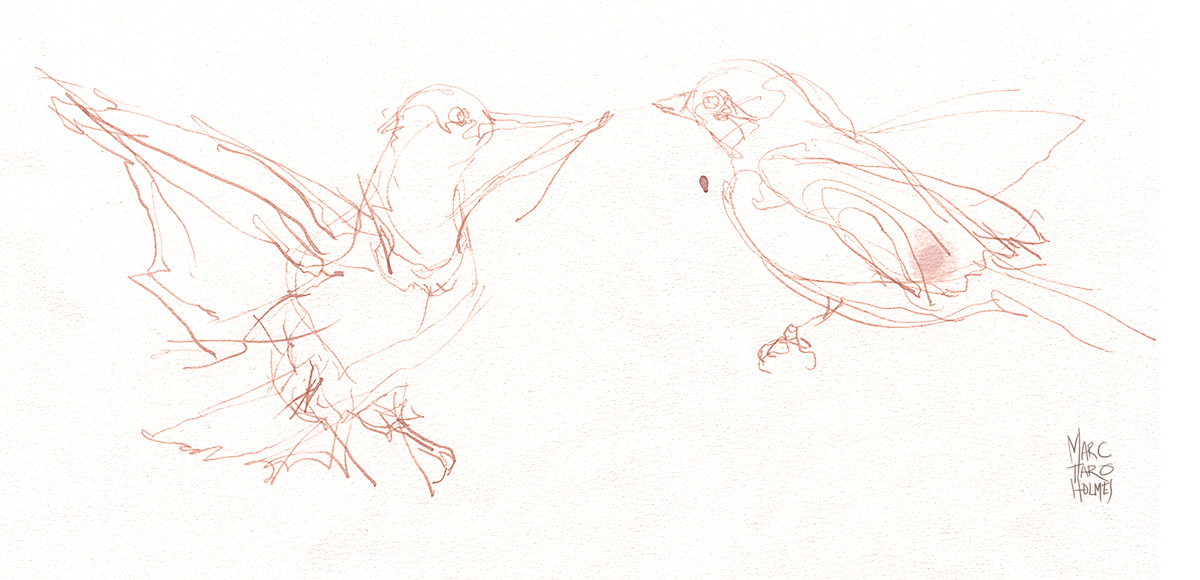
Negative and Positive Shapes in Watercolor

Hey everyone! I’m still living under a rock these days. A pile of rocks made of freelance illustration work that I’m gradually chipping away at. But I wanted to post something as I’m getting the itch for painting this spring in Portugal.
So, I went back into my files to bring you this demo about using negative shapes. I used this sketch as part of my online course Travel Sketching in Mixed Media. In the video I do a quick little reproduction of this painting for the cameras so you can see how I handle the paint. But I think you can see what’s important about the strategy from these phone shots snapped on location.
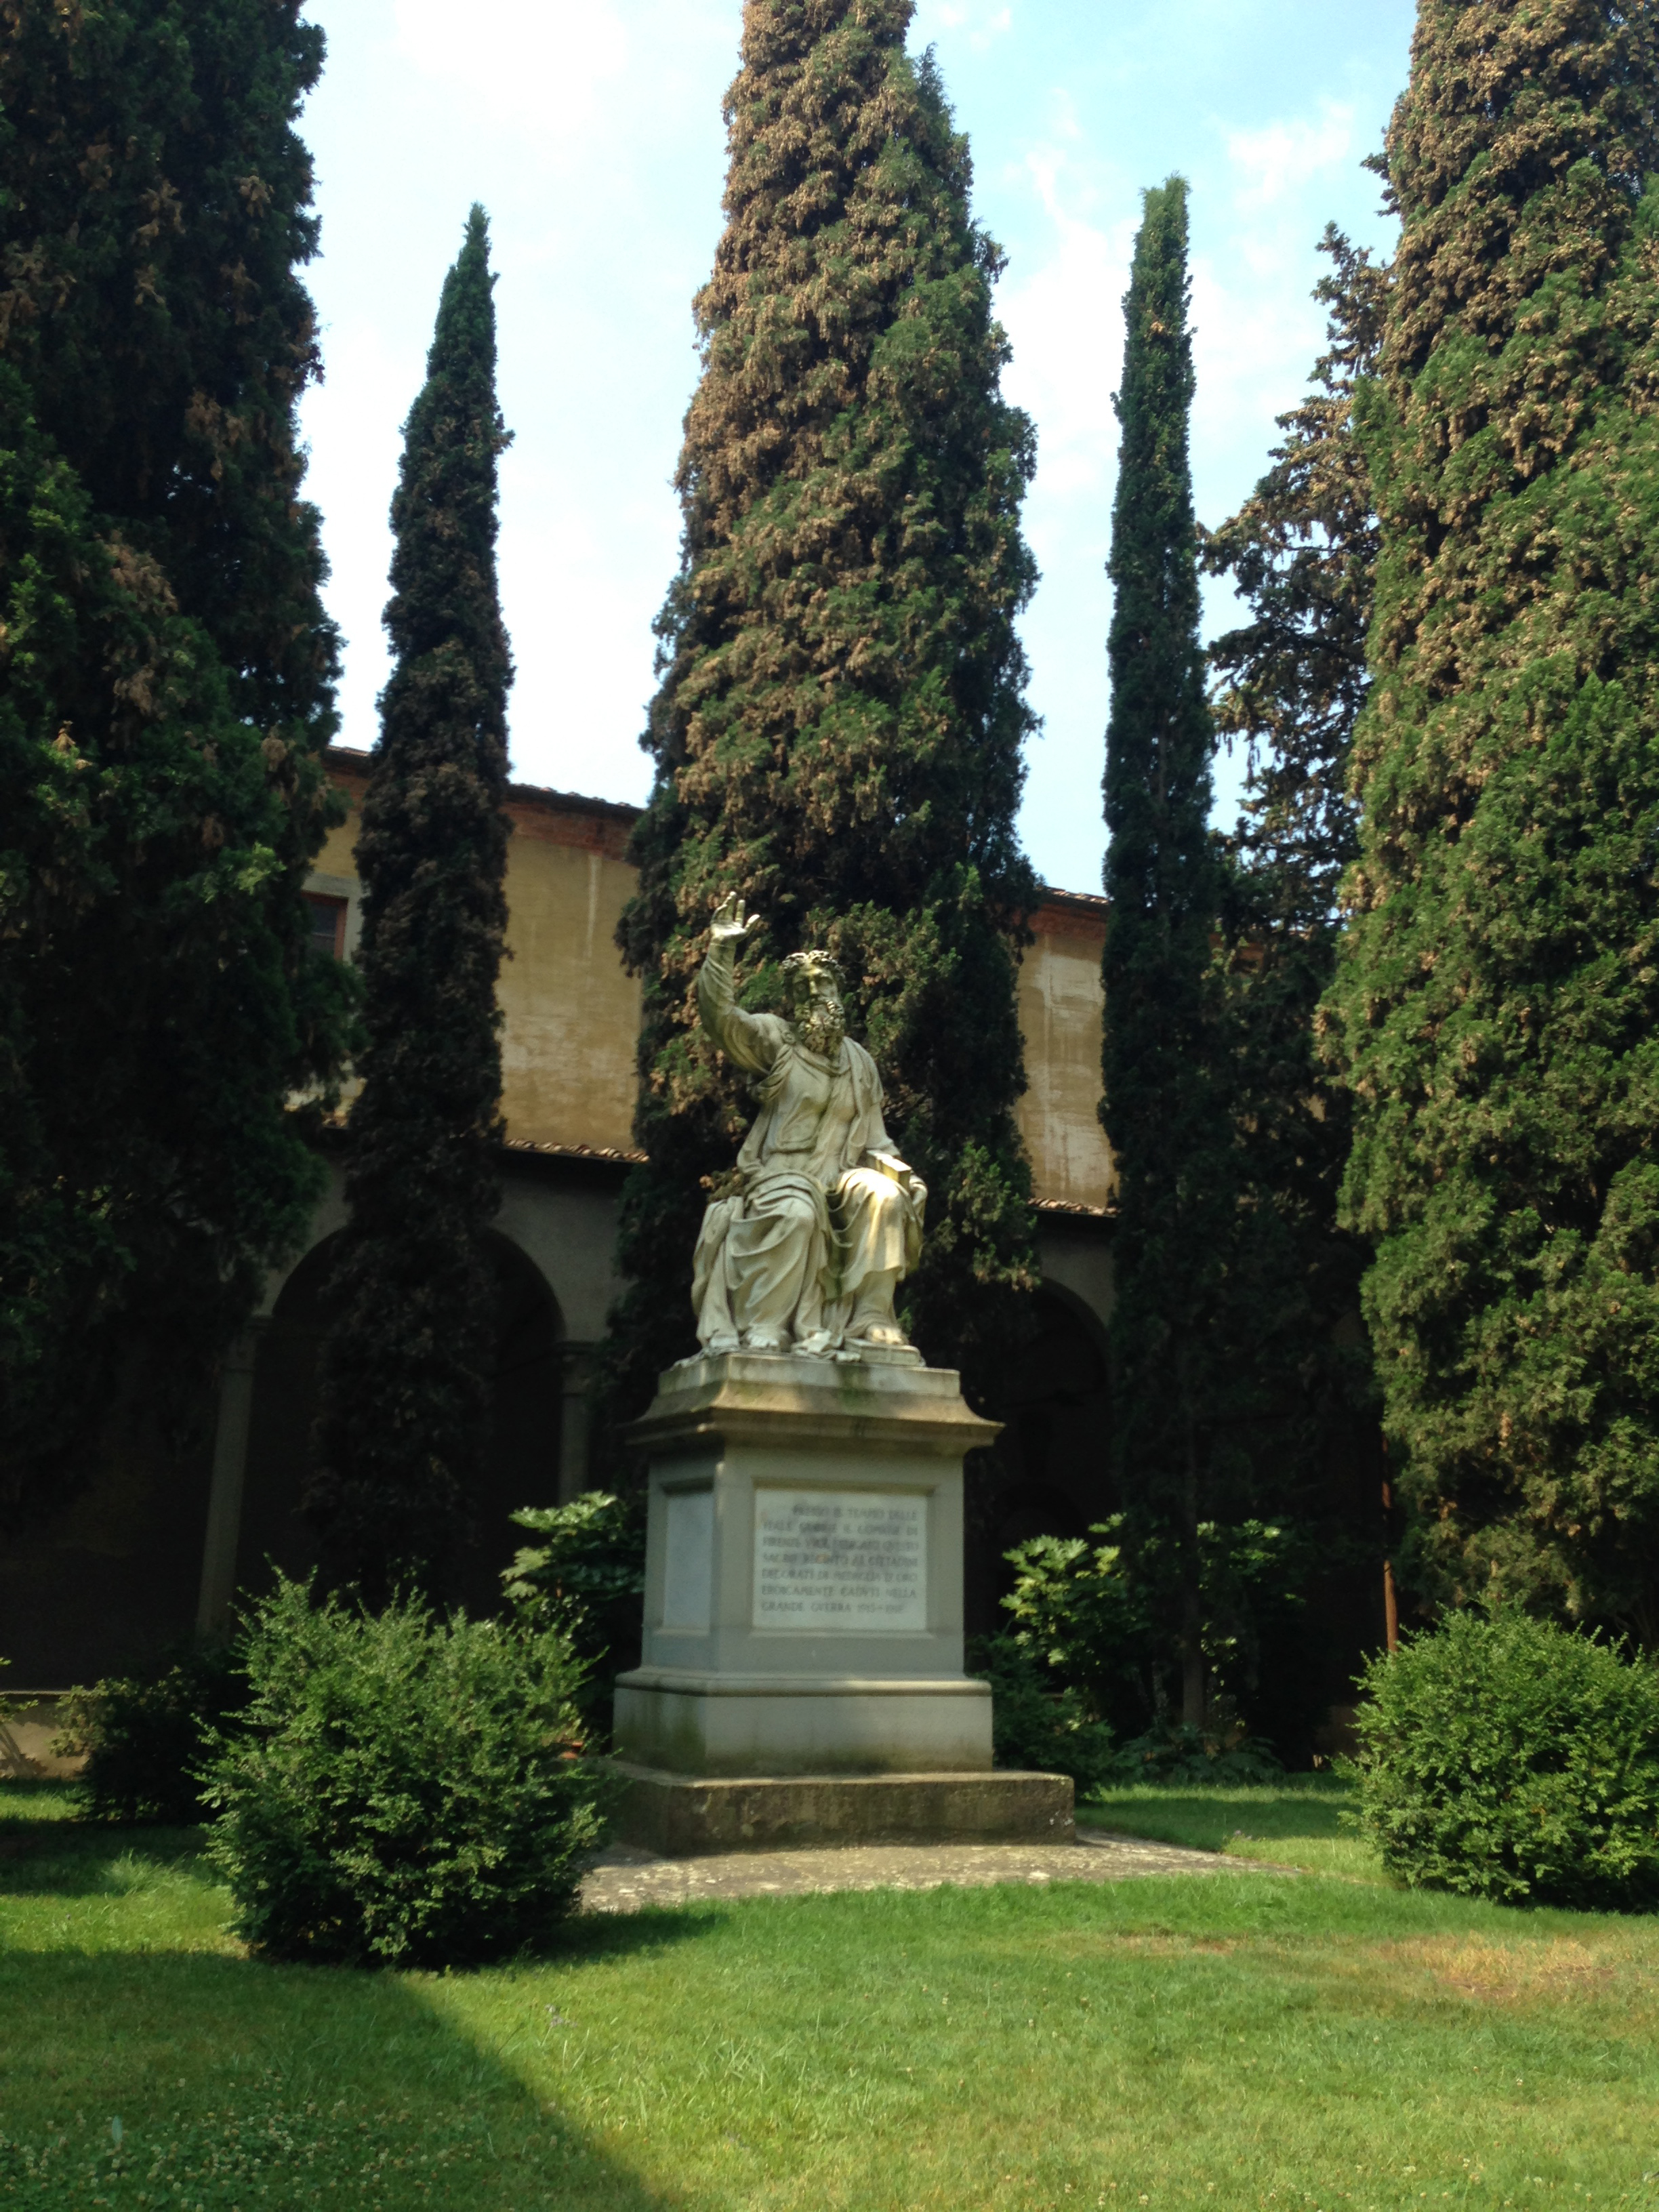
Whenever I’m looking at a scene I’m thinking about the silhouette shapes I see, and planning how the dark shapes will sit on top of the lighter ones below. My goal is to use the fewest shapes possible – to make the strongest composition. Too many shapes can get fiddly and confusing. I like to weld shapes – fuse some things together to make cleaner edges – as well as eliminate as many unnecessary objects as possible.
Also, I want to treat each shape as its own wet-on-dry passage. So there will be plenty of watercolor mixing and blooming inside the silhouette – but a nice sharp edge outside.
I like to say, “draw with the outside, paint with the inside”. If you get nice clear silhouette edges, the drawing falls into place. But inside those silhouettes is the texture and abstraction – and playfulness – that makes watercolor what it is.
Ok – so that’s the goal. Look at a scene, see the basic shapes, and plan what order they will go down.

So this is the first shape. A simple box that gradates from gold to green. This is the lightest local color that I will use to draw the wall behind AND the statue in front.
I make this wash in one continuous wet-on-dry shape, so that the greens will blossom upward. And I make sure to make an interesting hard edge where I’m fading out the sketch at the bottom. So it doesn’t end randomly or with uneven scratchy shapes.
I know I can let the green pigment float in a random way, because I plan to cover most of it up later. I’m already thinking a few moves ahead, to when I’ll make these blooms into small plants and shrubs.
At this point I let this first layer dry – so the next shapes can have crisp edges over top of those watery effects. On a warm enough day you don’t really have to wait long. Just until the paper flattens back and no longer feels cool to the touch.

This is the second pass complete. The most important thing I’ve done here is placed down the trees and shrubbery. You can see how each tree silhouette is grown out of wet paints – with plenty of color variation as I go. It may look like there is shading going on in the trees – but all the blending is done by the watercolor itself – not by manually smoothing with the brush. Simply place contrasting color and light and dark pigments next to each other, and allow them to blend naturally.
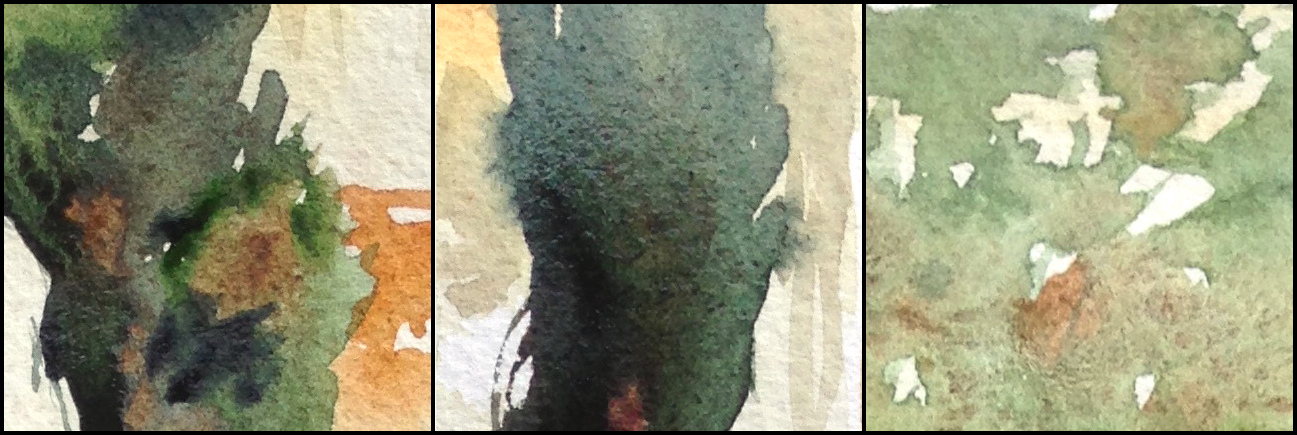
At the same time, I am allowing the background tone to show through in interesting ways. It’s important to leave small gaps and light flecks that show the first wash. It becomes instinctive – when to leave a little gap, and when to let it fill in.
And of course – there is the Negative Drawing of the statue. The outside silhouette of the statue is created by what is left out of the tree. Drawing the larger shape draws the smaller automatically.
I did use a little sketch, done with the point of the brush, so I could see where to cut out the silhouette – but really, I shouldn’t have bothered with that – eventually I’ll be confident enough to do without the guideline. I knew it would fuse with the dark green tree shape, so I risked it looking a bit labored.
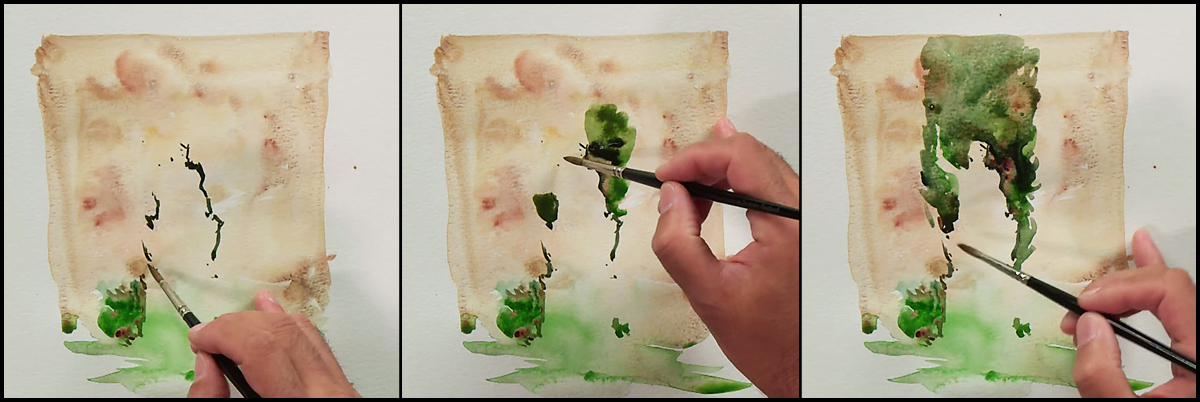
Here are a few screenshots of cutting around the negative shape of the statue. These are extracted from the video demonstration.

From here on, all the big shapes are in place, so it is just a matter of putting on small shadows. The most important being the shadows on the statue. These little shapes make the form appear. If you have the outside shape visualized correctly, then the shadows will simply fall into place and the object will look three dimensional.
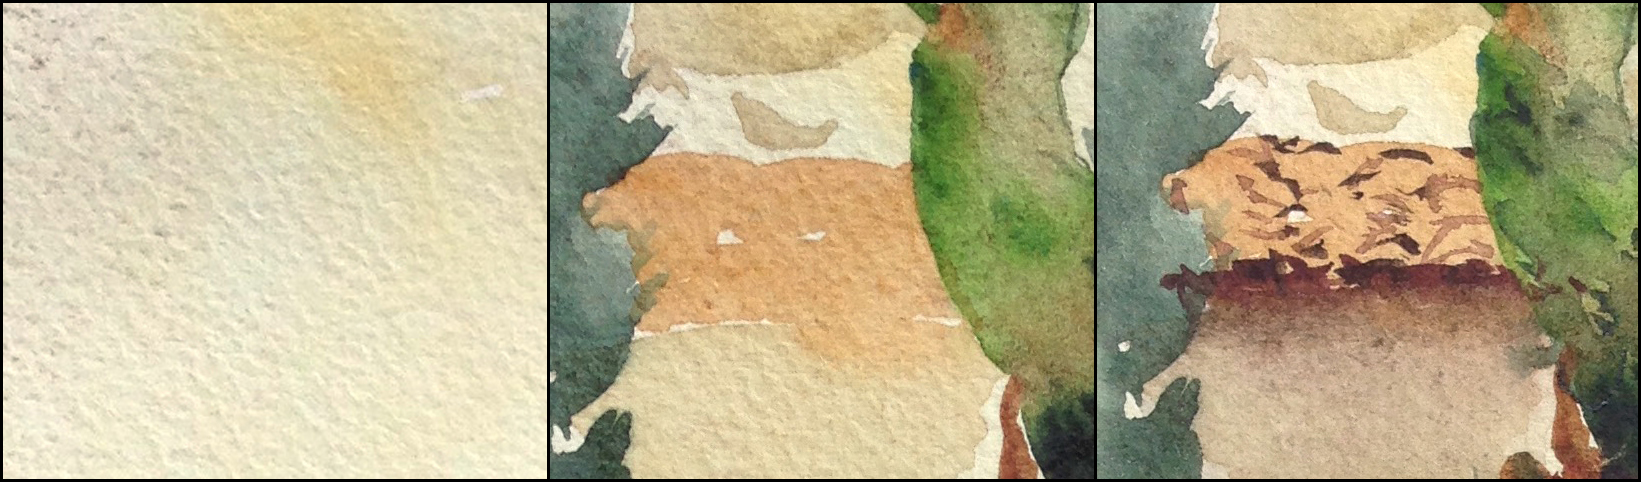
This area that will become the clay roof tiles is a good miniature example of this 1/2/3 process of stacking. Everything happening at a larger scale is visible in this small area.
So – there you have it. Something I am thinking about a lot these days – the order of the shapes I plan to stack and how I’ll let colors from below show through the marks made on top.
~m
Internal Travelogue: Imaginary People

I’m still under house arrest. Drawing every day for my character design book. I had to pass up a drawing trip with friends today! It’s kind of weird, taking a long break from drawing on the street. But I probably would be taking time off for winter anyway. It’s always a struggle finding enough interesting indoor locations to make it through the winter.
No matter! I have big plans for drawing expeditions next year. I’m just keeping that reward in my head through these long winter nights in front of the computer :)
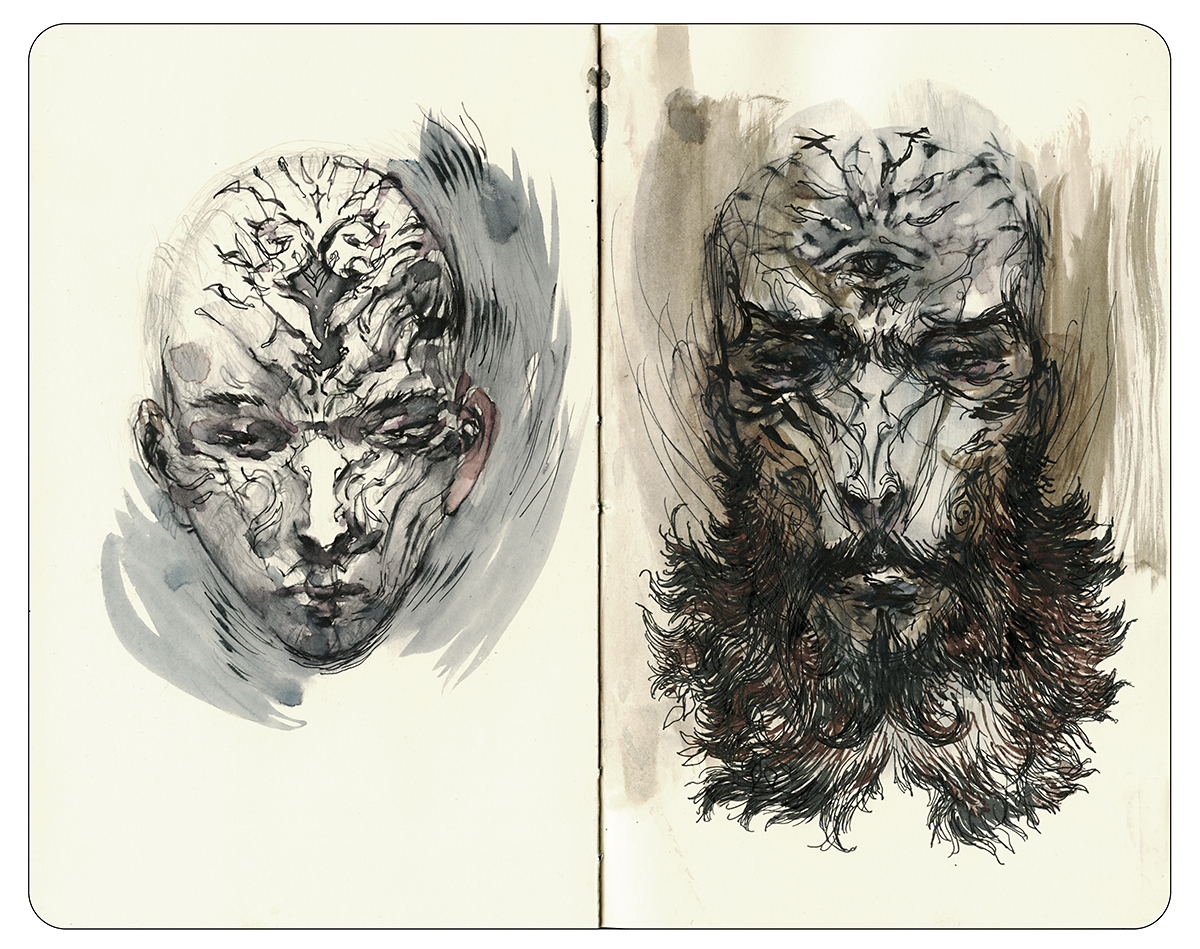
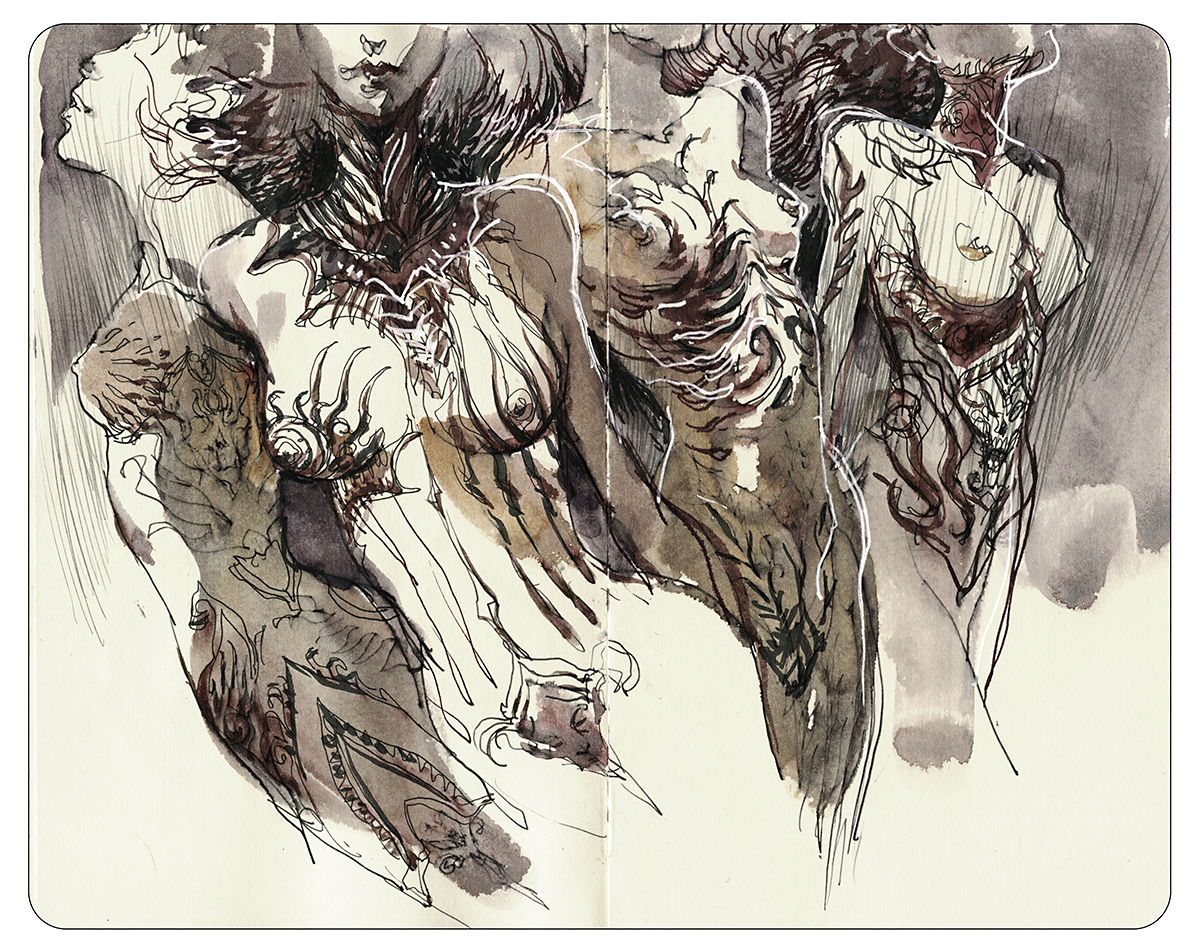
So it seems appropriate to post a few more pages from the imagination sketchbook. Last time I showed some imaginary places. This time, some of the imaginary people.
Drawing people from imagination takes a bit of practice. For me, it’s not really imagination at all – more like drawing from memory. I’ve done a lot of drawing from live models, so the data bank is there.
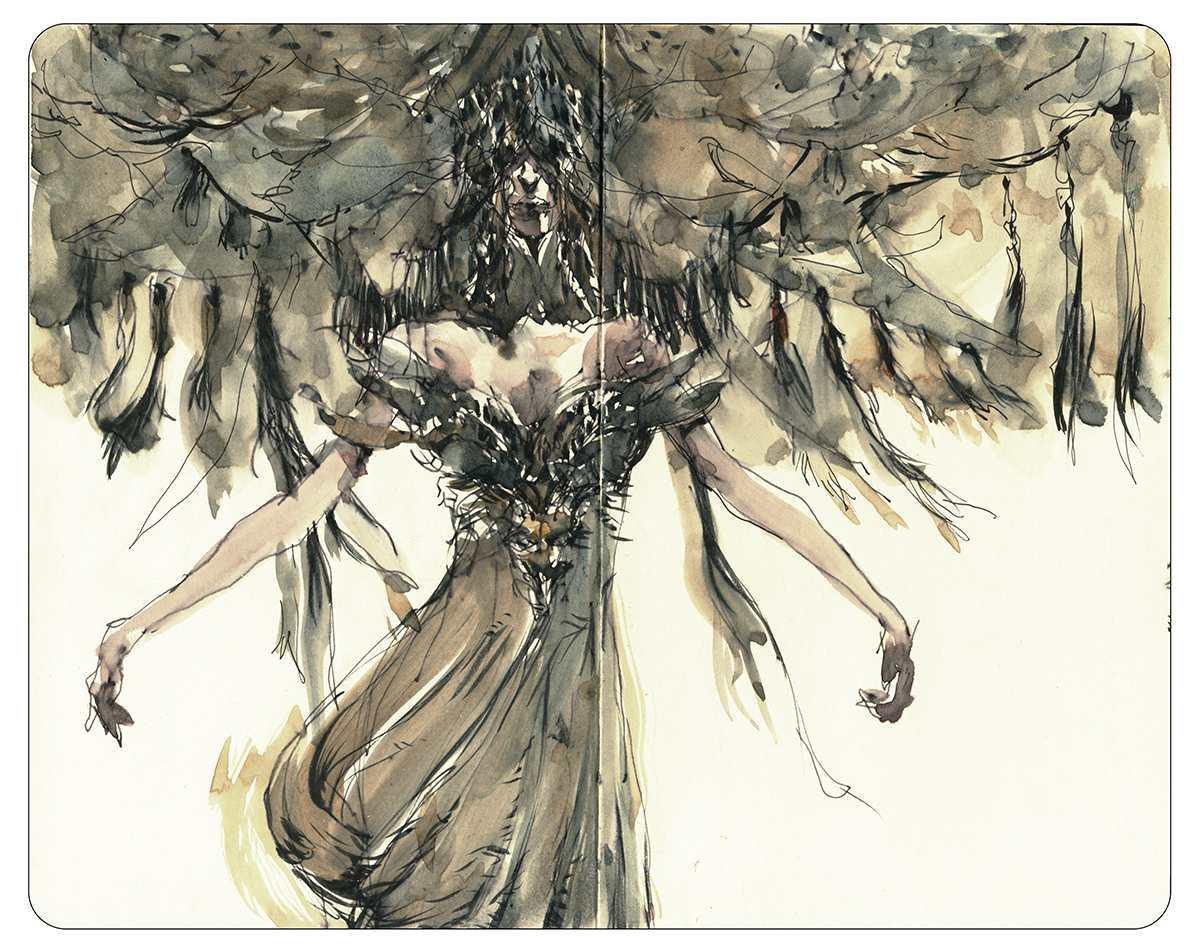
Inventing (vs. looking at) faces and figures is both more formulaic and more freeing at the same time. Your imaginary people might tend to look a little doll-like. A bit caricatured, a bit abstracted. Stylized to fit some kind of memory-model you’ve installed over time. But what you set aside in realism, you gain back in creativity. When will you ever get to meet people like this for real?
I don’t know if this stuff is as interesting to you guys :) That’s the other thing about sketching from imagination. It makes you self conscious! Drawing a real event, you have a valid story to tell. It’s not about your own head, it’s reportage: I was here, this is what I saw, this really happened. Once you’re inventing, things get a bit shaky. Sometimes you second guess the value of doing it.
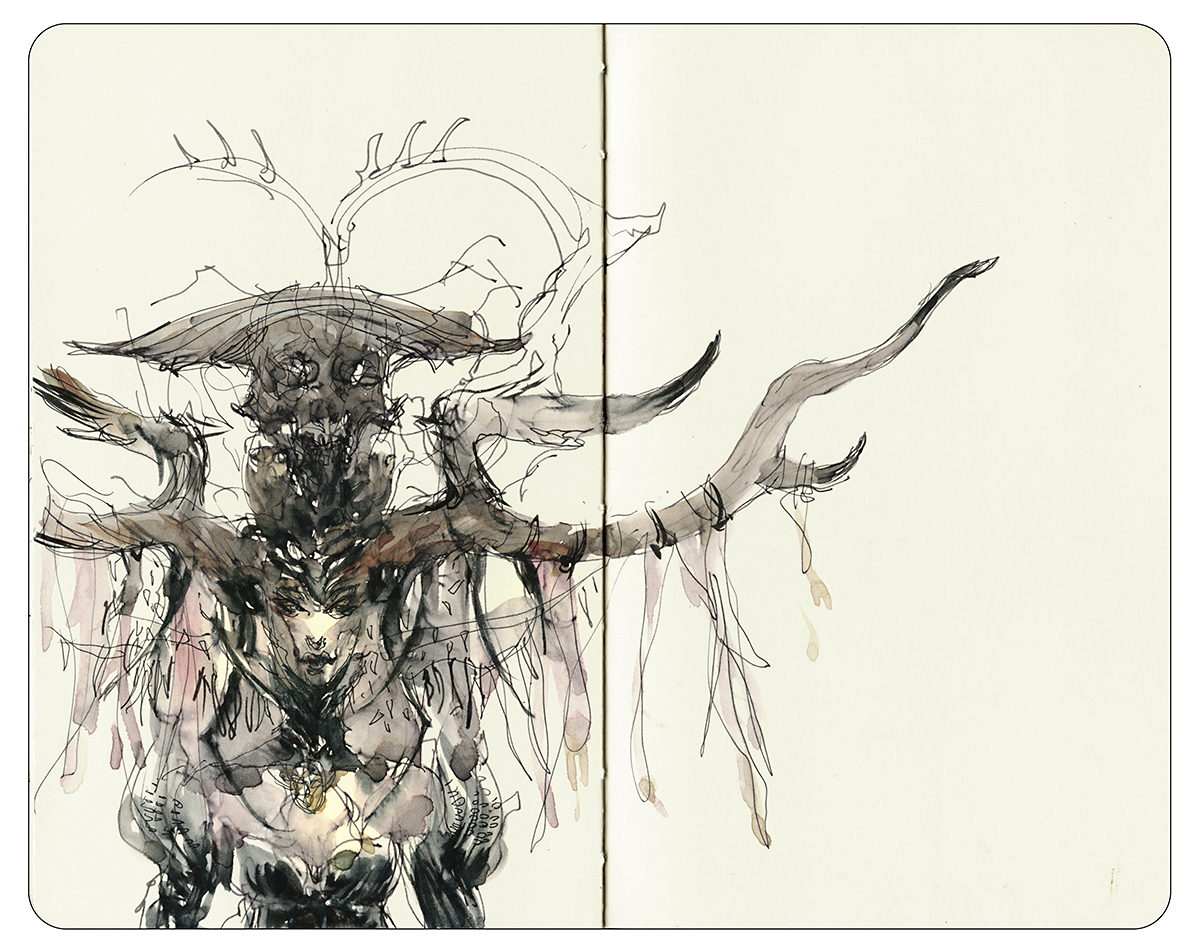
But like any kind of art – it has to be something you do for yourself. Partially – I’m simply having fun in this sketchbook. Trying to draw without a filter. Letting the subconscious choose subjects. I have this feeling that I have to put recurring motifs down on paper or I’ll forget them.

When I don’t have a sketchbook handy, I just write lists of paintings I want to do someday.
Does anyone else do that I wonder? That does sound a little crazy. But it’s not like I’m sticking these lists all over the bathroom mirror. I keep them on my phone mostly.
It’s probably not necessary. There will always be ideas for paintings, and I don’t think you forget your own major motifs. But it is interesting to see what keeps on coming back year after year. Of all the things you draw, which ones have staying power in your imagination.
That’s the real value of keeping a journal. Looking back at them years later.
Liz Steel’s Primer on Fountain Pens
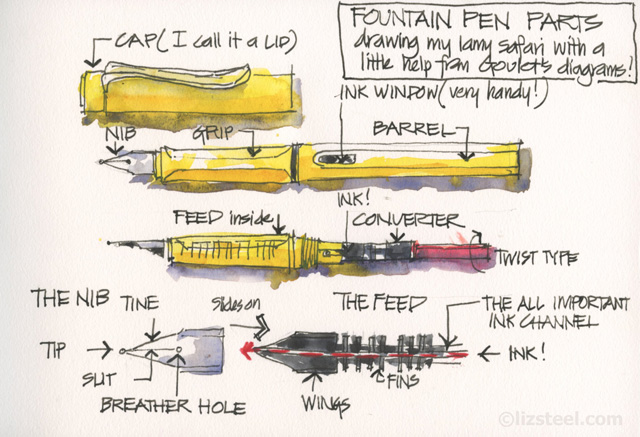
[Image: Liz Steel]
I wanted to point people over to a useful project: Liz Steel’s mini-series on selecting and using fountain pens for sketching. At the time of writing she’s posting articles to her blog twice a week, expecting to be complete before the end of Dec.
There is some very solid info for beginners – so I know many online students will love this primer. Plus, some of her notes should come in handy if you’re looking for new pens this holiday gift season.
Click over for Liz Steel’s series on Fountain Pens for Sketching.


