
Last weekend was the USK sketchcrawl on Mount Royal, as well as the Vernissage for the exhibition. Seeing everyone’s work in person reminded me how much we miss looking at art online. Much of the work in the show is in large formats or with texture and fine detail that is lost in web-sized photographs. It’s great to be able to see it all up close.
The show is up for one more weekend. You can still enjoy a day of art on the mountain May 30/31.
We had a great turnout – I’m going to guess 40 people came for sketching, including some folks from Ottawa and from Vermont, and our own far flung areas – Hudson, Laval, etc.
This is the thing I love best about the urban sketching movement. How it brings people together from all over, to enjoy a day of drawing.
Thanks to everyone who came out to volunteer!
I’m sure the visiting sketchers had a great experience, having all our local USK’ers on hand to show their work-in-progress and share their sketchbooks. For a while there, the vernissage had a ‘kitchen party’ feeling, with everyone crowded in the side room around a big table of the days sketches.
There is talk of doing this show again for next year – so maybe you’ll make a sketch in the park this summer!
~m

I’m excited to announce my first watercolor workshop of 2016 – in Alvor, Portugal!
We’re offering this event in partnership with Going Places Together.com and The Art District Gallery of Kitchener / Waterlooo.
This workshop will be a mix of days painting on location in Alvor and nearby Portimao, and day-tripping with a camera or sketchbook. I’ll be doing plenty of demos, and offering suggested exercises teaching you to travel light, paint quickly, and capture the world in spontaneous, colorful sketches!
Some key concepts we’ll cover:
- Composition and design – focal point, gradient of interest,
- Seeing the painting as silhouette shapes,
- Direct sketching in watercolor – painting wet-on-dry,
- Color mixing and paint viscosity,
- Making color variation, warm and cool, charging in, and color notes,
- Edge control – hard and soft edges of wet shapes,
- and calligraphic brushwork for fine details.
Click over to my workshops page for the full details.
Please note: In order to insure the best experience for everyone, there is only space for 15 artists. We are looking to get your registration before August 31, 2015 in order to book accommodations in advance. Thanks! ~m
Join us on the Mountain this Sunday May 24th

This Sunday May 24th is the open sketching event associated with the Draw Me a Mountain Exhibition. Everyone is welcome, just bring your pens and sketchbook. We will be going ahead no matter what the weather – even if there is rain, we’ll be under the eaves of the buildings :)
Meet at the Smith House at 10 AM, and will have sketchers at scenic spots throughout the day. At 3PM we’ll meet back at the Smith House to enjoy the sketching exhibition and show off the drawings we have done that day.
See you there! Please join us to do some drawing of our mountain!

Spring in the Cemetery

At the time of writing, it’s been a very dry spring. It’s looking more like second fall around here. The Noodler’s Red Black and Rome Burning I’ve been using lately are really helping with that fall color feeling.
Here’s some sketches from the smaller of our neighborhood cemeteries: Notre-Dame-des-Neiges.
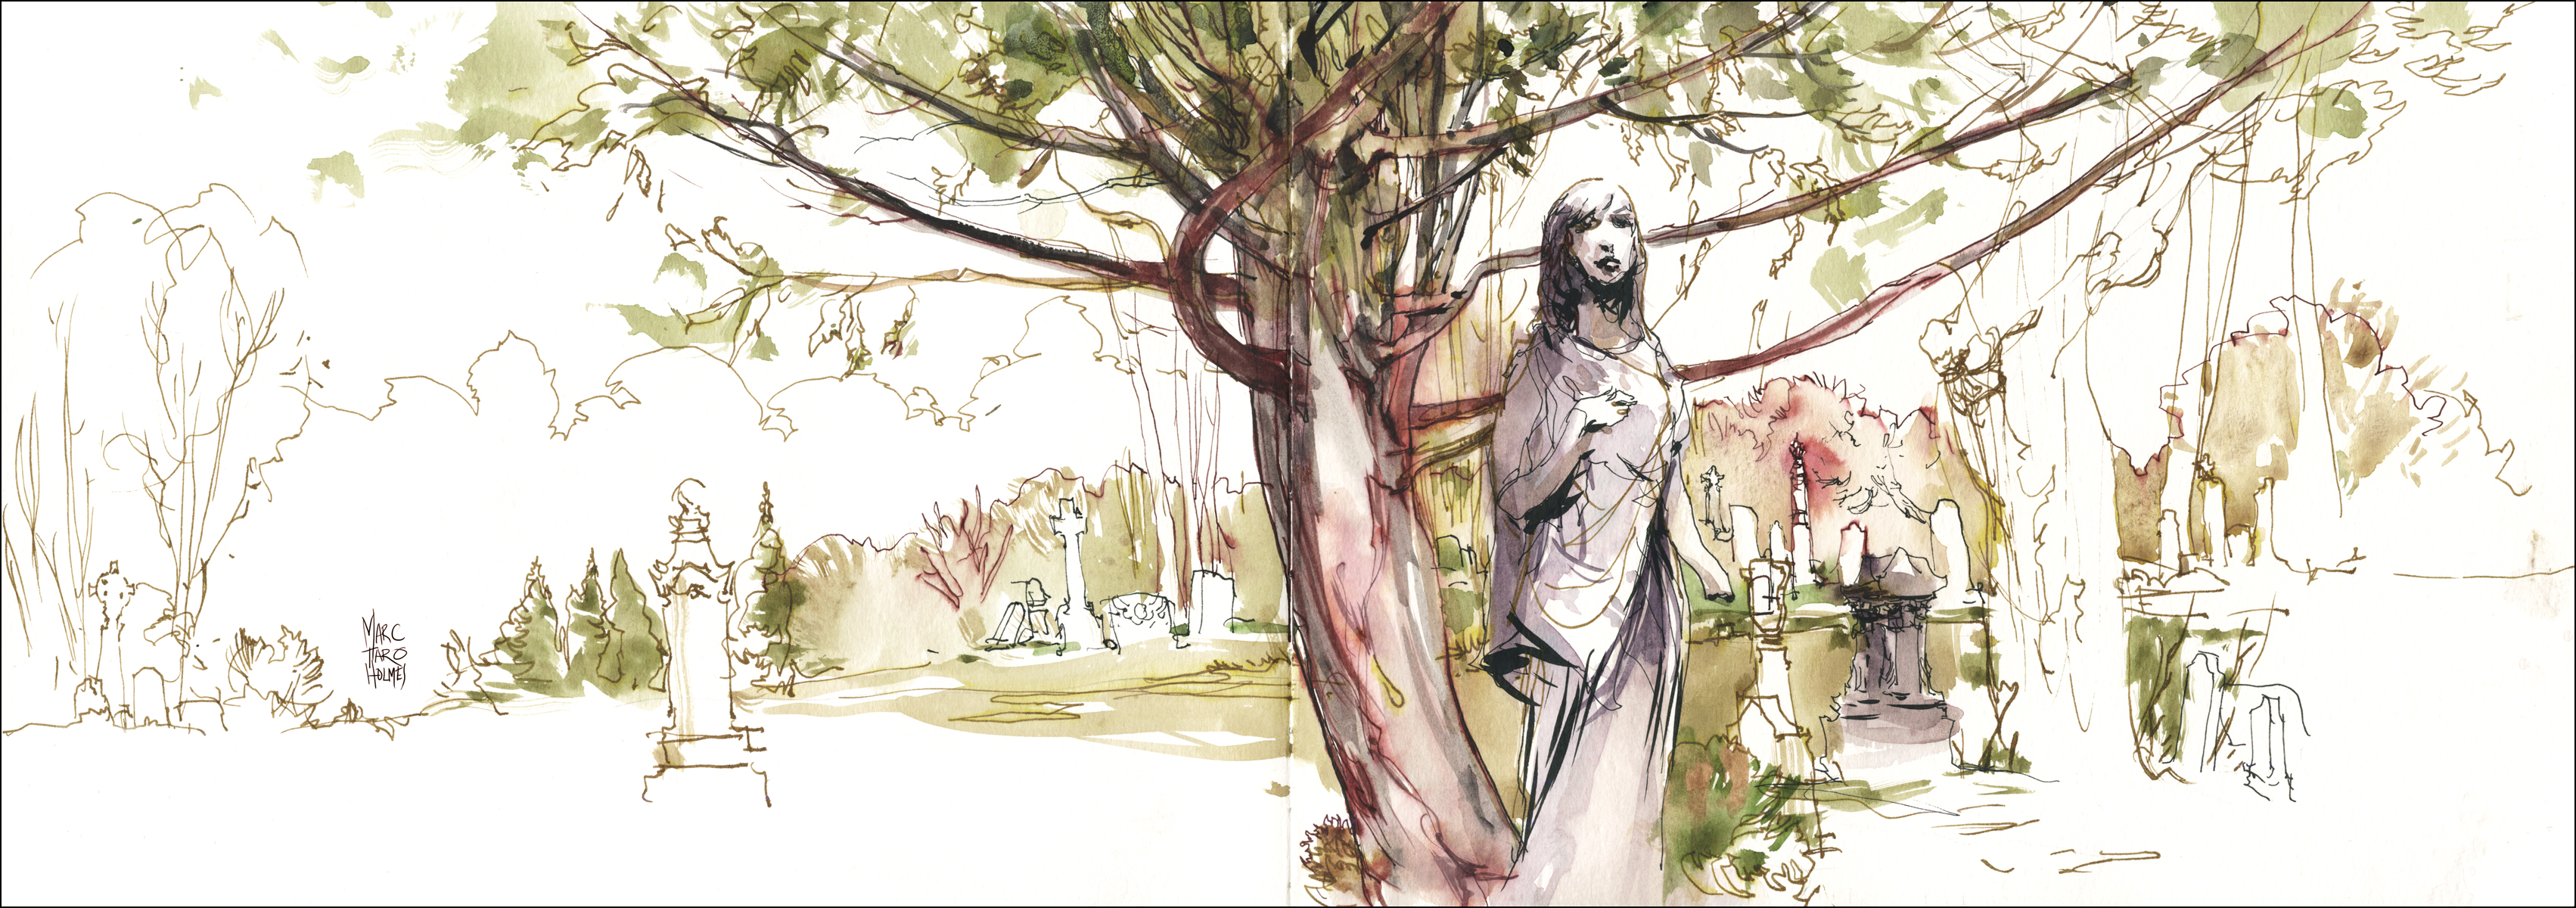
These are sketched in a Moleskine Folio Watercolor Album, (11.75 x 8.25″) – which is a beautiful book, with this very wide format. But it is frankly just a little bit too large for every day use. It takes up a lot of room in a bag, and I’d definitely consider a backing board and bulldog clips to hold it open when drawing. It wants to flop around, fall off my knees, or otherwise behave badly. I’m starting to think that a book bigger than you can easily hold in one hand calls for an easel for sketching. But if I was going to do that I’d just paint rather than sketch.
Still – it is a beautiful book, and will look very nice when filled :)
Philadelphia!

Just some doodles from a drive-through trip to Philly. I’m out of town right now, working on a secret sketching project I hope to be able to announce soon. Back in a couple of days! ~m
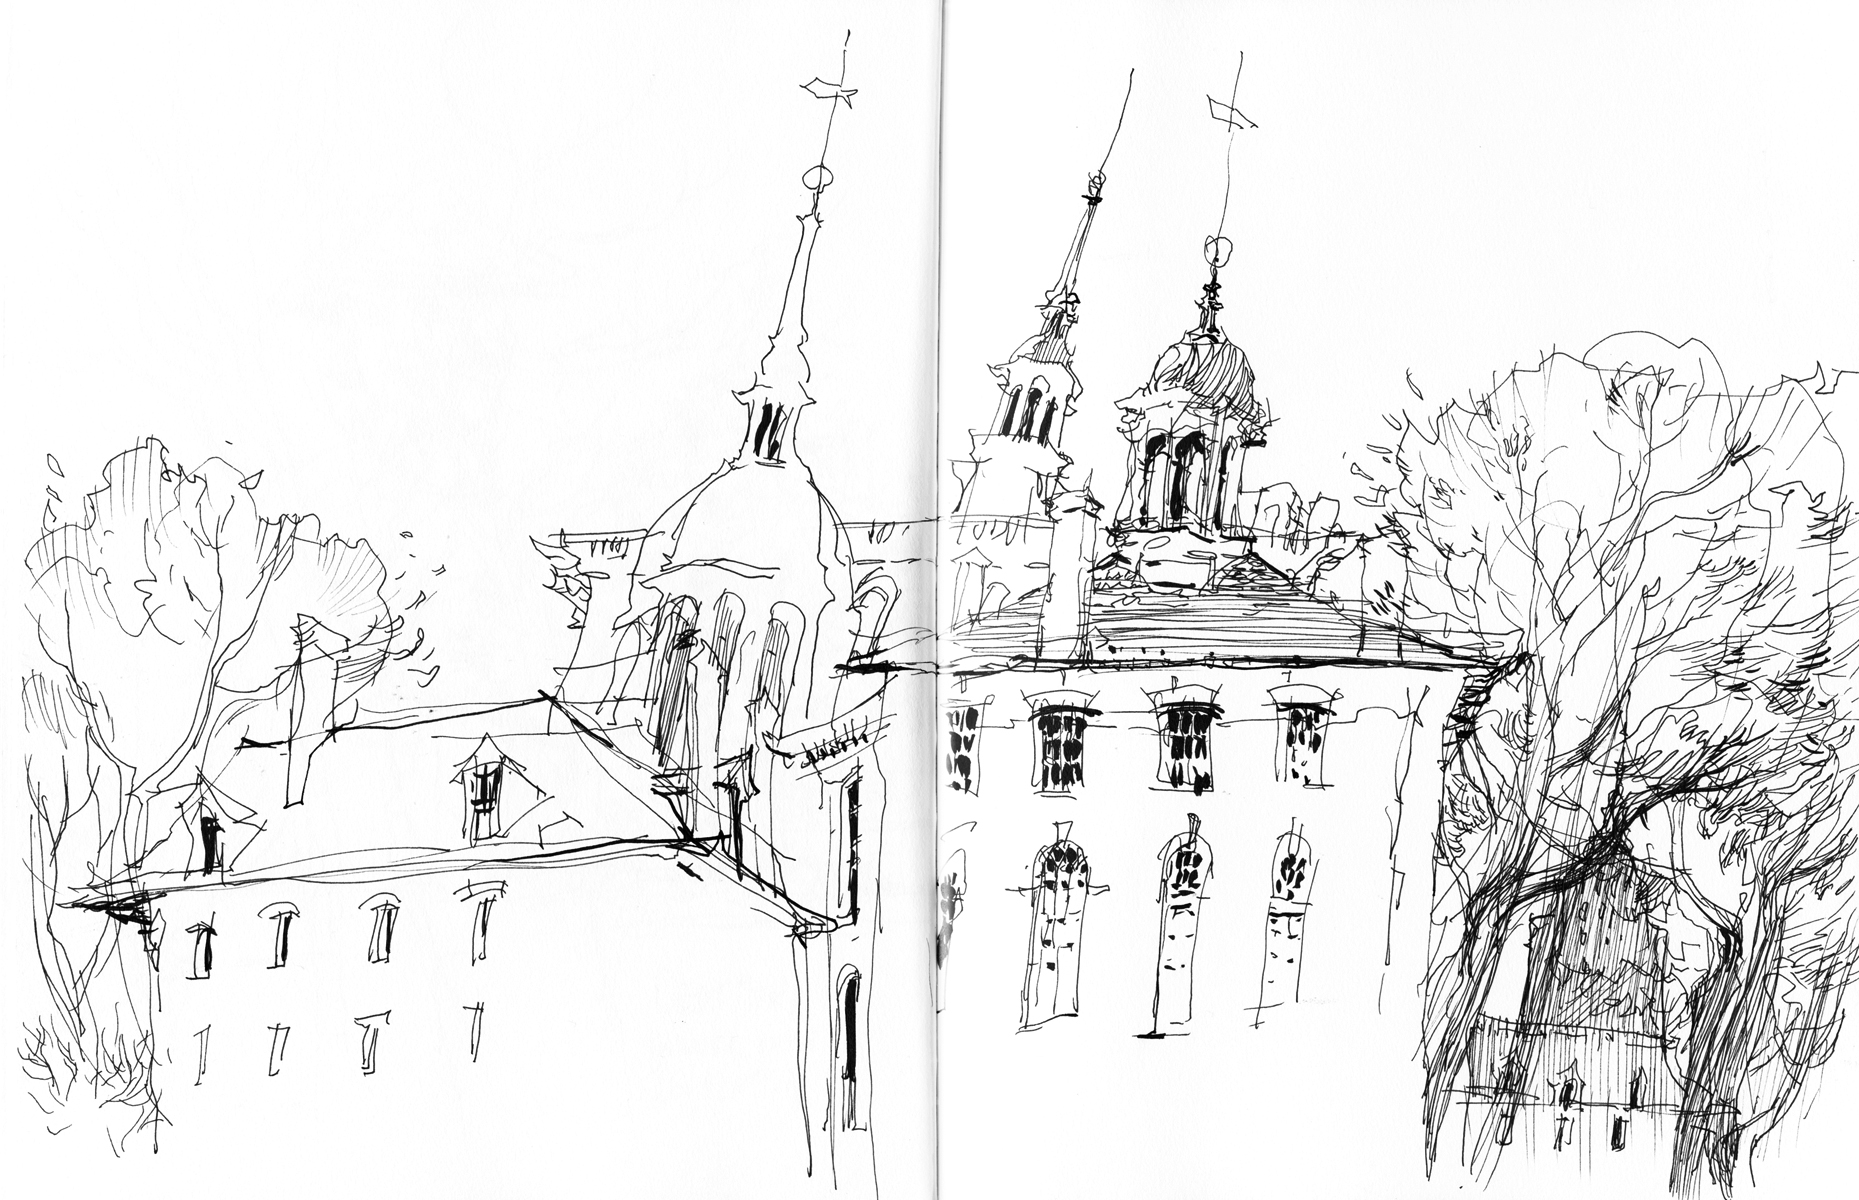
One Day : One Sketchbook : The Plateau Panoramas

This past May Day was the first alignment of great weather and time off I’ve had in Montreal for 2015. I met up with a couple of friends from USK, and spent the afternoon sketching in the Plateau.
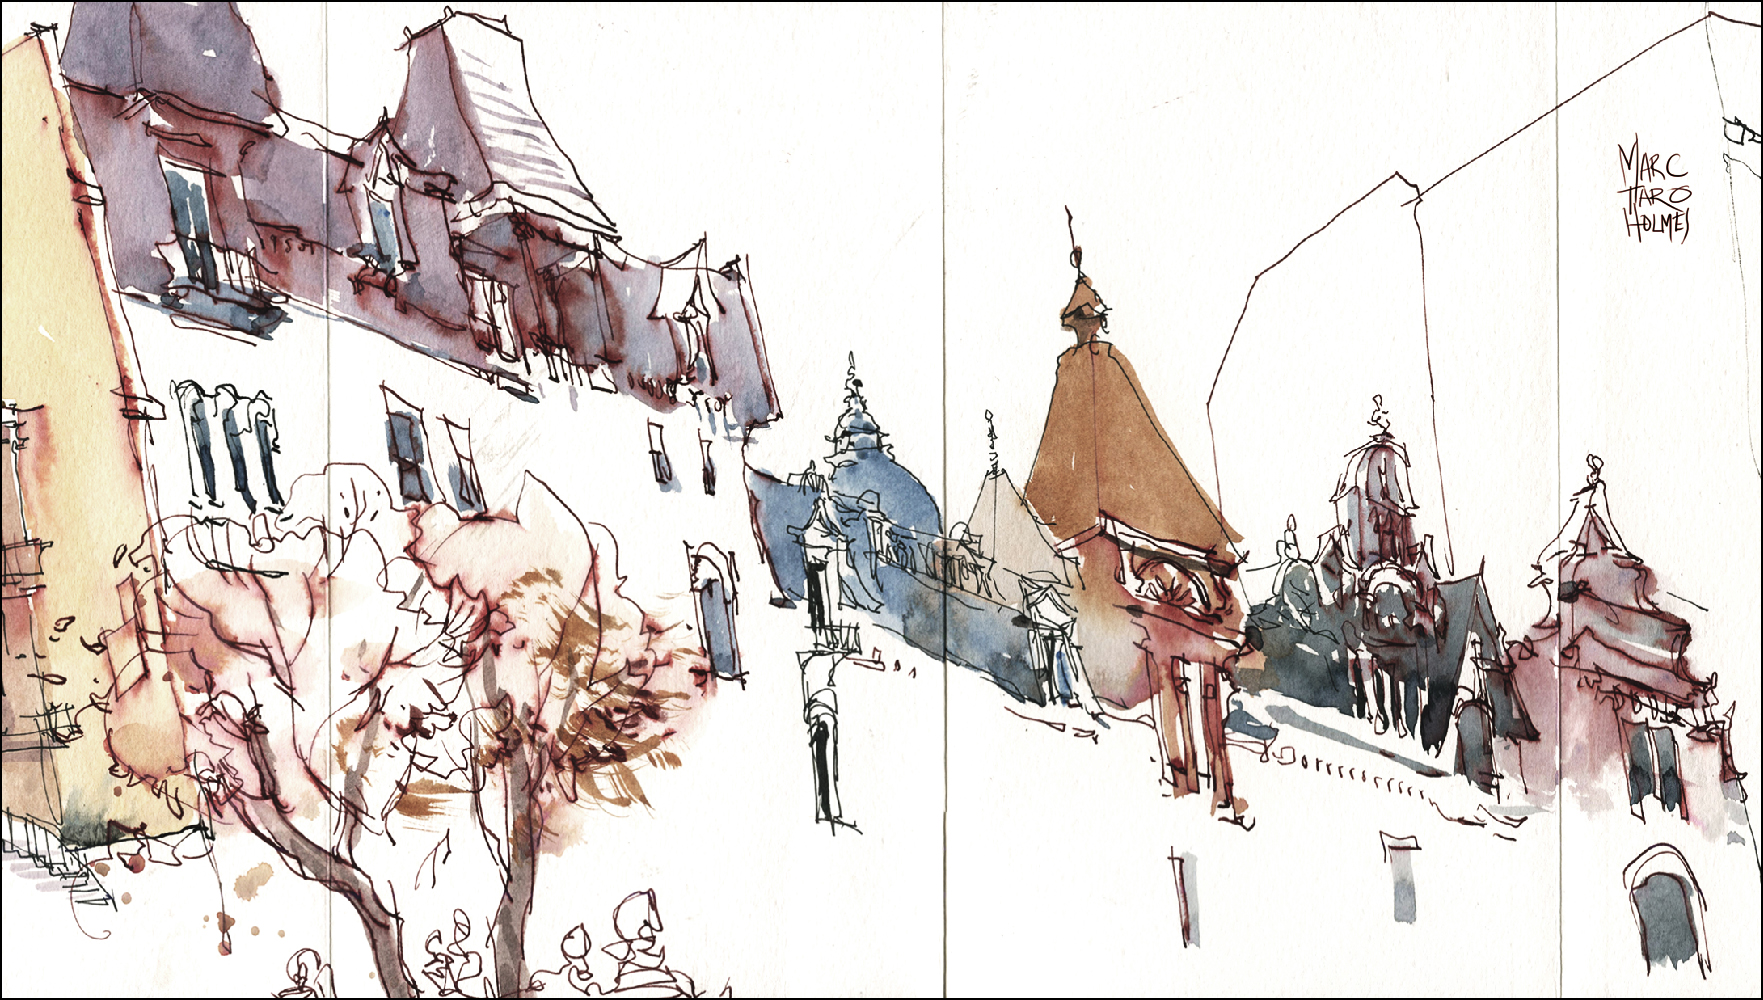
I was playing around with an accordion sketchbook – a 5×8.5″ format book with a single sheet of folded paper, forming a long ‘continuous’ ribbon of paper. (It’s not really a single piece. There are some glued seams in the paper – but you don’t really notice them). I got this specially made one at USK Barcelona – not sure where to really buy them in watercolor paper like this. There is a Mokeskine in this format – but I prefer a real water paper – sooooo – might have to make my own.
My goal was to try to make a really big panorama drawing, going the entire length of the book. I started my first sketch early and made it just over halfway before I had to relocate to meet the others.

This first drawing was done by moving down Sherbrooke and adding buildings as I moved west. I’m purposely not worrying about a ‘correct’ point of view. Each ‘block’ of buildings is in its own perspective and scale – but it adds up to a kind of floating view that zooms in on whatever interesting bits there are to see.
The second half of the book is drawn in Square Saint Louis. We were sitting in the middle of the park, so it was natural to stay in one place and wrap a 180 degree arc of view around the fountain centrepiece. Well, it’s meant to be in the center, but I sort of ran out of book. So half the arc is a little squished – but hey, this was just for fun so I’m not complaining.

The real goal for this day was to just be out in the sun, having fun drawing. No bothersome perspective, no measuring for accuracy, no particular care with color. Just using loopy Single Line Sketches and very vaguely thinking about Post and Rail Panoramas – but not in any disciplined way.
I was sort of challenging myself to see if I could make it to the end of the book – I like to have a little game, or goal post for each day. Turned out not to be that hard at all. There are only 11 spreads in this book (+ endpapers).
When you give yourself permission to use up a lot of paper, you can do it pretty fast. This was all done cover-to-cover in about 4 hours on location, with another hour-ish at home to touch up some color. There’s still the back side of the accordion to fill up someday – but I think this is fair enough for an afternoon’s fun and games :)

Noodler’s Ink: Not so Waterproof after all

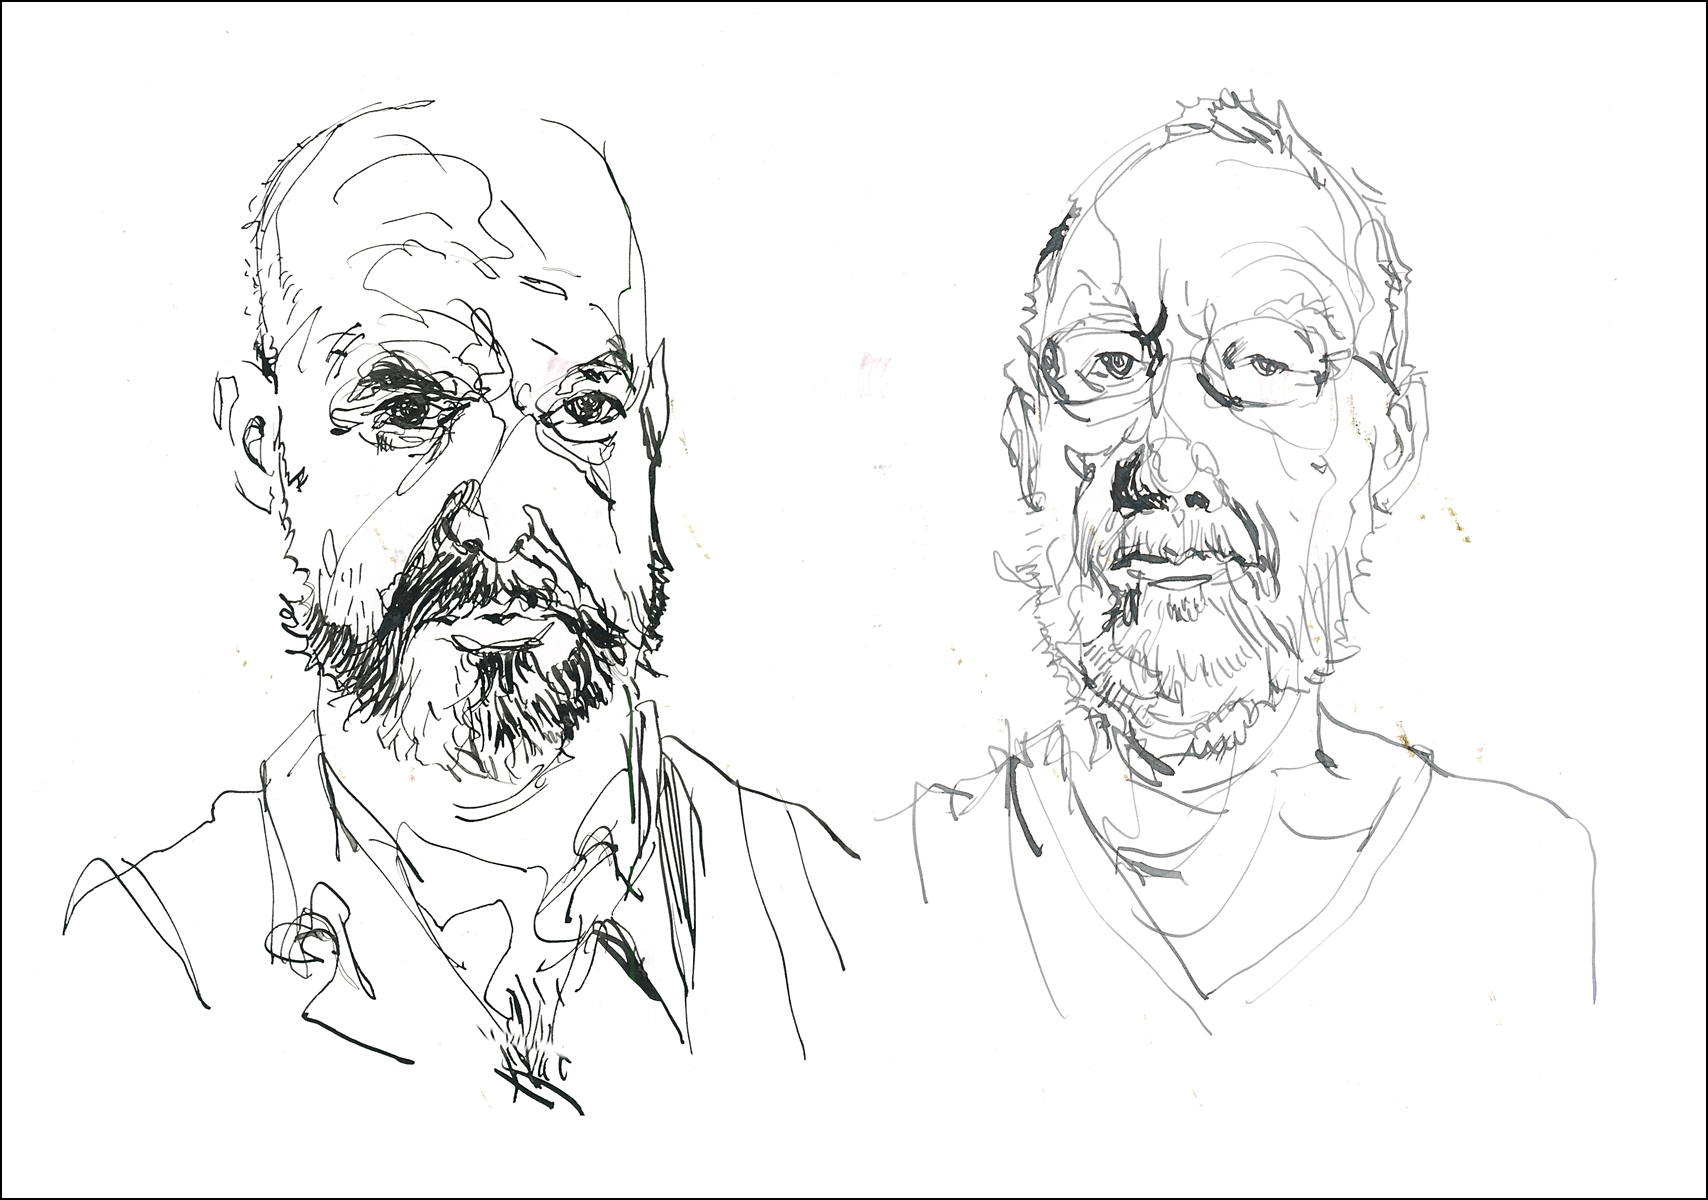
Jaret Kupcinsky, Ian Bowden @ JKPP
I’ve recently been testing inks – looking for a good set of waterproof colors.
These portraits above, (done from people on the JKPP Flickr group) are Noodler’s Red Black and Rome Burning. The Noodler’s specification chart lists Red Black as ‘partially’ water resistant and Rome Burning as fully water resistant. Bulletproof even.
And for my control group, one in straight up Platinum Carbon Ink, Black (which I know is rock-solid-waterproof), next to Pilot’s Iroshizuku Kiri-Same.
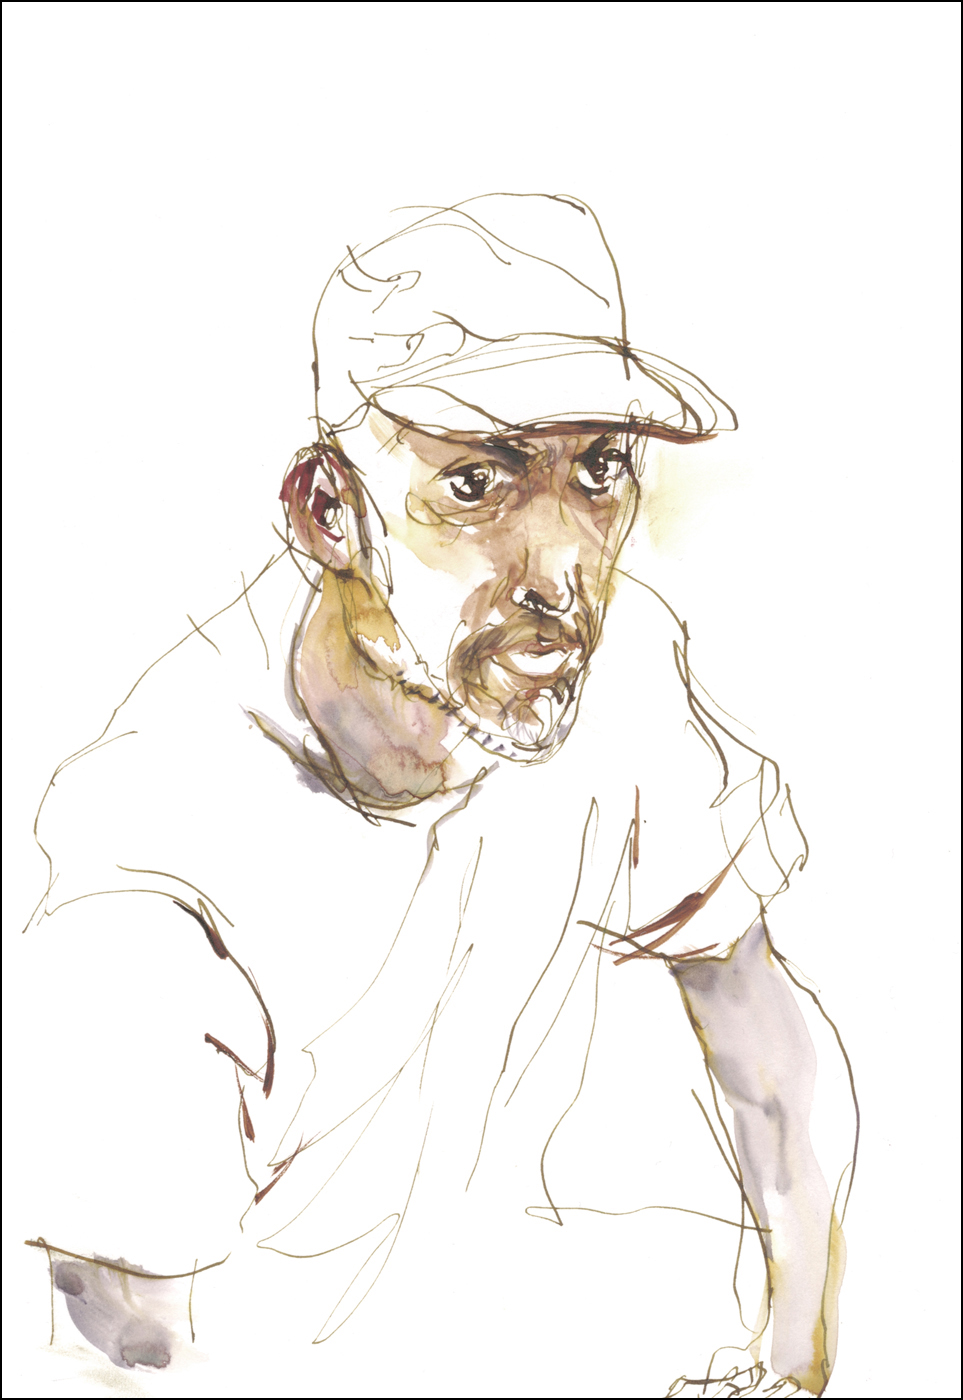
Luis Vigil, Pat Hayes @ JKPP
I don’t find the Kiri-Same to be sufficiently different from black to be worth bringing another pen along. So this was a good test, but I won’t be bothering with grey ink. I do plan to use the colors. I’ve ordered a pair of Noodler’s Ahab Flex pens in appropriate colored barrels for the red and gold ink :)
These particular drawings were done with a Blue Pumpkin dip nip, and ink sample vials from Goulet Pens. If I had realized Goulet was in Richmond, I would have stopped by when I was in town!
I have however, found a Canadian company. Wonderpens.ca out of Toronto. So I can now get pens and ink without paying duty. *Winning*!


So here’s what you’d expect with washing watercolor over a waterproof ink drawing. Color does its thing, lines stay put.
These are on Strathmore Bristol (smooth) and tinted with DS Potters Pink, Naples Yellow, a touch of Quinn Gold Deep and some Moonglow. A limited palette that can serve for caucasian-ish skin. Incidentally – I am not very impressed with Potters pink as a pigment. The Daniel Smith tube I tried was inordinately weak and seemed unusually poorly mixed with the binder. I will be binning that directly.
Now here are the Red Black and Rome Burning. Painted with the same colors.

Neat hey?
So, we’ve established that Noodler’s claims these inks are at least partially water resistant. I’d say that is 100% true about 20% of the time.
I was expecting a little more resistance than this. Maybe it would be nice to see 70-80% line – holding. But in fact they both give out a tremendous amount of color even though one is “partial” and the other “bulletproof”.
So I have not found a set of waterproof inks – but I have found a new variation on water soluble drawing :) I’ve always done washable drawings with Lamy black ink and enjoyed the neutralizing effect it offers. Now, I am very much liking the color cast I can give to a drawing.
Here’s one last test, done on Canson Montval 140lb cold pressed. Just to see if it was only the smooth Bristol causing the wash-out. If anything, the ink traveled further on this coated watercolor stock.
Pretty great effect hey! I think I’ll be doing more with this.
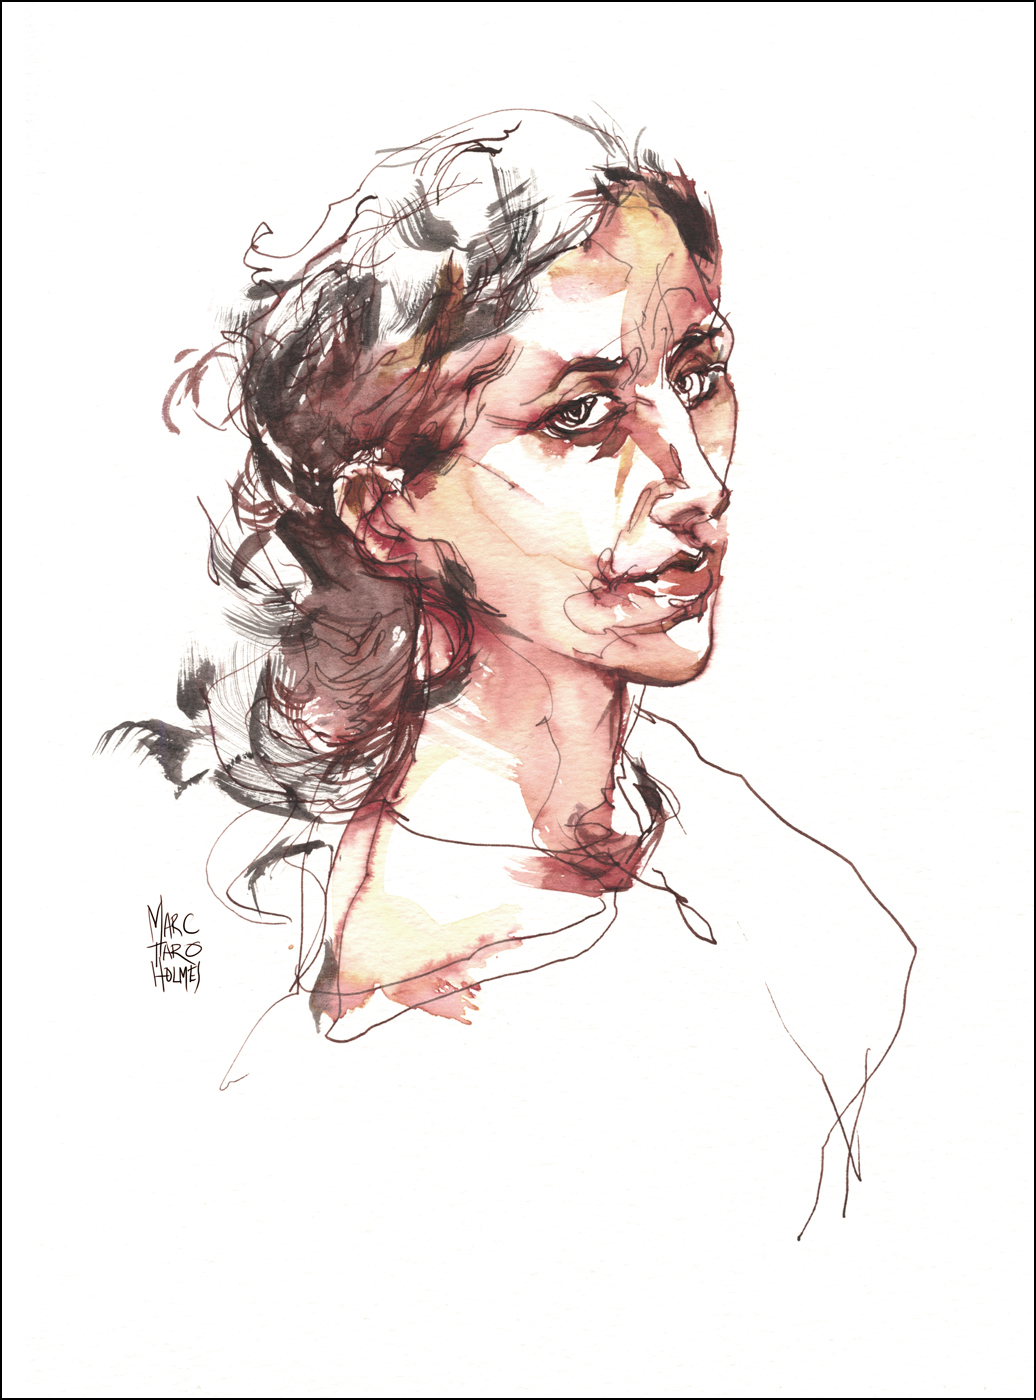
Cristina Urdiales @JKPP
Illustrating the Archéologie du Québec

Here’s something a little out of the ordinary for this blog. I don’t usually show my commerical art work – but last year I did a project that was so interesting, I thought I’d share.
These are illustrations for Les Editions de L’Homme, working with the Pointe-à-Callière Museum on the scientific monograph AIR – Archéologie du Québec – Territoire et Peuplement.
It was a great pleasure to be using my drawing skills on a topic like this. I suppose this is similar to the design work I’ve done for video games, but somehow has more meaning to me – knowing these things might really have happened.
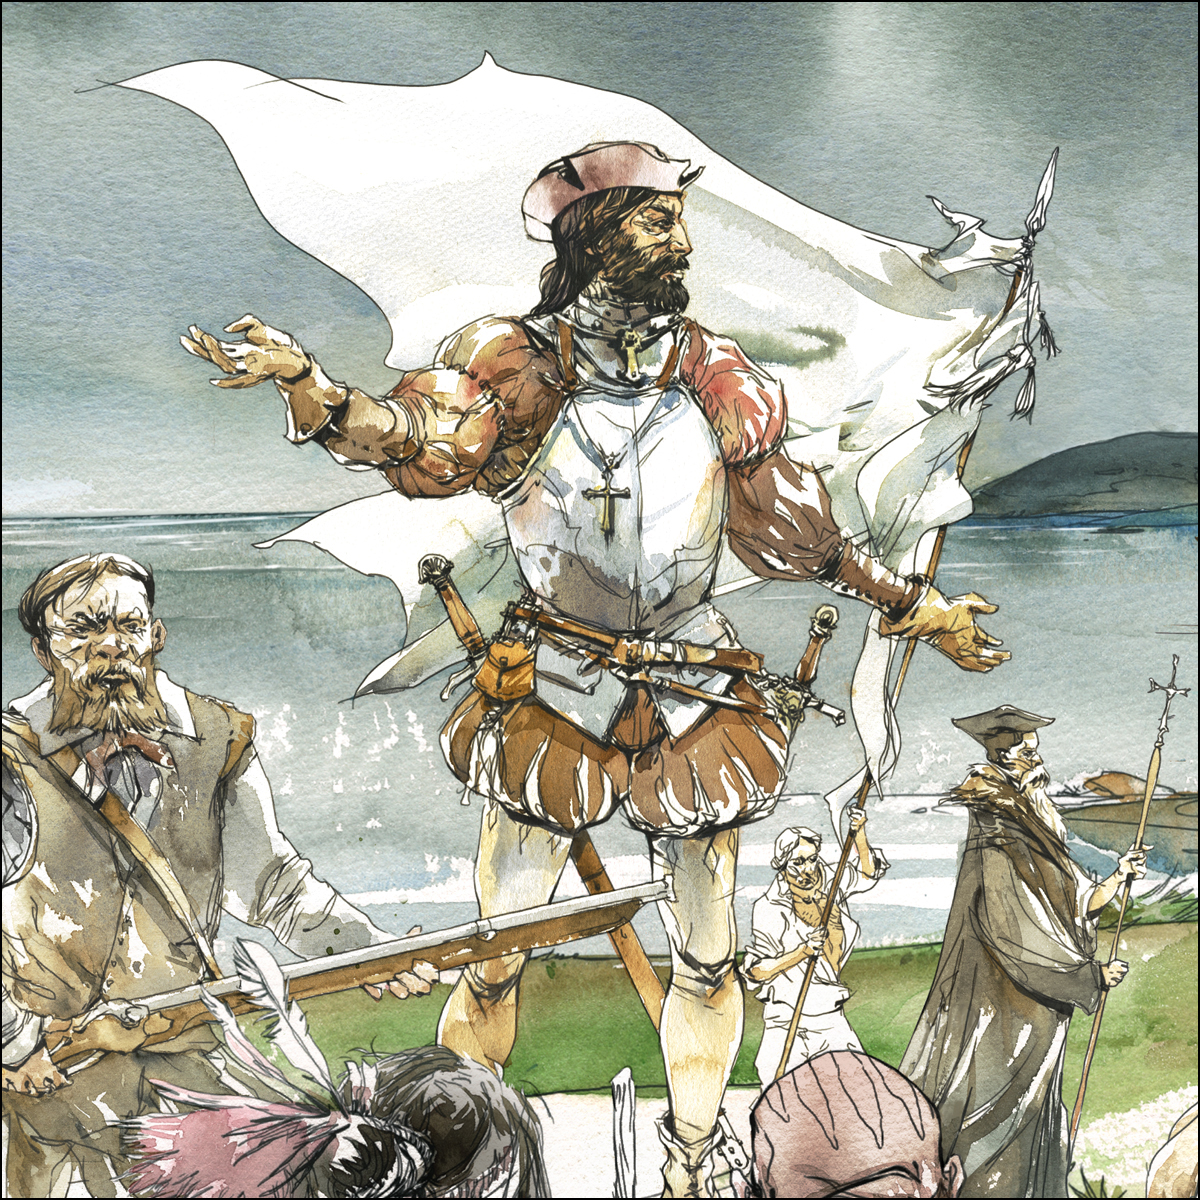
This first drawing shows Jack Cartier making contact with First Nation Indians near present day Gaspé Quebec.
There’s a lot of storytelling going on in this scene. From the little details of costumes, to the acting in the poses, and the use of each character’s gaze to navigate the reader through the image.
It’s tremendous fun to bring history to life with your drawings. You get the opportunity to sneak your opinions into the composition.
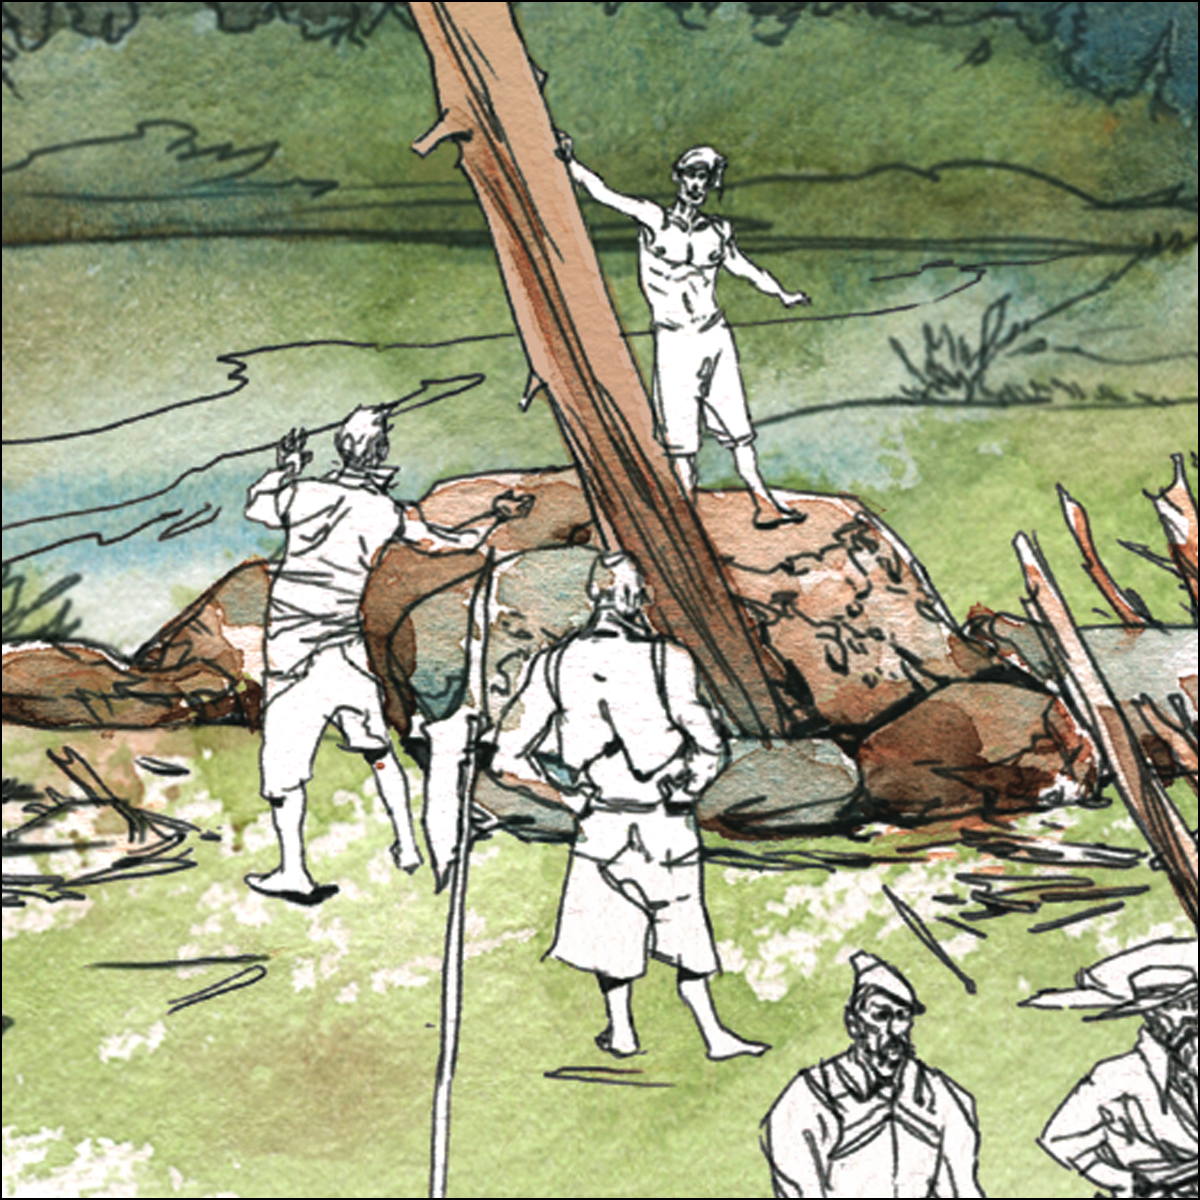
Here we have Cartier’s sailors in the distance erecting a ‘navigational marker’. So they can come back with trade goods. Yeaaah. That’s it. Trade goods. They actually did this. Can you believe the cheek on those explorers?
He is clearly claiming the territory, and it isn’t fooling the natives one bit. He gives a little speech to the gathered chieftains, which probably didn’t go over that well, as he ended up having to kidnap their leader’s sons and take them back to France.
I’m not sure of the logic there – to somehow use the hostages to prove that he had arrived in China? Cartier did leave us with the town of Lachine. Named as part of his proof of establishing trade routes with the far east. I’m a little fuzzy on the history there.

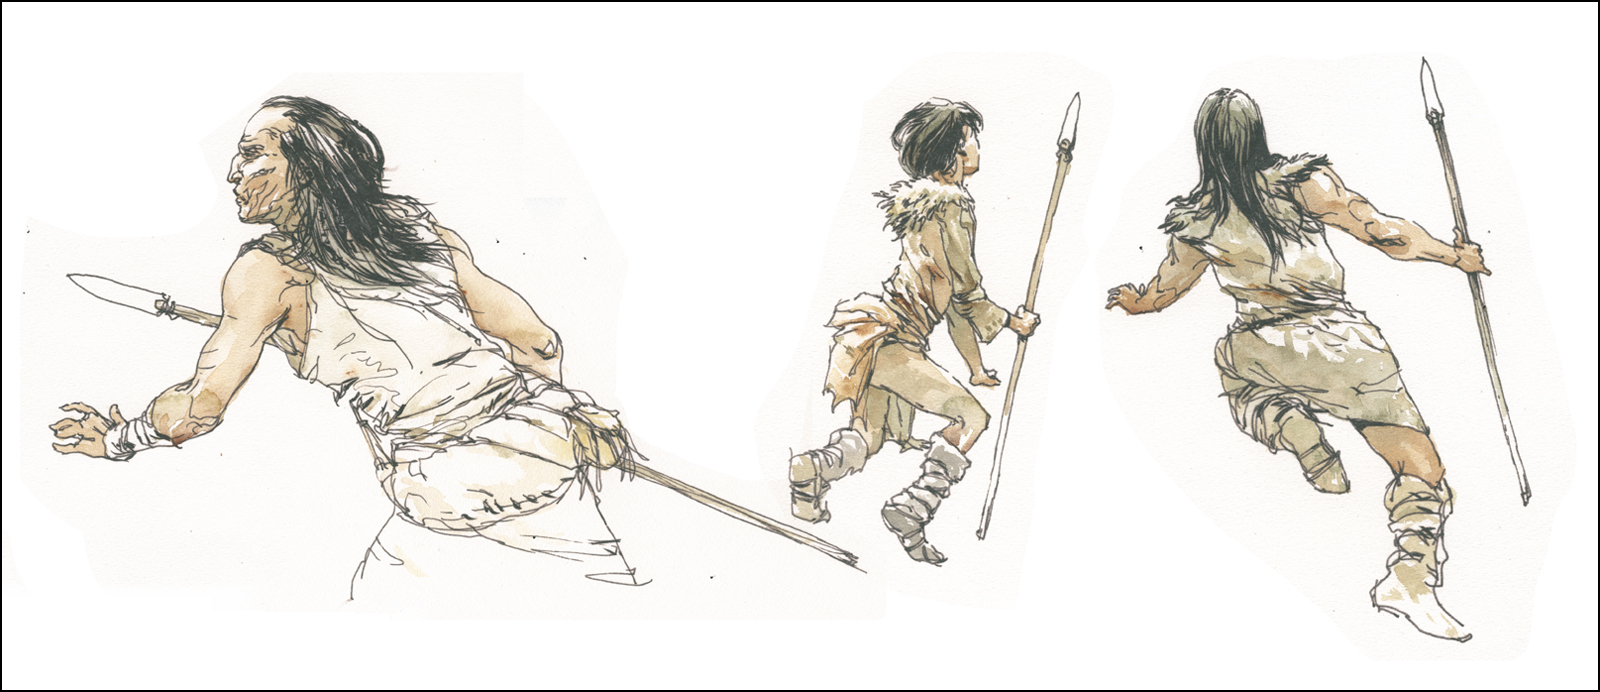
Going back a bit further in time we have Canada’s early caribou hunters. 17,000 years ago these Paleo-Indians would have been the first humans to enter the Americas. Having crossed the land bridge of Beringia as early as 50,000 years ago, but needing to wait until the Laurentide glaciers melted to get here. I know what they felt like, as we wait for spring in Montreal.


Originally I had sketched this family group of hunters to include a young girl getting hunting lessons from her father, as an older uncle moves out to the attack.
It seemed to me, we don’t really know what life was like – but if people are in a survival situation, then whoever is good at hunting, would do the hunting. Regardless of their gender. And regardless of that theory, if I had kids reading this textbook in school, I might want them to see a girl up front with a spear.
But, eventually it was decided we needed to replace her with a boy.
I wouldn’t have tried such a radical idea in the first place except that my method for this sort of thing is to sketch each character separately, and digitally collage them together into the final drawing. So, even though I expected I’d be switching her out later on, it was worth a try, as it’s easy enough to take her out of the history books. We’ve been doing that for centuries.
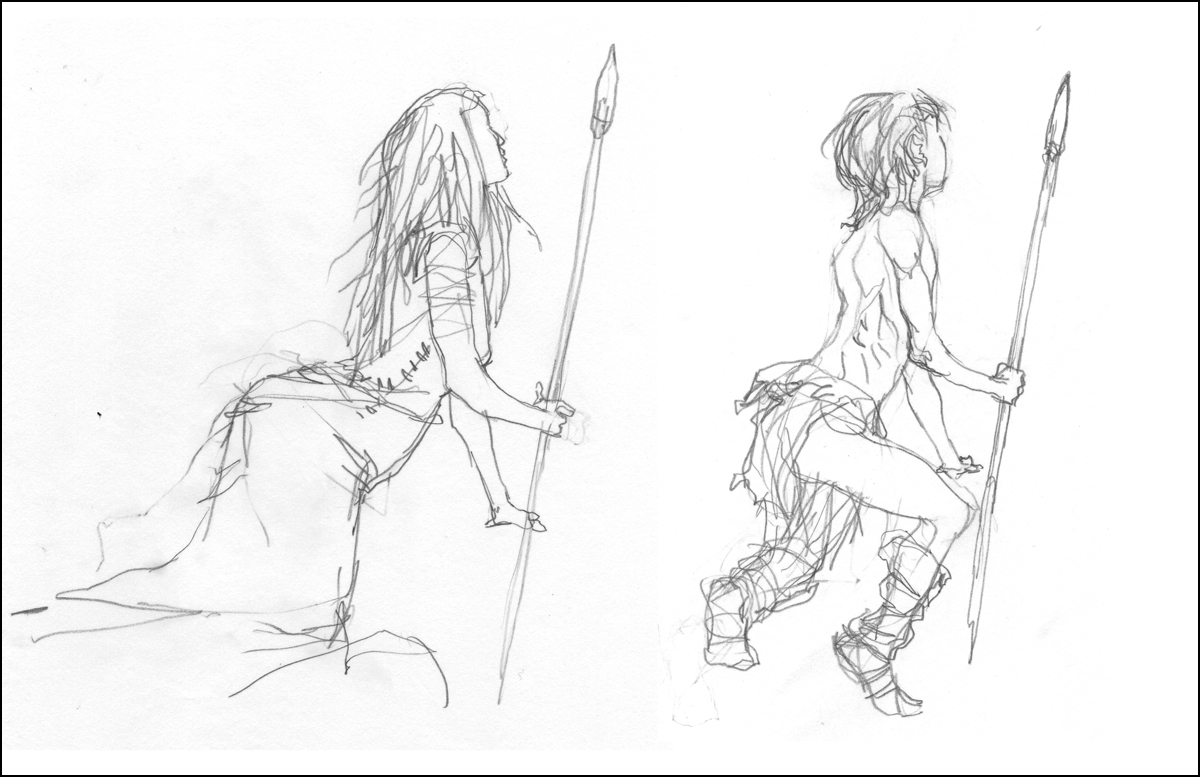
For those who are curious, the first round of drawings are done in pencil on tracing paper, in a big stack of sketches all taped together into the composition. Then I make final ink drawings on drafting vellum, and transfer those to watercolor paper for painting (via a medium format printer). In this case I painted all the figures individually, then assembled them on top of a background – somewhat like an old-school animation cel. This guaranteed I’d have a second shot at the sky, if I needed it.
In the past I might have done this all digitally from start to finish – but I enjoy the effect I get, mixing pencils, dipping pens, and watercolor, with digital collage and color correction. You really can’t get the same natural effect of watercolor with any kind of digital art available today. I don’t imagine it makes any difference, you could work in any media, but the Pointe was generous enough to allow me to handle it any way I chose – so this was the approach that was the most fun for me.
That’s the perfect kind of illustration job! You don’t get too many like this.

Book Excerpt in Watercolor Artist Magazine

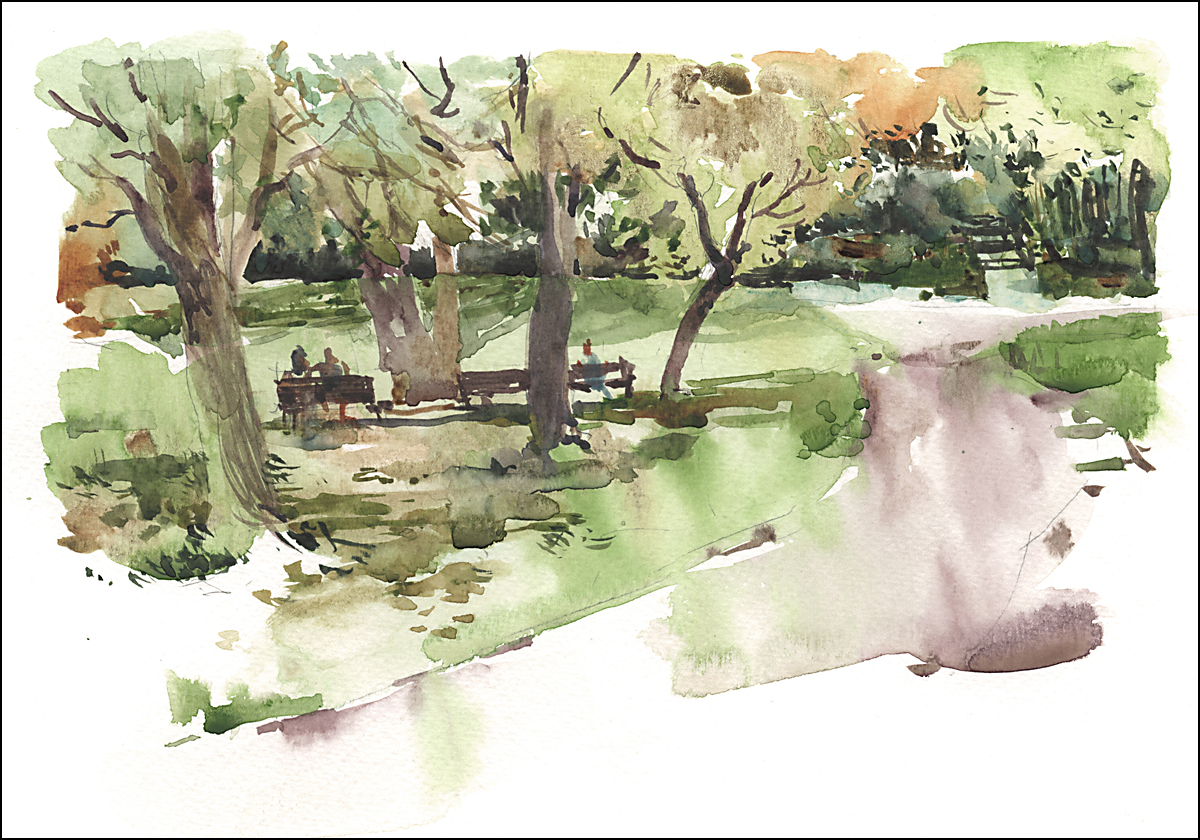
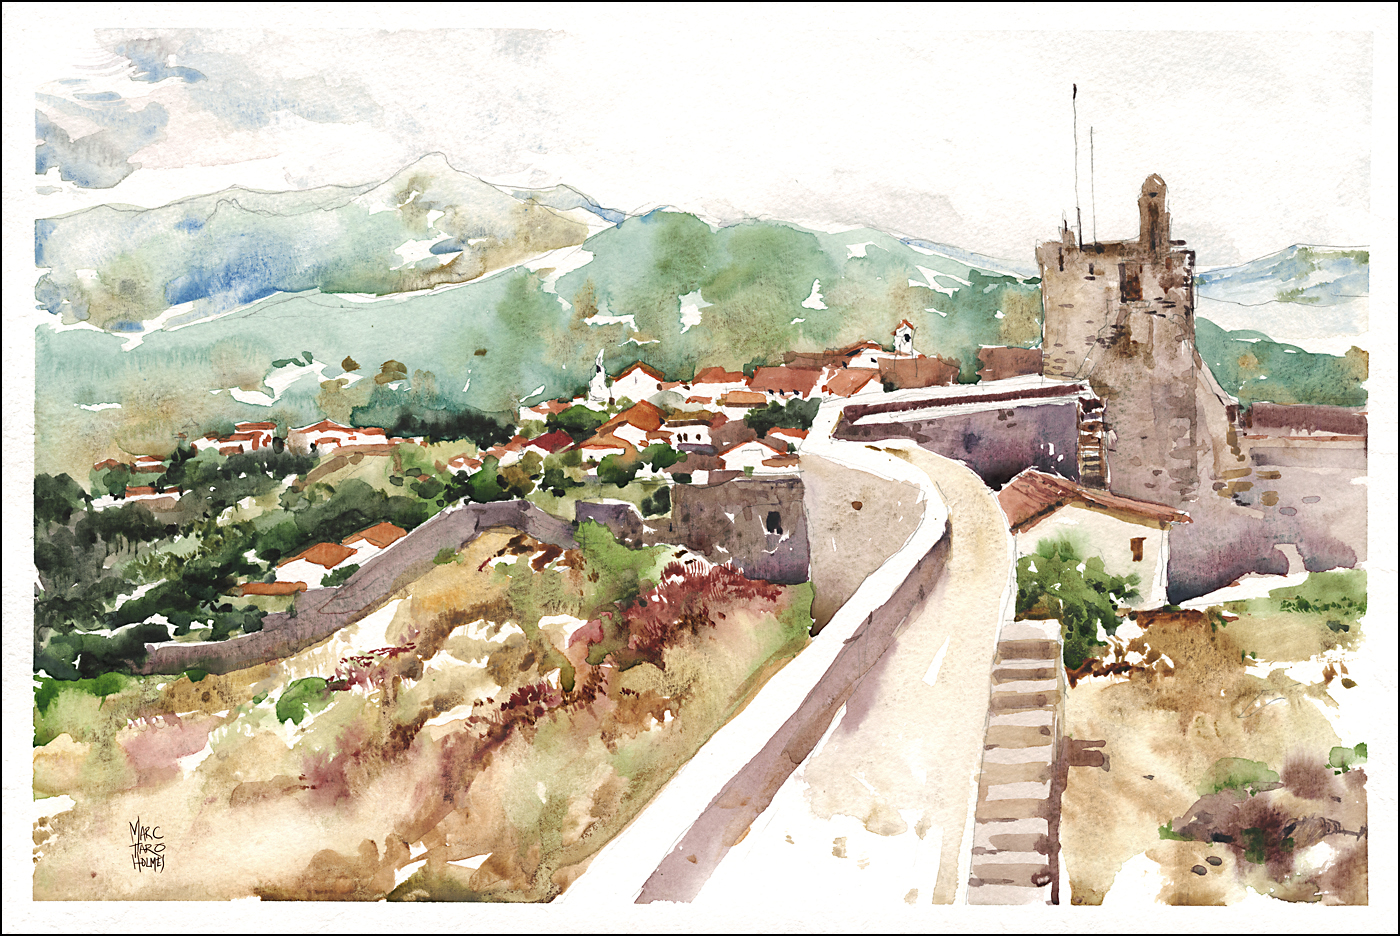
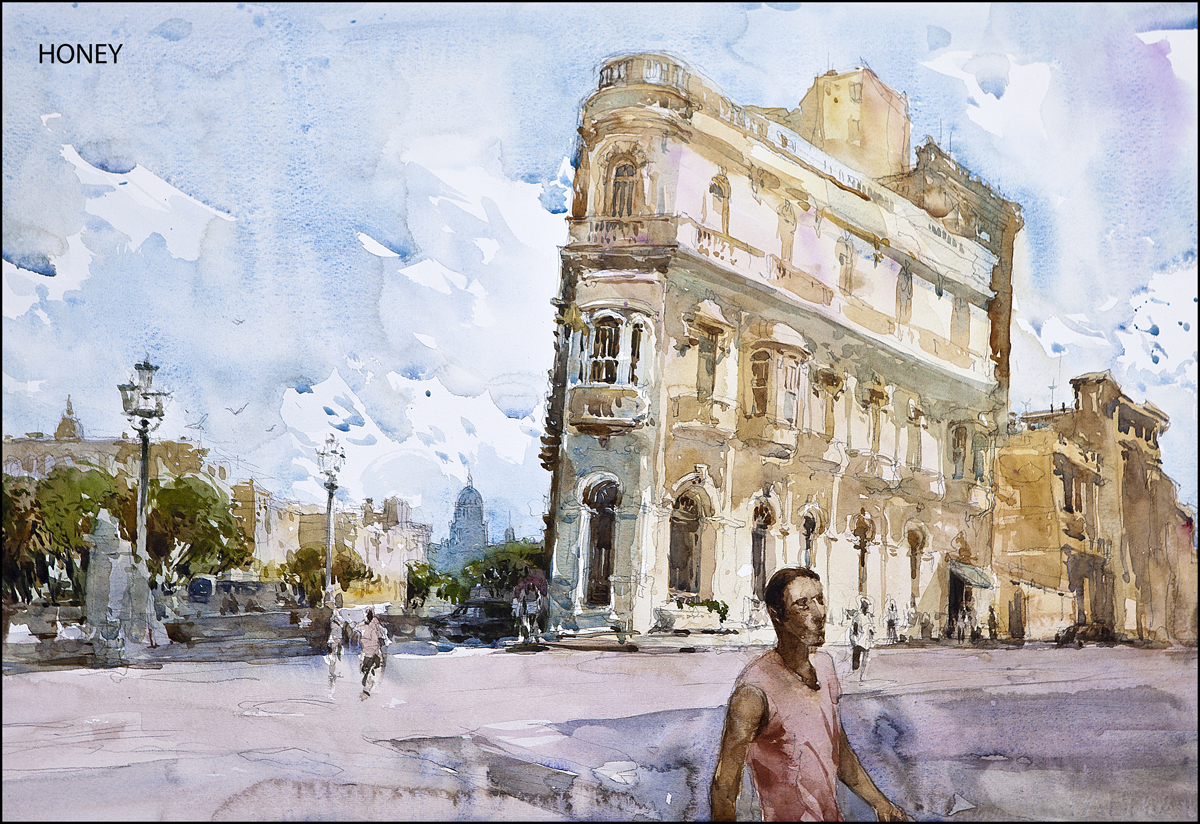
Just a quick note to say I have an article up in the current issue of Watercolor Artists magazine. It’s a thing North Light Books does with all their authors, where they reprint excerpts from our books. The June issue features part of chapter three of The Urban Sketcher, where I demo the approach I like to call Tea, Milk and Honey. Tinting a pencil drawing in three passes of watercolor, working from Large-to-Small, Light-to-Dark, and Wet-to-Dry.
Here’ s the images from the demo painting. You can get a good idea of the technique just looking at the sequence of images.

The drawing is the important first step. I give myself everything I need to know for later – sketching in the major blocks of color and the shadow shapes that will go on top.

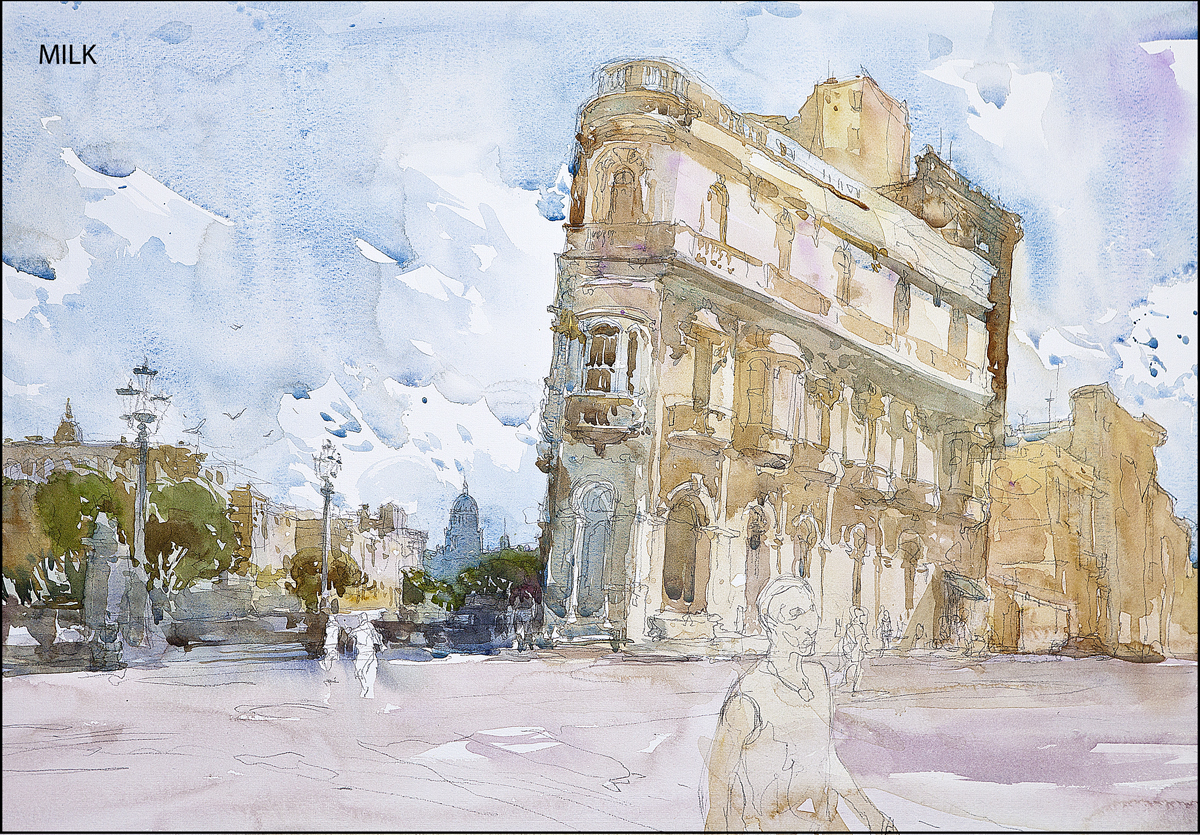
Remember: Larger-to-Smaller, Lighter-to-Darker – using progressively ‘denser’ paint (more pigment, less water, each pass).You’re aiming for viscosity similar to the liquids Tea, Milk, and Honey.
Of course, I encourage you to buy the book:) It’s part of how I support my activities on the blog here :) The book is a program to teach yourself the drawing skills leading up to this kind of sketch, so there’s lots of good background in there.
Of course I have plenty of free info on this blog if you just read back in time. Including a downloadable ‘cheat sheet’ handout on this technique – available here.
Draw Me a Mountain Opens Sat May 2

It’s almost time for the opening of Draw Me A Mountain! We have received a tremendous variety of art work, celebrating our love of Mont Royal. If you live near Montreal, I hope you’ll come out to see the show and participate in the public drawing event.
The Exhibition: Weekends, May 2 to 31, 2015
The exhibition Draw Me a Mountain will be on view as part of Mai 2015 – Mois du mont Royal, on Saturdays and Sundays throughout May, at Les amis de la montagne, in Smith House, in Mount Royal Parc. Public admission is free.
The Public Drawing Day: Sunday, May 24, 2015
You are invited to join Urban Sketchers Montréal for a day of drawing and painting on the Mountain on Sunday, May 24 – the anniversary of the creation of Mount Royal Park.
Head over to USK:MTL for a preview of works from the show.

