Broken Silhouettes in the Park
I was out the other day, practicing for our watercolor-and-brush drawing exercise in Chicago: the Broken Silhouette.
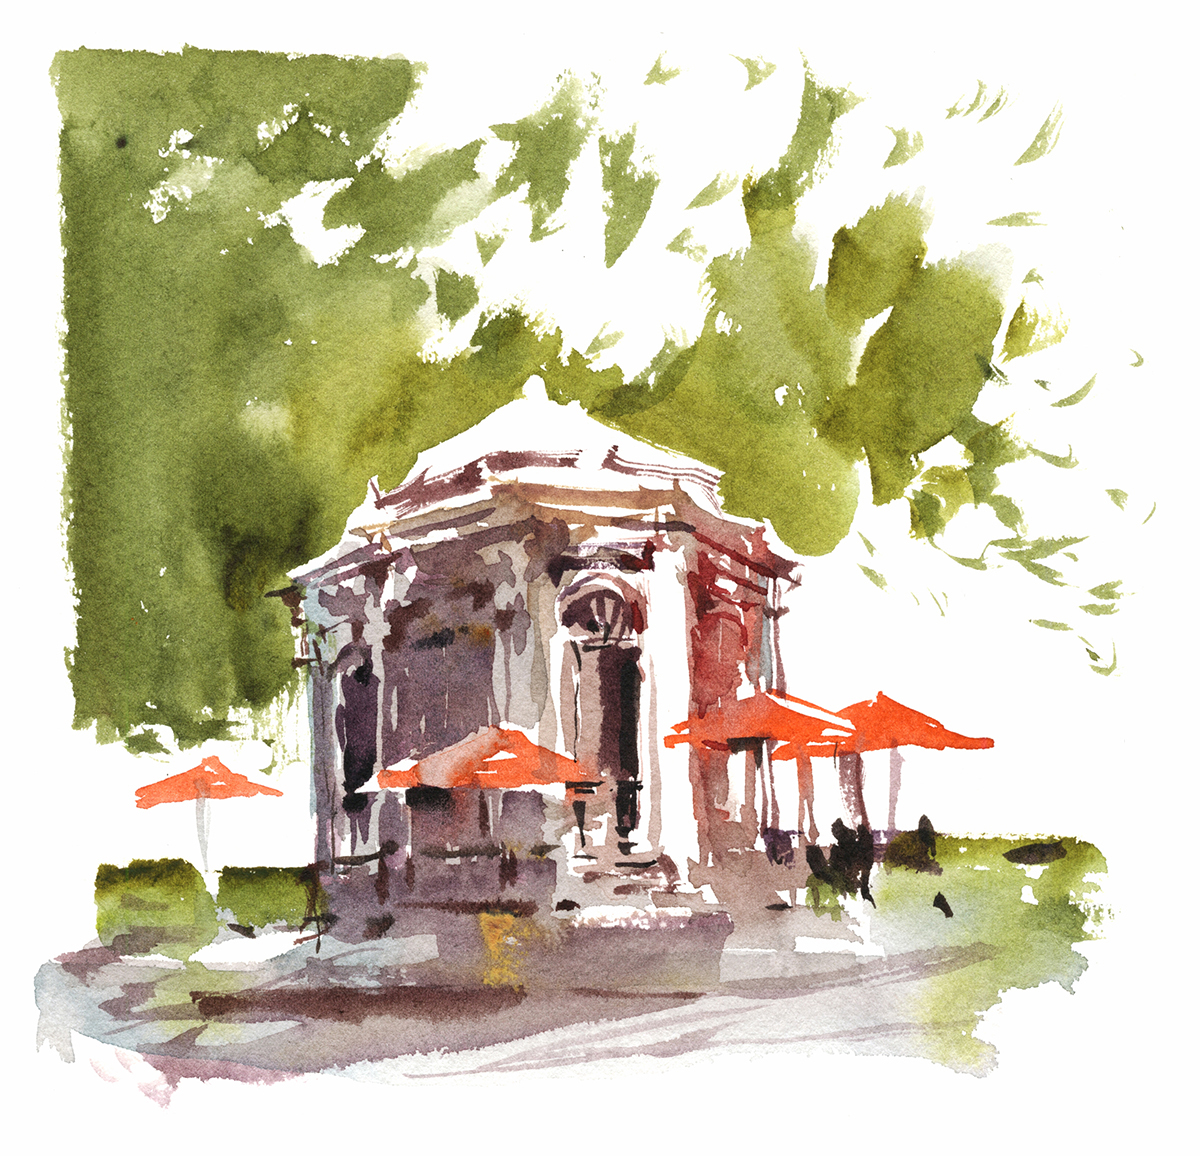
This little cafe-kiosk is a good example of using a leafy background to draw the roof line, with negative space.
The sketch isn’t entirely a positive or a negative shape – it’s both at the same time – multiple edges, interlocked.

I think of these shapes as silhouettes – even if they’re not actually completely enclosed shapes. (Thus the ‘broken’ part).
They’re more a massing up of small strokes, intended to fuse visually into a single shape.
I think you can see how I’m working to (partially) fill the silhouette of the object, but leaving openings for white paper to represent the fall of light.
All this needs is a background tone to catch that open edge, and it would be more finished.
I worked top down with the light colors, then top down again with the darks. Going fast enough that the strokes will fuse as I go, but slow enough so that my second touches go down on dry-ish paper.

If I did a straightforward flat silhouette – literally filling the object – rather than making the ‘broken shape’ – I wouldn’t get those bright highlights. Like on the upper surface of the triangular pediment. But, on the other hand, the object would look more solid. So it’s a trade off. That is what I ended up doing in Manchester – all the rain and dark bricks, needed a deep tone first.
In the rooftops here, I washed the flat shape first with gold to give it a sun-downing look. then came back with the darks. So there’s no reserved white in the dome, but that works because it’s edging towards being back-lit about now.
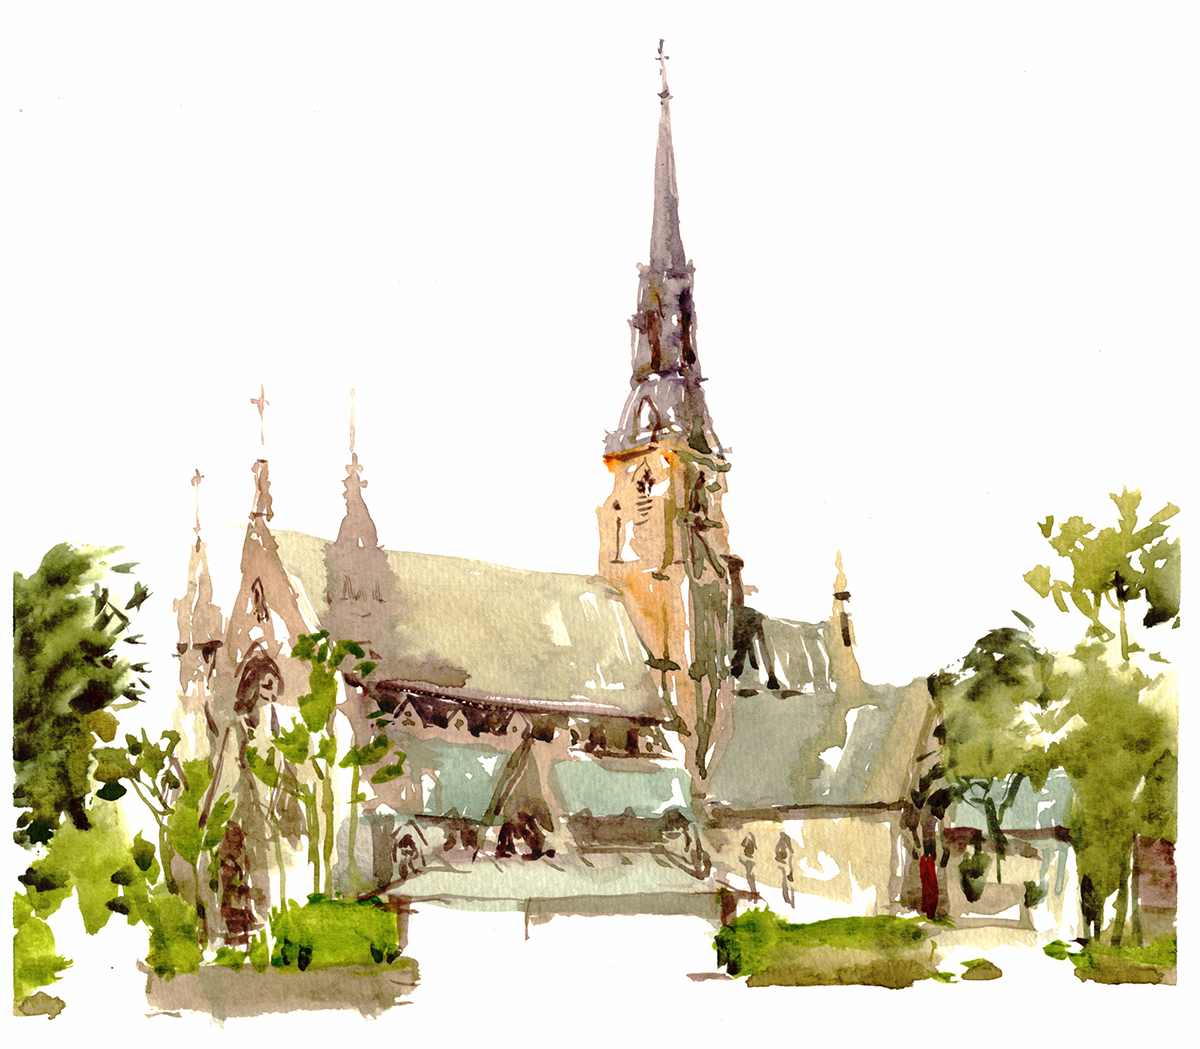
This one was from a more overcast day – so here the silhouette is a bit more solidly filled.
If it’s overcast, color or humid out, you might have to give more time to dry. So, you’ll need to decide before you begin, is it sunny and dry enough for brushwork to dry as we go? Or are you’re going to build it all in one go with reserved lights and edges? Or if you’re going to need 15-20 minutes to do the drawing in two distinct passes.

And once again, here’s the link to the longer handout.
We’re heading off very soon, so I think this might be the last practice run for this demo. Looking forward to seeing some of you there!
~m


Great stuff as usual Marc!
Lots of things to think about, isn’t there? Thanks for putting this out for us to practice before Chicago…Can’t wait!
Each one of your sketches is better than the next!!! How DO you do it Marc Taro Holmes?!?!
I so appreciate your sharing all these tips along with your own wonderful sketches. Wishing all the best in your upcoming event and workshop!
Thank You so much for sharing this super approach! Love it!
These are excuse my French just fucking gorgeous.
I’ve got to get out and start doing this–sketching with wc.
nice
Thank you so much Marc!! Awesome article!
Ouch! That would be a challenge to my details-loving heart! I occasionally try to forego the pencil or ink lines, but I don’t feel very confident when I do. Thanks for the detailed handout, it’s great help.
Come visit our Hahnemühle booth next week in Chicago. We would love to show you some of our amazing Sketchbooks, sheet, pads ect. and let you test the samples.
I tried out the Bamboo 125lb, it’s very nice!
These are absolutely beautiful.
wow your sketches are magnificent😊
These are gorgrous
Great sketching, as always. Maybe I will see you today. I will be at the Guerrilla Painter sponsor table. Thanks for your great and continuing contribution to our community
You have a great blog. 3cstyle.com nominated you for an award. Congrats and keep up the good work. See the post I’m floating! for more details about the award. Dominique (No obligation) Please delete the link to my blog after you read the message. Don’t want to create spam on your blog.
Can’t add anything to what has been already written. Just ditto-these are wonderful. Appreciate your posting the steps.