Direct to Watercolor Part 3 of 4 : Step By Step Process
Note: If you’re linking in from somewhere, this is part 3 of 1 / 2 / 3 / 4
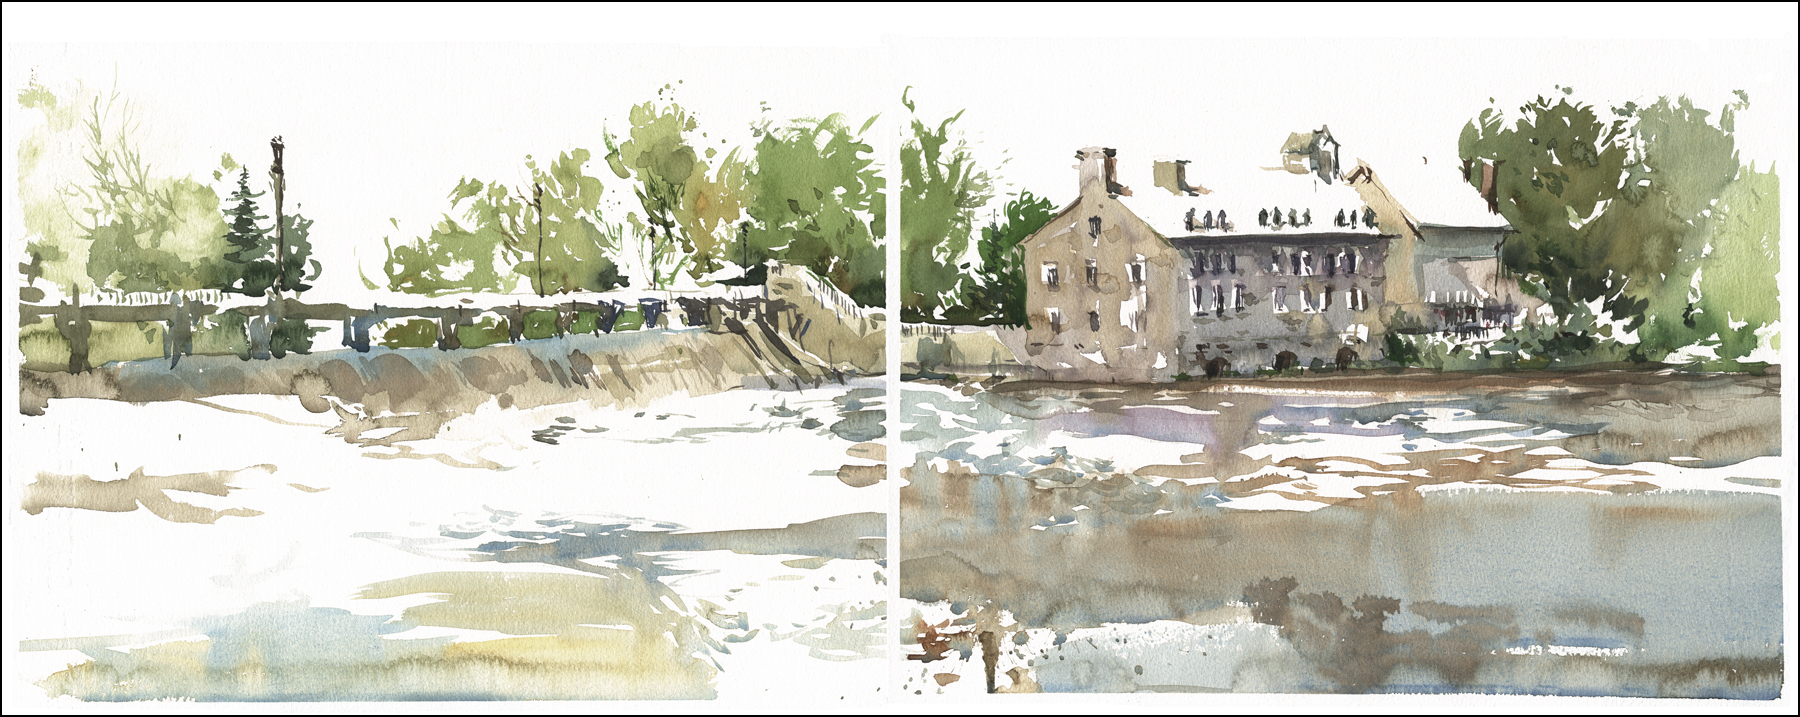
[Terrebonne Mill, L’ile des Moulins]
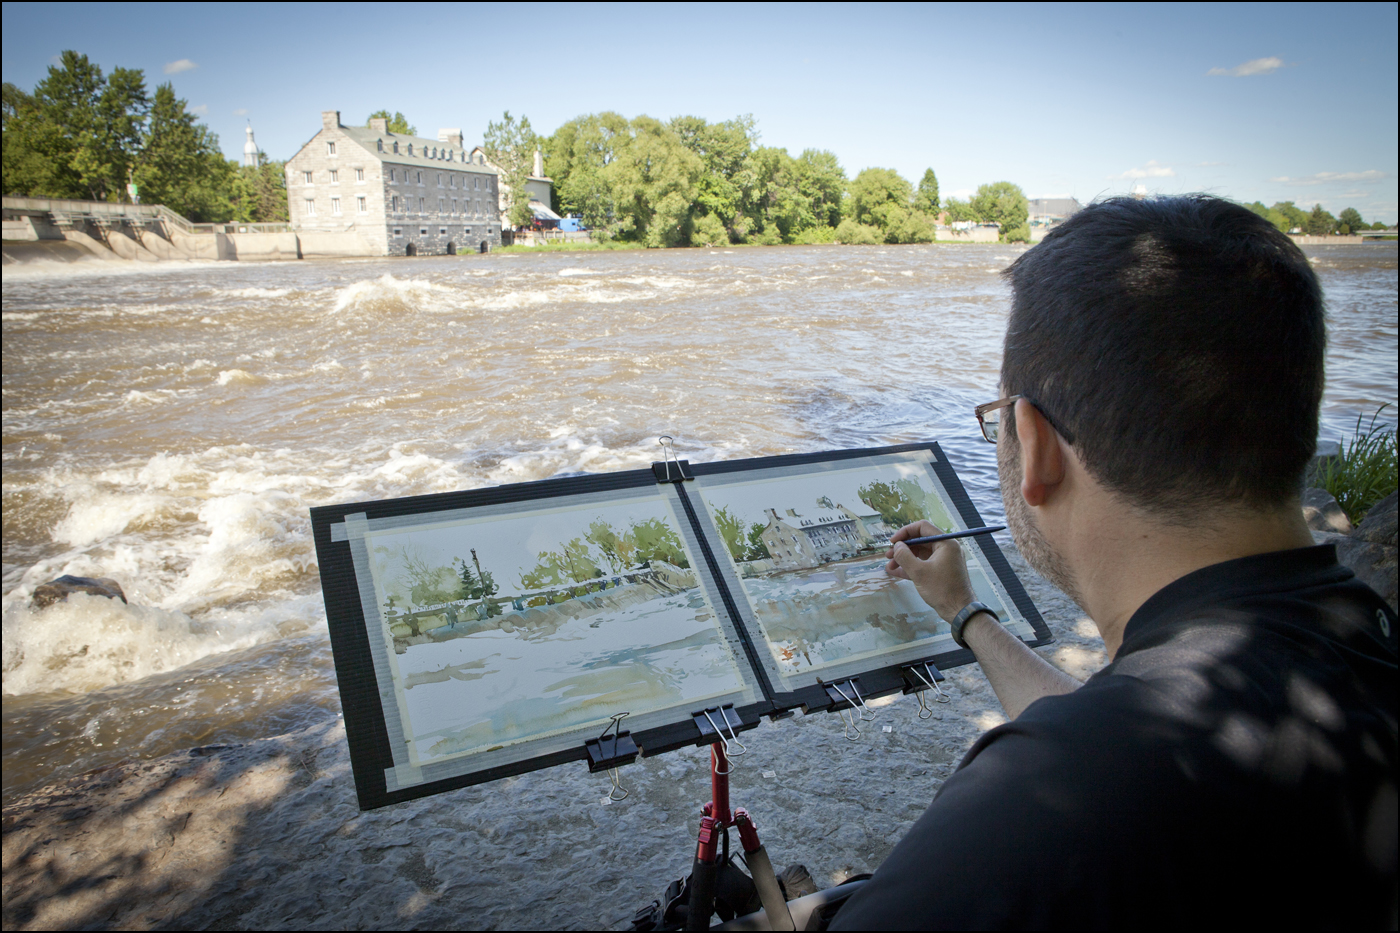
Ok, this is from the second week of this painting project. Now that I was more confident with this process, I took the time to make progress shots. These are just handheld snaps, so the quality is poor, but I think they will serve.

Here’s the location. Out in Terrebonne QC, at a historic site on L’ile des Moulins (Google Map).
There’s a big old mill here that makes for a dramatic subject. Water flows through a kind of sluice gate/pedestrian bridge thingy, and under the foundations of the old stone structure. It’s a great subject for this kind of painted sketch. The architecture and parkland behind lend themselves to graphic simplification.

At this point I’m not even seriously doing the Dot Plot method any longer. I used perhaps three marks to establish the placement of these two buildings. I one at the chimney, the roof line, and the base of the rightmost structure. Mostly I just visualized it all in my head – since the composition here is fairly simple.
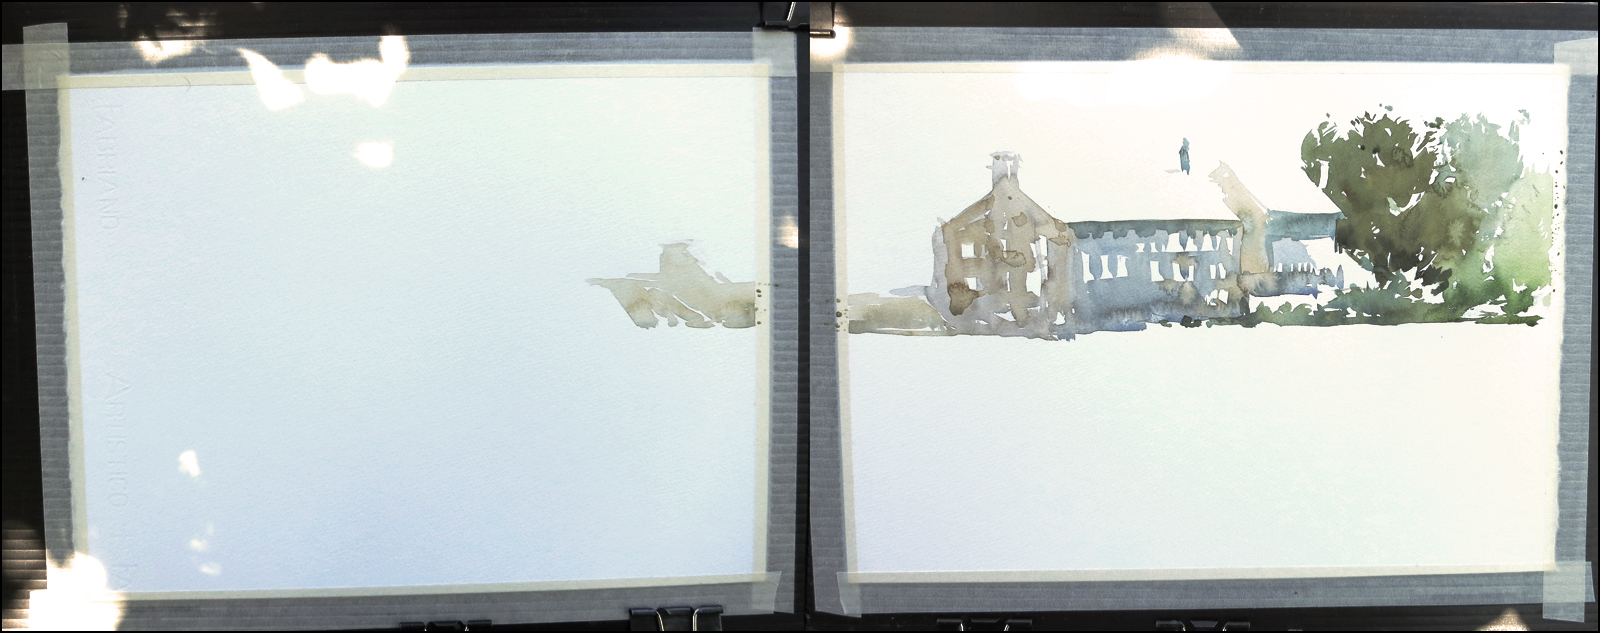
I’m blocking in ‘logical chunks’. Not working all over the painting, just drawing each major shape as it interlocks into the next. I’m able to make some transitions by letting objects touch in small ways. And I can charge color into my wet shapes, making the interiors of the washes as interesting as possible. The paper is dry, so that the edges of each silhouette shape are clean and sharp.

Putting in the bridge was a bit nerve wracking. I was sorely tempted to get out a pencil and give myself a guideline.
Thankfully, I knew I’d have that moment of weakness, so I didn’t bring one with me.
The only way I’ve been able to pull off this whole series, is by taking all drawing materials out of my bag, putting down the pens, and walking away from them. Honestly, if I had a pen, I’d have used it.
Since I had no choice, I had to figure the bridge out with the brush. Looking at the silhouette – finding the key shapes – the repeating piers that support the pedestrian deck, creating the gaps where the river flows down a concrete embankment.
It was important to me to drastically simplify things. There’s a lot of pipes and mechanics under the bridge – but this is not the focus of the painting. The eye is meant to go to the mill on the other panel. So I know I need to limit this to a calligraphic silhouette.
The river was comparatively easy – you can’t really go wrong painting water – it has no particular shape. Just keep it flowing and let the watercolor do the work.

The bridge comes to life when I put in the tree line. I create the sunlit upper deck simply by leaving it out. Just like the shiny tile roof of the mill. The bridge deck is drawn with negative space. I have to prevent myself from putting people on the bridge. It’s not the focus – so it doesn’t deserve too much detail. I’m referring (yet again) to my foundation principle ‘The Gradient of Interest’. (There’s at least three or four exercises on this topic in my upcoming book. To me, this is the essence of a ‘quick’ sketch. The strength of the composition, the control of where the eye goes).
The last step is the darkest darks. The semi-opaque touches, most visible in the windows on the mill. This stage is the closest to drawing in ink. The dark paint mix has a similar consistency. I usually use a mix like Prussian Blue and Burnt Sienna. Or these days, Shadow (Perylene) Green and Burnt Sienna. Warm and Cold, in varying proportions. I’m still using the relatively large #7 long hair W&N for this detail work.
I feel like this painting has come full circle, bringing back some of what I love about ink drawing, but in a subdued way, more suitable to plein air painting.
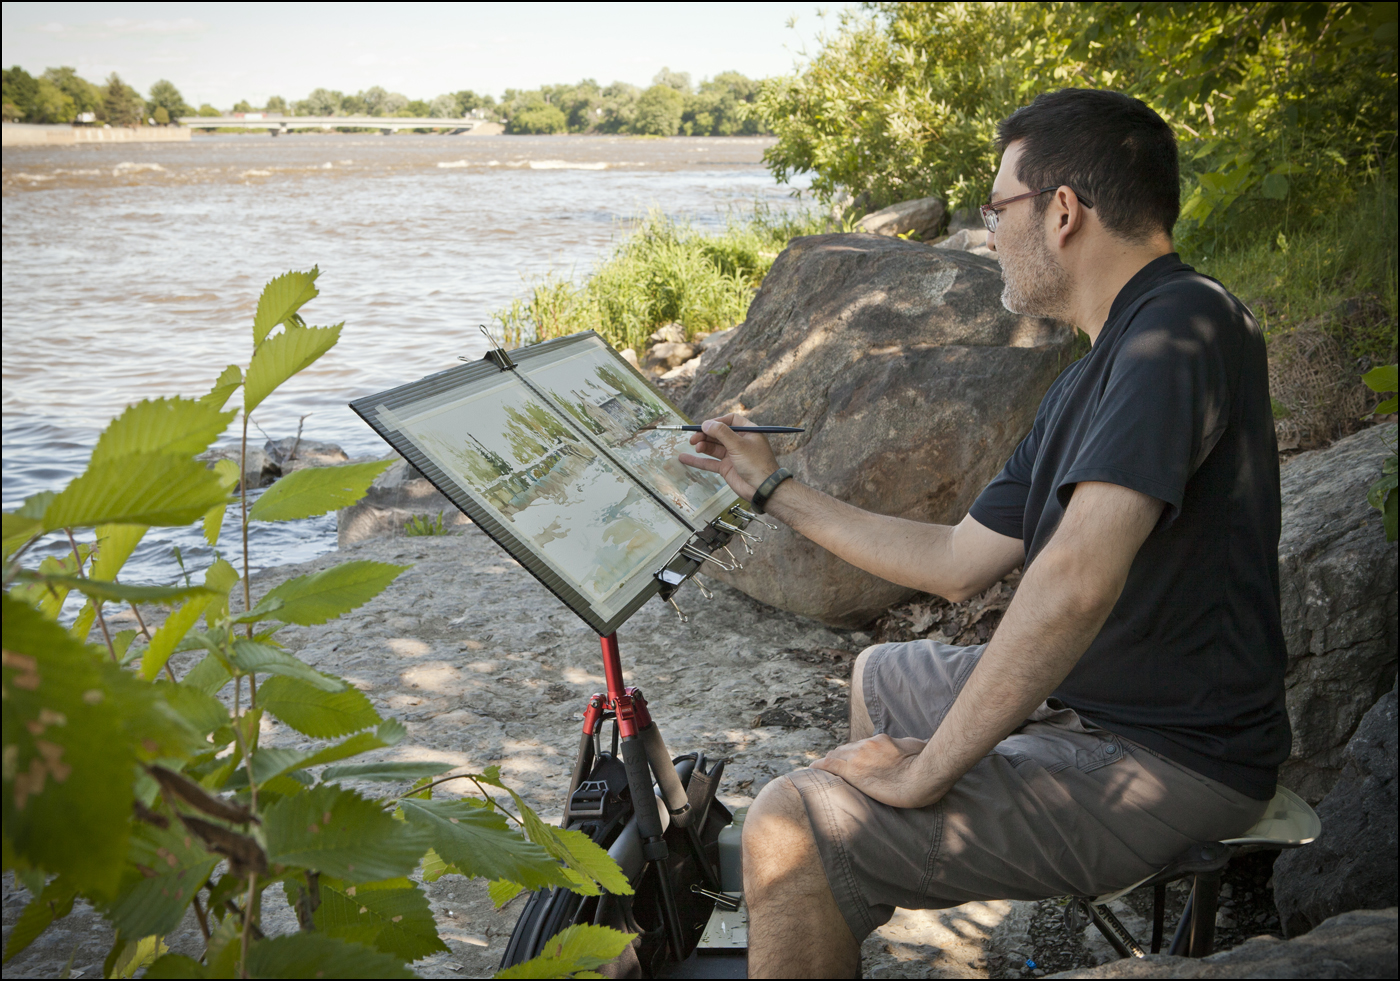
Here’s a better look at my diptych setup. Two watercolor quarter sheets, taped onto Coroplast panels clipped to my lightweight folding easel. Sort of like a giant sketchbook spread. You might say, why not one long panorama? Well, no great reason. Except that with two panels I can turn them face to face and put it all away into a large courier bag. If it was a single sheet, I’d have to carry the paper under my arm. I’ve certainly done that before – but I’m trying to field test how I might work on a long term trip – and I don’t want to be travelling with big drawing boards.
Note: If you’re linking in from somewhere, this is part 1 of 1 / 2 / 3 / 4


What I find awe-inspiring is how many areas of the paper are touched by the brush just once. That shows that power of a great draughtsman and the confidence of a great watercolourist.
That’s the best thing anyone’s said about my stuff :) thanks for that.
Hi Marc,
I like where you’re doing with your watercolour paintings, but I have a question… when does the art stop being a “sketch” and become a “painting”?
Thanks,
Sharon
I do like to play around on that border! It’s true, so e of these are getting to the point ther terms become interchangeable:)
Thank you for putting this series together, it has been extremely informative.
This is FANTASTIC! I especially love how you handled the water. And thanks for all those terrific tips.
This great1 Can’t wait for October and your book!
Thanks for the step-by-step of your beautiful work. Great teaching tool, I’m taking notes! -Sharon :-)
ÐÑекÑаÑно!!!
now you will have to do another book!… thats fine, we will all buy two.. wonderful drawings and bravo….sandra
The way you paint amazes me! I love everything you do. Keep these posts coming! I’m looking forward to your book :) Can you tell me what lightweight easel is your favorite? Thx!
Here’s an older post that talks about easels : https://citizensketcher.wordpress.com/2013/08/18/people-always-ask-about-the-easel/
I switched down to a lighter setup since then, but the idea is the same – just folds down smaller.
Hey Kristine – I just updated my materials list – and put info on my current favorite easel down at the bottom: https://citizensketcher.wordpress.com/class-notes/
But in short, it’s a camera tripod with an accessory tray. I like it because it folds small enough for a shoulder bag.
Thanks for sharing your process and thoughts about how you are changing your approach!
Marc, thanks for the ideas and the step by step insights. Mike
Nice watercolours!
Can you tell me what device you’re using to mount the board to a tripod?
Naptunain – there’s some info about the tripod tray at the very bottom of this materials page: https://citizensketcher.wordpress.com/class-notes/
~m
Thanks!!! Your site’s a gold mine :)
Something is amiss with the navigation bar at the bottom of the article.