Direct-to-Ink Exercises: Part Three: Post and Rail Panorama
This is the one of three exercises from the Richmond workshop : 01 Single Line | 02 Tone Shapes | 03 Post and Rail Panoramas
Ok, I’ll admit this last exercise is less about your pen work – but it’s a good application of the previous two exercises. Plus, this is a very common situation when you’re travelling with a sketchbook. Don’t you always go to those tourist spots with an amazing view? And of course you want to get it all in. (Note: In fact, we did not do this exercise in Richmond. I wanted to do it, but I think I’d put too much on the timeline. Everyone got a worksheet with these notes, so they can try it when they get home. ~m)
Here’s one way to tackle a panorama without getting lost in the details. (And without spending all day at it).
Direct to Ink Exercise: Post and Rail Panorama

- Decide how wide you want to go. The wider the field of view, the ‘shorter’ your drawing will be compared to its length.
- In a small book, this can make your drawing little more than bumps-on-a-horizon-line.
- Choose how many pages in your drawing. Will you work across a double page spread? Or keep going as you flip the page? There are also accordion fold sketchbooks that offer plenty of length.
- I prefer loose sheets as I like to start in the center, and work outward in both directions.

- To begin, choose a landmark that is the most important thing in your view. Something highly distinctive, a recognizable part of the skyline.
- This is your first ‘post’.
- The idea is to build your drawing like a fence. Placing posts, and joining them with rails.
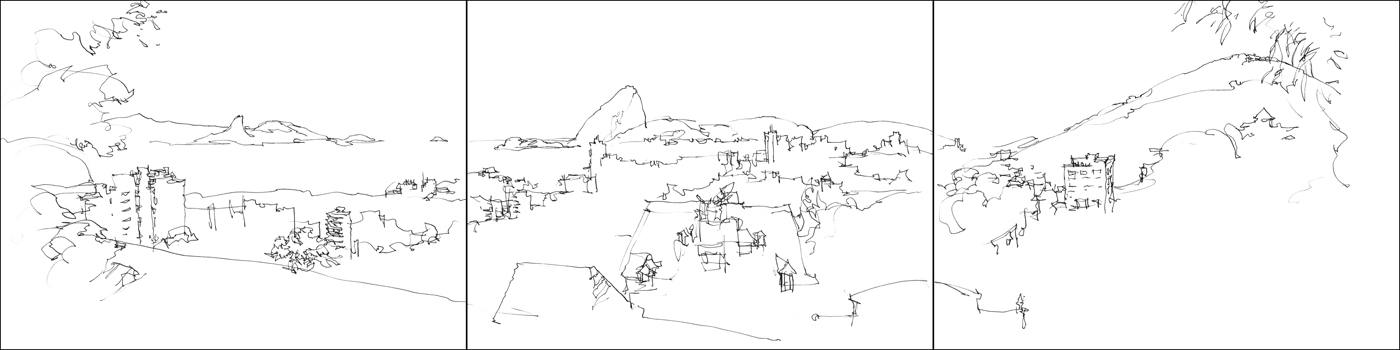
- Each ‘rail’ is a Single Line Sketch (see Exercise One).
- If you want to make it a little easier, roughly sketch a few key posts in pencil first, and you have a chance to do some sight measuring before the ink.
- Personally, I try not to be obsessive about accuracy, and often enjoy going straight to ink (or watercolor).
- Then it’s simply a matter of squinting at the values and scribbling in Tone Shapes (Exercise Two), and adding color if you want.


Trackbacks
- Direct-to-Ink Exercises: Part Two: Tone Shapes | Citizen Sketcher
- Direct-to-Ink Exercises: Part One: Single Line Sketching | Citizen Sketcher
- One Day : One Sketchbook : The Plateau Panoramas | Citizen Sketcher
- Make you own Accordion Fold Travel Journals for watercolor sketching | Citizen Sketcher
- Sketching Interiors or: Breaking the Tyranny of Perspective | Citizen Sketcher
- Sketching Interiors or: Breaking the Tyranny of Perspective – | Cygnus


Lovely drawing. Thank you very much for sharing. How long it took from start to finish?
I did this one in an odd way, to make the steps of the demonstration as clear as possible – so I was stopping to scan copies along the way. I would guess in a real situation it might take 45 minutes or so? I can do it faster if I’m in a rush :) But usually the idea is to relax and enjoy the day.
This is great! Thanks for sharing the helpful tips and ideas!
Reblogged this on Kit Schuetze – Art.
What a beautiful city. I like
This three part series is a great reference. Thanks so much for your generosity in sharing!